Nature Play that Rocks
Easy Family Garden Herbs Forage Recipies Backyard Wildlife photography

Starting A Garden with Your Children

Showing Toddlers How Things Grow

Teaching Toddlers How Things Grow with Gardening and Usborne Books

If you’re just joining us for this Toddler School Gardening Unit, we’re just now getting to the green part. My goals for this unit are to teach the tots about the great outdoors by planting a garden together throughout the Spring and into the summer. They are very interested in how things work! The last few weeks we’ve been Building our Compost Bin, getting Inspired by our Library Picture book list, and of course, practicing our new Garden Rules. Now that we have all of this awesome soil in our garden, after Filling Our Bin,  it is finally time to teach them exactly how things grow once they’re in our homemade dirt.

HOW THINGS GROW

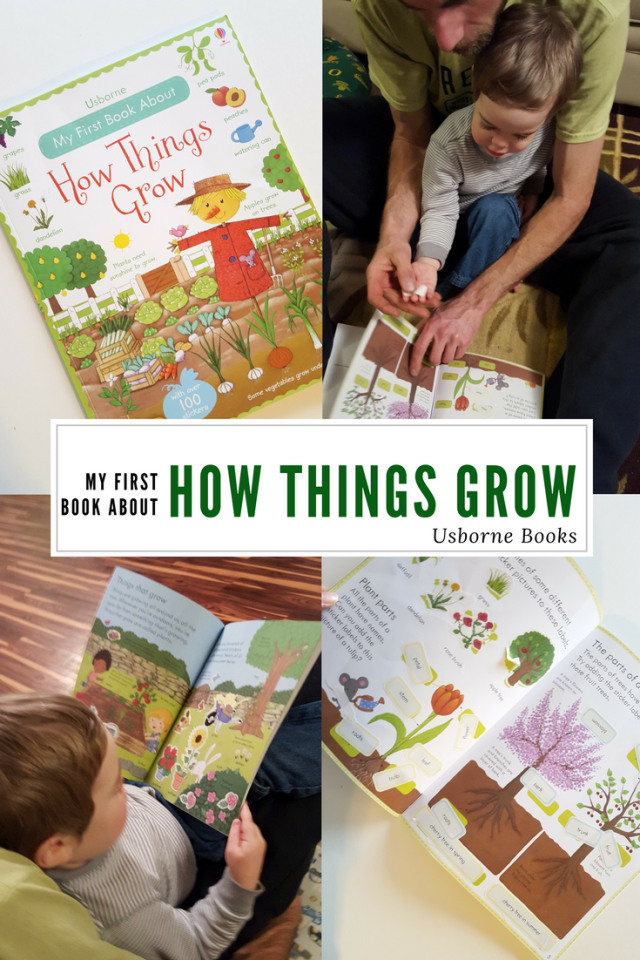
For the main instruction of this lesson, I turn to one of my favorite Usborne books My First Book about How Things Grow, which is actually a sticker book that lets kids label scientific illustrations as you learn. We started reading this book a few weeks ago before bedtime. This was a fantastic way to get Dad involved in the whole unit! The boys and I would go outside, learn a bit, read this book at lunchtime then do some stickers. Then at bedtime, they would re-read the pages we did with Dad, explain them to him and read a few pages ahead, which is what the boys and I would talk about tomorrow. We built a fun little learning circle out of this book that involved Dad and a little comprehension. Win-Win! Plus, Mom didn’t have to read again at bedtime.

Teaching Toddlers How Things Grow with Usborne Books

APPLIED LEARNING

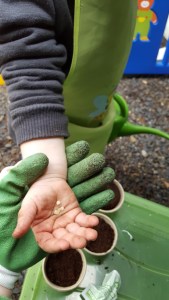
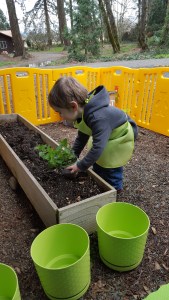
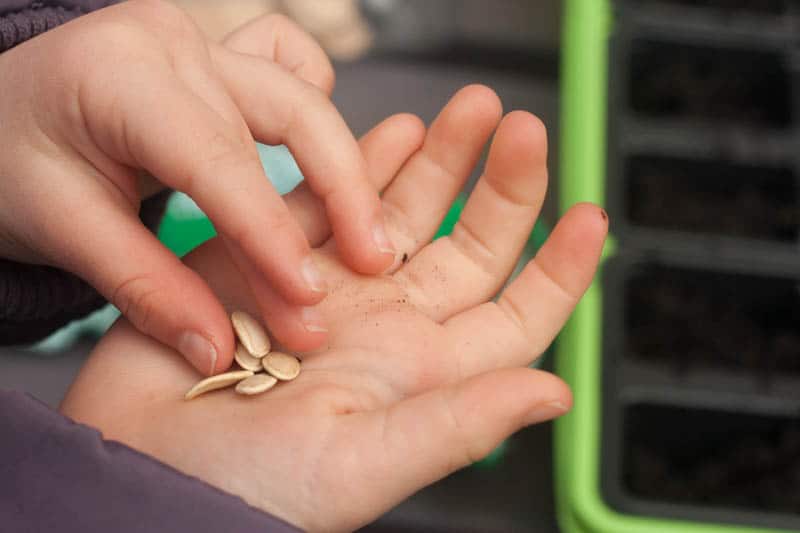
And now I’m just going to blast you with adorableness… Once we learned that seeds needed to go in the soil, I had the boys tuck in a few. Now granted, the boys are very young, and I knew these seeds wouldn’t actually ever grow {due to Brandon’s excessive watering and dumping of dirt} But we still did it! 

Teaching Toddlers How Things Grow and How to Plant a Garden. Gardening with Toddlers


Teaching Toddlers How Things Grow and How to Plant a Garden. Gardening with Toddlers


Teaching Toddlers How Things Grow and How to Plant a Garden. Gardening with Toddlers


Teaching Toddlers How Things Grow and How to Plant a Garden. Gardening with Toddlers

 PLANTING OUR GARDEN

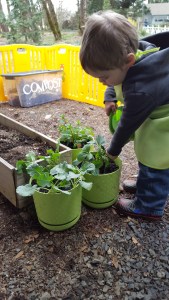
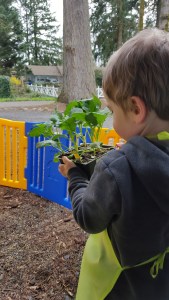
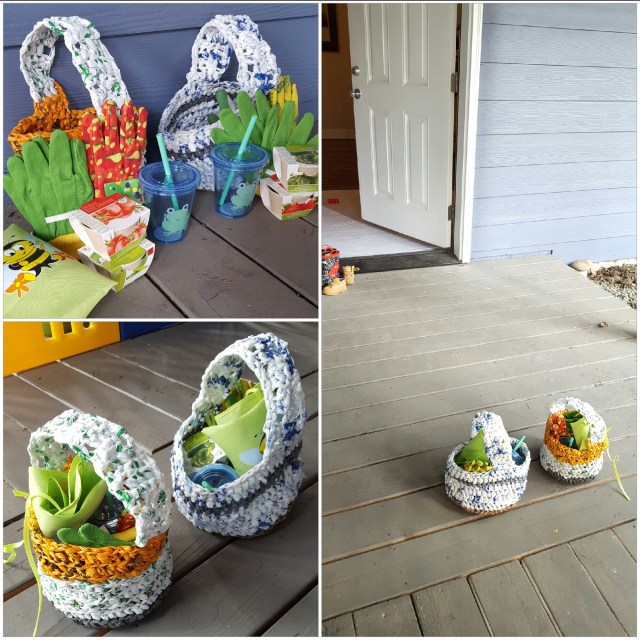
This may have been one of my favorite days out in the garden. They were so cute in their little Dollar Tree Aprons! Before we went outside today I surprised them with their Spring Baskets. I made myself some plastic yarn out of grocery bags and crocheted them some Harvest Baskets {I know, super #crunchymom} which I filled with garden gloves, a new smoothie cup, and the aprons. I also put the seed pods in them. Sort of like an Easter Basket, but for Spring! This really kick started our Garden Day with some fun and excitement as they rushed out the door!

Spring Garden Baskets for Kids

THE FULL GARDEN UNIT

We’re really excited you’re on this educational adventure with us! Link Back to the Gardening Unit’s Main Post to start from the beginning! Learn More about Toddler School and past Lessons/Units HERE

RELATED POST

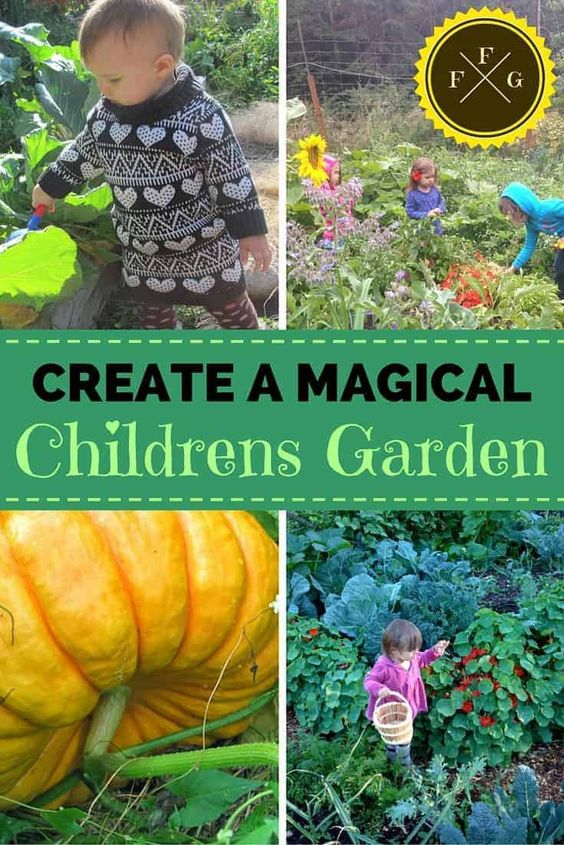
Magical Children's Garden Design Ideas | Family Food Garden

Build a sunflower fort, a pizza garden, a pole bean teepee fort or create fun children's garden design ideas. Create fairytale garden with fairy wands

Gardening with Children

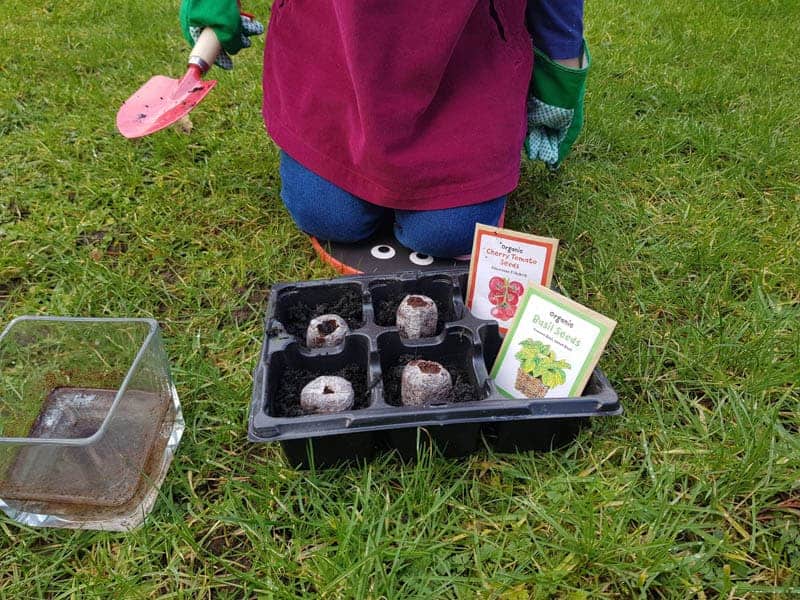
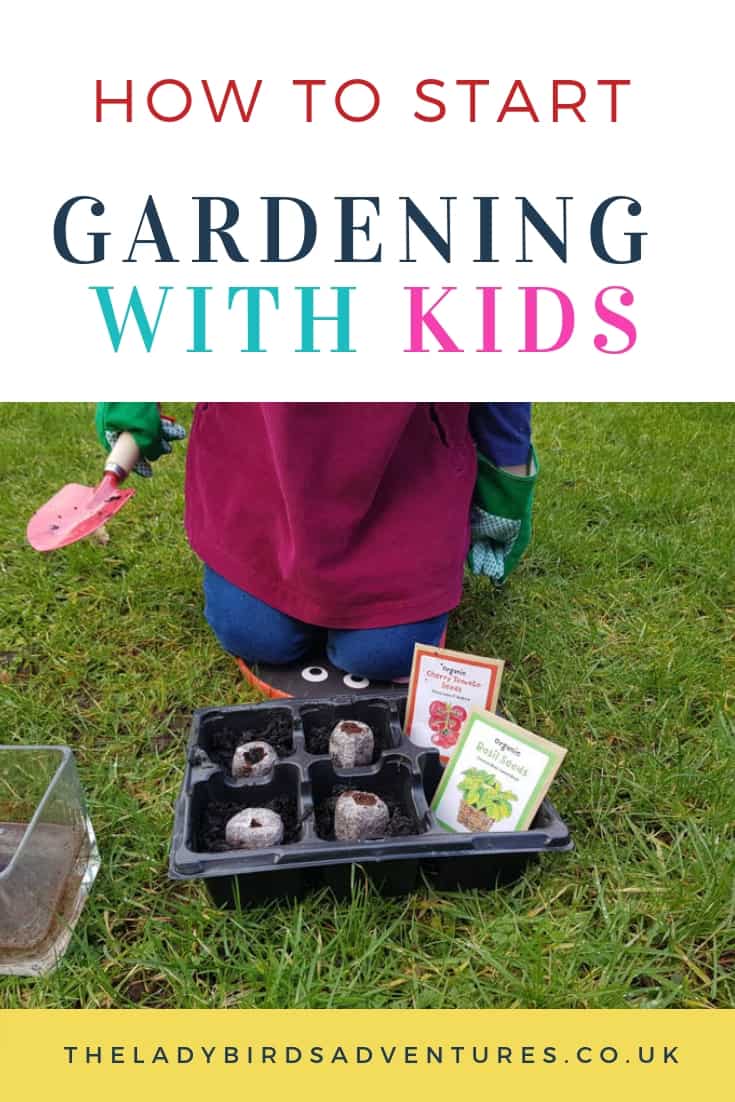
Seed tray with a child kneeling near it

Starting gardening with children can seem challenging but it’s really one of my favourite outdoor activities for children. There are so many options for things to grow, fruit, vegetables, flowers and shrubs. Perhaps you are keen to start gardening with your children but have never done much gardening yourself. Knowing when to start growing, what and how can seem a little overwhelming. I’m keen to teach my children about growing fruit and vegetables.

I’d also love to grow flowers that encourage wildlife into our garden.

Gardening with kids

 My plan for keeping my kids interested is to plant what they love to eat. I also want to plant some fast growing vegetables so they see results quickly.

Starting gardening with children

How to get kids gardening from The Guardian is packed full of expert tips.

Starting gardening with children

Garden Seeds - GE, GMO, Heirloom - What's It Mean?

Starting gardening with children

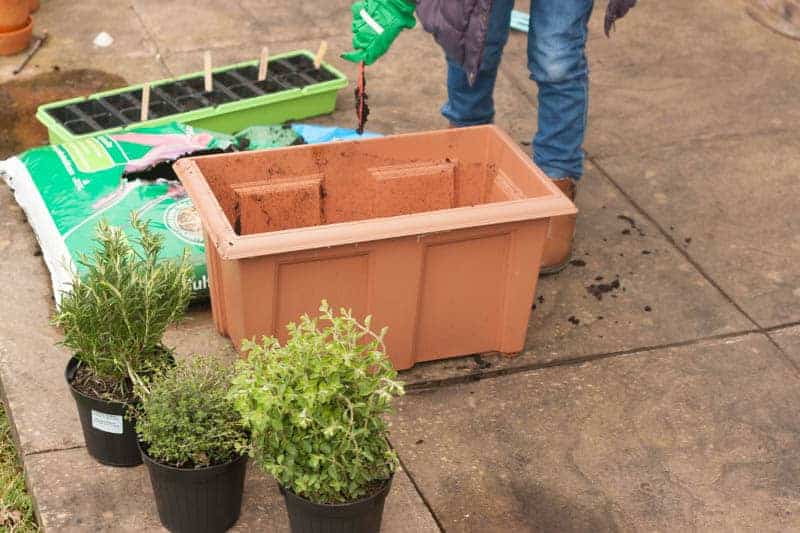
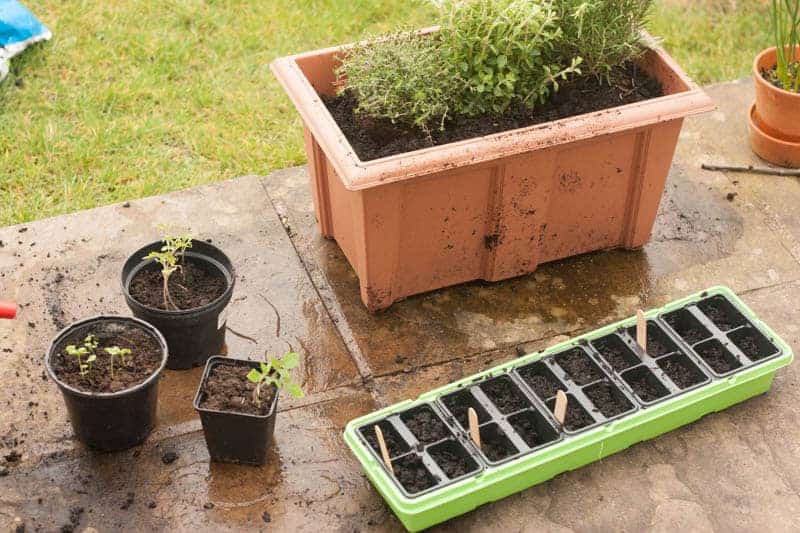
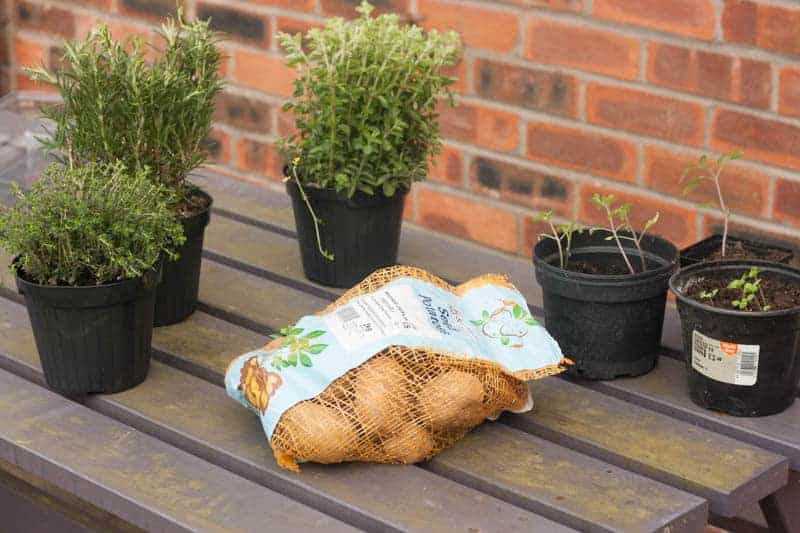
  Last week I took my eldest who is almost 5 to the garden centre to choose some seeds to grow together. We chose some simple to grow vegetables, sunflowers and some herbs. Once home she helped me to plant up a container with the herbs (we chose rosemary, thyme and oregano as these are ones I use most in my cooking). We also planted some seeds in a propagator which is sat on our kitchen windowsill. We picked up some potatoes too which is a bit more of a gamble. They were reduced to just £1 because it is now time to start planting them but they need chitting first. I decided it was worth the risk so they are in our kitchen window again waiting for the shoots to grow.  

Starting gardening with children

I will, of course, keep you updated about how all our plants are doing this summer but until then I’ve included my top tips for getting started gardening with children and listed 9 easy to grow plants for kids.  

Starting gardening with children

How to get started gardening with children

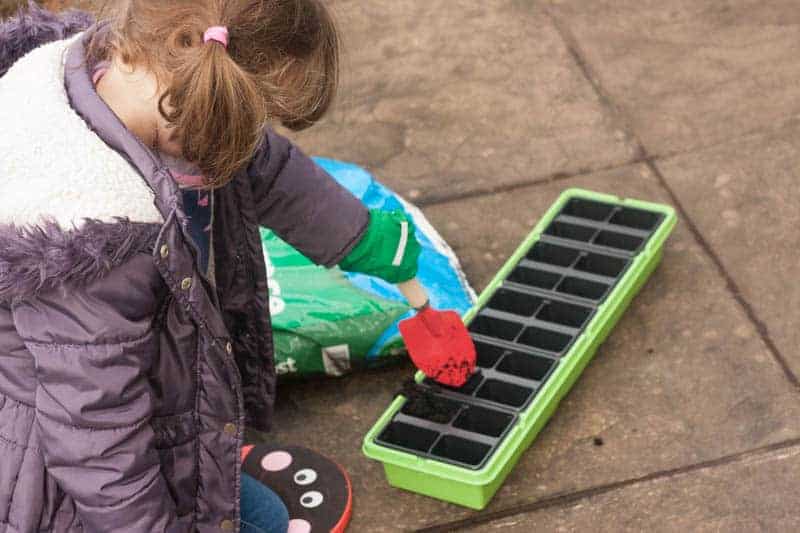
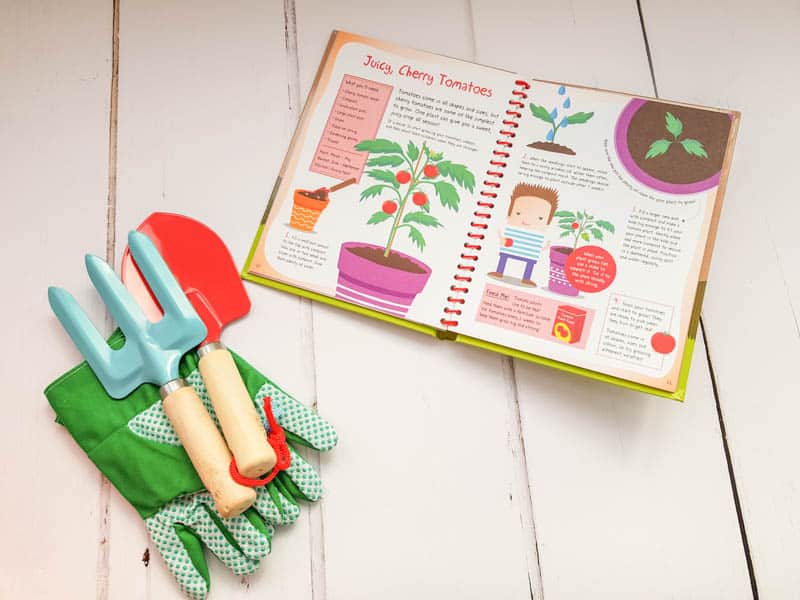
1 – Buy them some mini tools – you can pick up a child’s garden set cheaply in your local garden centre or even with your weekly shop. Mini tools will be easy for your child to use and help them feel independent.  

Starting gardening with children

2 – Take them shopping to help choose what to grow – Children love to feel involved in choosing what to grow. It starts getting them excited from the very beginning of the process.
It's a good idea to plant what they eat as far as vegetables go.

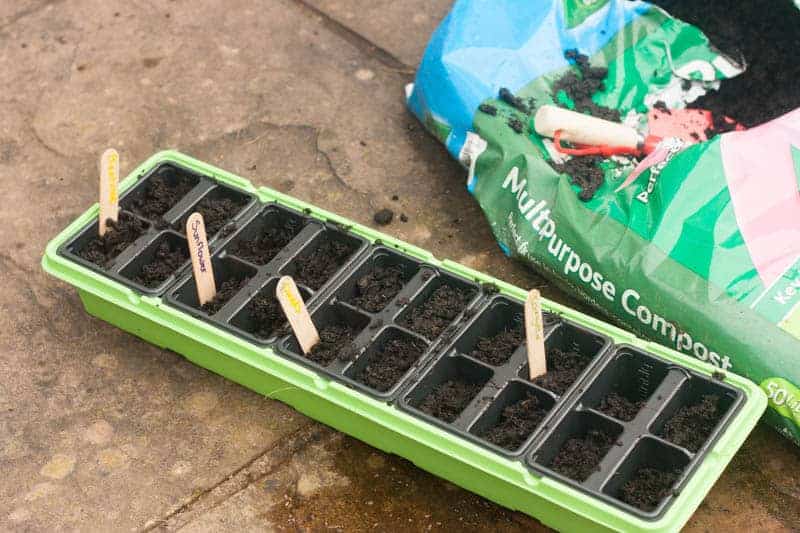
3 – Make some plant markers – I love these DIY wooden spoon vegetable markers that your children can make. Markers will help you remember what you’ve planted where.

4 – Start growing from seed indoors – Some plants need starting off inside. Always read the back of the packet to see what you should start off indoors. For us, we have started basil, tomatoes and courgettes indoors.  

Starting gardening with children

5 – Transplant the seedlings outdoors or sow direct – once your seedlings are ready to plant outside following the advice on the packet

6 – Water and care for your plants – my kids love using mini watering cans to water the plants.

7 – Harvest and enjoy eating all your edible plants – is there anything better than eating homegrown produce? Who knows you may even get a fussy eater to try something new.  

8. – Build a fairy garden – Children love these miniature gardens full of magic and make-believe. Find out exactly how to make a fairy garden and see just how much your child loves their miniature world.

25 Shade Loving Perennials To Brighten Up Shady Spots

26 Vegetables To Grow In The Shade

18 Perennial Veggies You Can Plant Once And Harvest For Years


9 Easy to grow plants

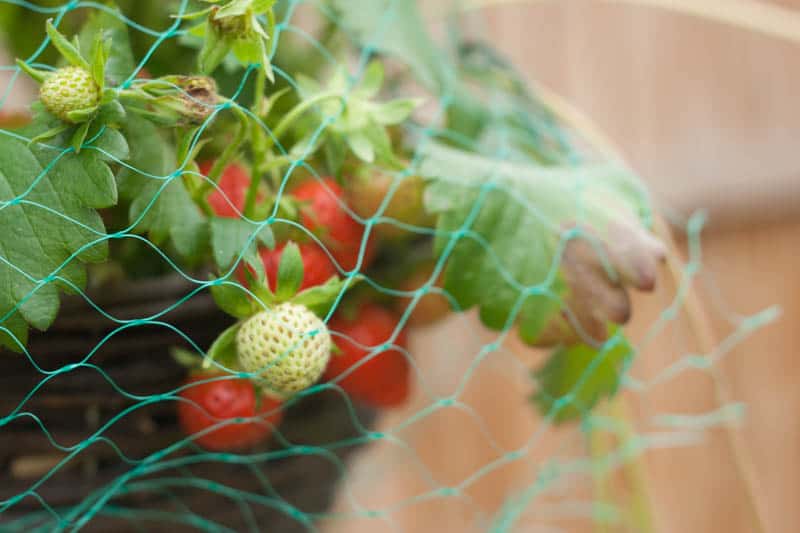
1 – Herbs – not only easy to grow but they are a great sensory plant. 2 – Strawberries – we grew some in hanging baskets and my toddler loved picking them and eating them in the garden.  

Starting gardening with children

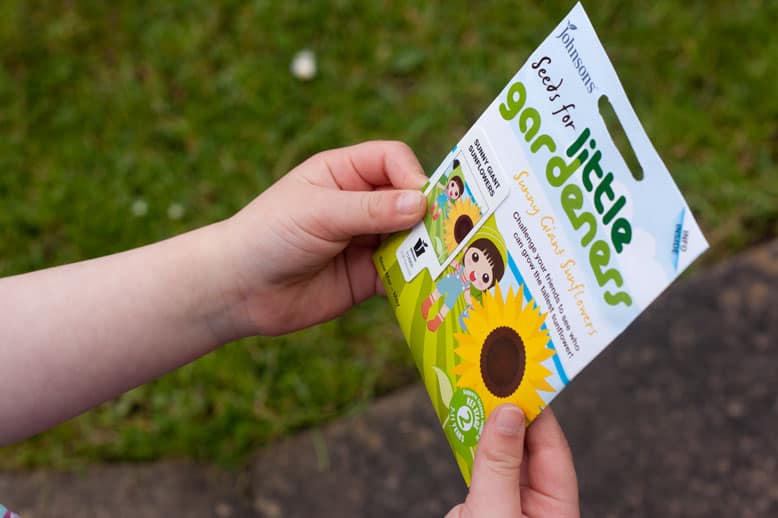
  3 – Carrot – My kids love eating carrots, they can also be sown directly outside which is a bonus. 4 – Tomatoes – These can be grown in grow bags or even hanging baskets. 5 – Salad leaves – Salad leaves can be grown in just a few short weeks. This is perfect for young children who aren’t known for their patience. I have even grown pea shoots from dried peas bought in the supermarket. 6 – Potatoes – simple to grow and can be grown in containers. 7 – Sunflowers – who can grow the tallest sunflower? and just how tall will it be?  

Starting gardening with children

  8 – Beetroot – another plant that can be sown directly outside. 9 – Cress – really quick to grow and can be grown on a windowsill.   You might also find my post on creating a raised bed vegetable garden useful too.  

Whats next?

There are so many options to build on this experience. Perhaps you could start making compost? Find out how here – How to compost at home – Eco Green Living

Or encourage birds into your garden? or insects? start a garden journal and help your child watch and learn about the plants as they grow. How about planting a winter Pansy planter?  

40 Best Hands-On Plant Activities for Toddlers & Preschoolers

To learn about nature, toddlers and preschoolers need hands-on, engaging, and sensory-rich activities. This list of 40 plant activities has something for every child.


Here are a couple of articles that you might find useful:

Starting gardening with kids is a great thing to do on earth day. Find more ideas and facts in my 
Earth day facts for kids post.

Kids' Science in the Garden and What Seeds to Grow with Kids

Best plants to grow with young kids and creative ways for learning kids' science in the garden while doing simple science experiments gardening with kids.

Plants for Kids - Botany Activities

Learn plant science for kids with these FUN experiments and activities for kids of all ages! From pollution to transpiration, life cycles, and more!

Kids Garden Activities that 'Dig into Reading'

Inspire kids to dig in the dirt & grow something with these great garden books & activities!
Gardening and nature science for kids

Read and Explore in the Garden 

30 Garden & Plant Activities for Preschool & Elementary Ages

{30 Garden Ideas & Activities} Great Guide to get kids in the garden! Ideas for what to plant, how to get started and fun garden books and activities!

20 Garden Science Activities Inspired by Books

Learn about plants and animals in our backyards or gardens with these garden science activities. Each of the science in the garden activities was inspired by a children’s book.


Attracting Benificial Wildlife to Your Garden

You already know about the plethora of beneficial insects that can help rid your garden of pests, but did you know there are a number of beasties out there that do the same? Birds, frogs, toads, lizards, and snakes are all more than happy to eat the nasty insects that make mince-meat of your plants. What’s more, all you have to do to attract them is provide a little shelter and water — although each creature has slightly different needs.

BIRDS

You’ll want to offer two types of shelter to attract birds to your garden — plants and birdhouses. Plantwise, shrubs, trees, and climbers will all work splendidly to give your little winged friends a place to hide. As for birdhouses, different birds have different housing needs — do your research to find the type of lodging that your favorite species prefers. Some will even build nests in your hanging baskets!

Attracting Wildlife Birds

Birds will need more than just insects to feed on. Offer a range of plants, such as asters, cornflowers, fuchsia, moss rose, and zinnias, as well as a bird feeder stocked with good quality seed. Just be sure to cover your berries and tomatoes to keep the birds from feasting on them as well.

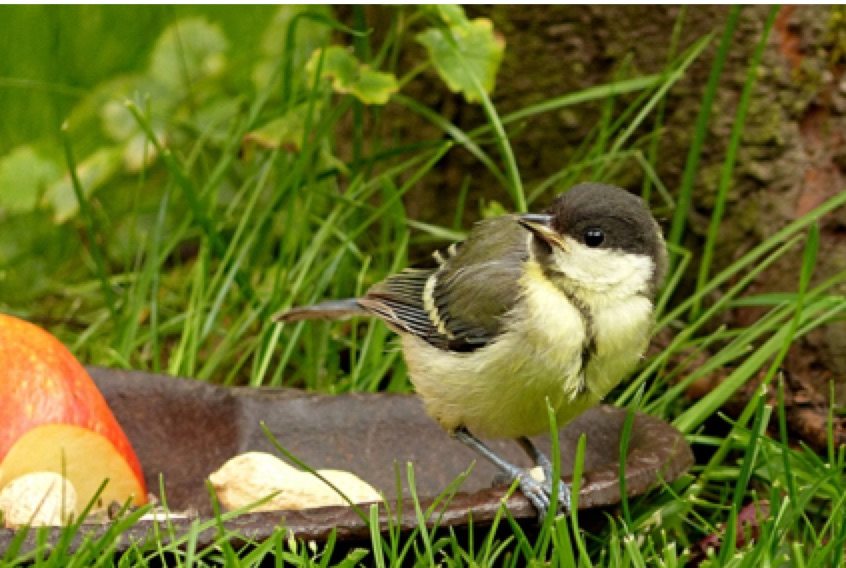
Finally, add a little water to your yard in the form of a sloping bath. Add a few flat stones to the dish so different species can get in and out easily.


FROGS & TOADS

A well cared for pond will provide a suitable environment for frogs and toads. Frogs and toads prefer still water, so you won’t need pumps, aeration, waterfalls, or fountains. When placing your pond, remember that tadpoles will need shade to keep the water from getting too hot, plants for cover, and algae for food.

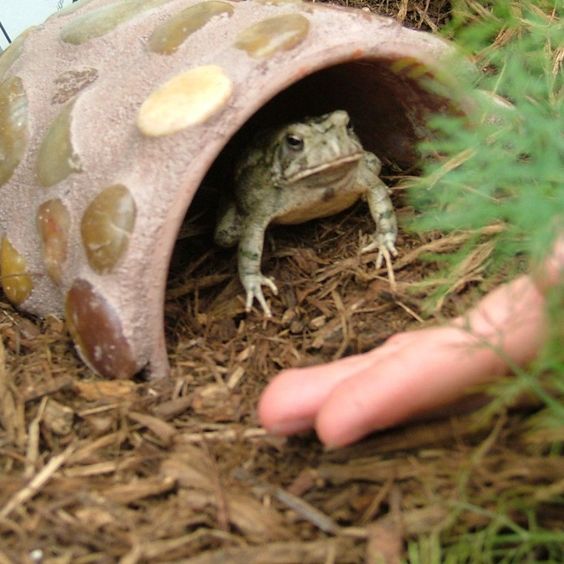
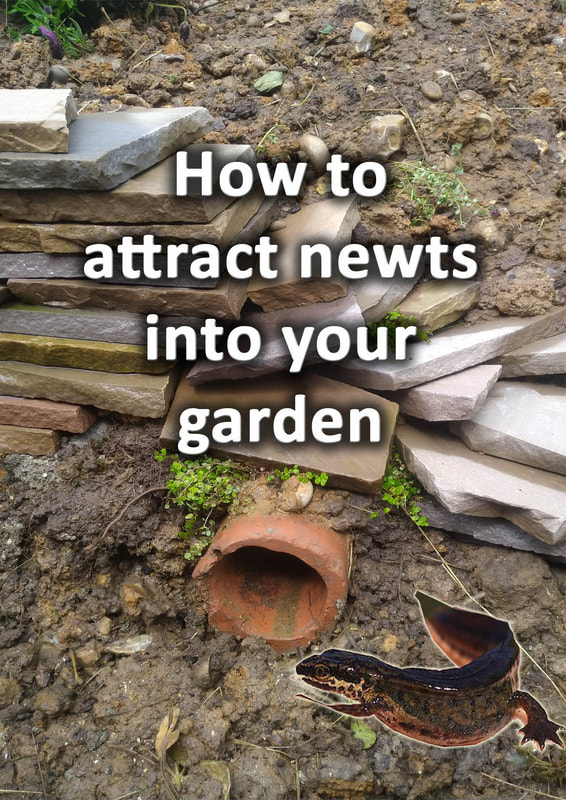
When they’re not hanging out near the water, frogs and toads will need a cool, sheltered space to hide. Turn a ceramic flowerpot onto its side and partially bury it in the soil. Place the “toad abode” near your pond in a shady spot, under the cover of shrubs or other plants.

Attracting Wildlife Lizards

LIZARDS

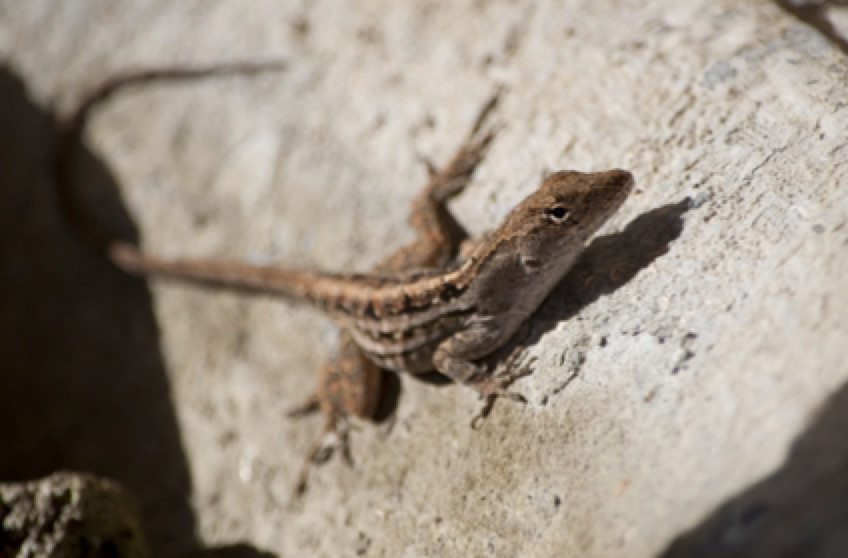
When designing a lizard habitat, create spaces that are both vertical and horizontal, as lizards like to move up and down throughout their environment. Rocks, tree trunks, terra cotta pottery, stone walls, and wood piles are all great additions to your garden as they allow lizard to bask in the sun and shelter from predators.

A lizard habitat should be self contained. Lizards do not tolerate regular disturbance to their environment, so you’ll need to provide a spot that is somewhat wild and isolated. If you let them be, they’ll feel comfortable enough to lay eggs and populate your garden. They’ll need a water source, but luckily it doesn’t have to be anything complicated — a small terracotta dish will work well.

Most of us, at one time or another, will be faced with the problem of how to get rid of snakes. Snakes, like a great many species of the animal kingdom, have had to adapt to a world filled with humans. The truth is that as snake habitats shrink and populations increase, there will be more and more human/snake interaction. Click the link to learn how to get rid of snakes! #gardening #outdoorgarden #snakes #DIY

SNAKES

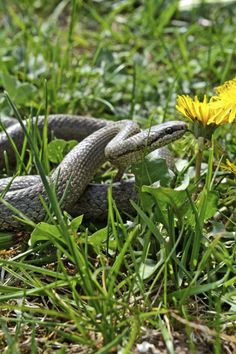
Garter snakes — which are harmless to humans — are a gardener’s best friend. Their broad diet effectively keeps destructive pests out of your garden all season long. They eat everything from slugs to rodents!

First and foremost, snakes need a place to hide from hawks, crows, raccoons and mink. An old piece of plywood, corrugated metal, or carpet placed in a sunny spot will do the trick. Snakes, will also need a source of fresh water. 

No matter what beneficial wildlife you wish to attract to your garden, it’s important to refrain from the use of insecticides, chemical fertilizers, and herbicides. Birds, frogs, toads, lizards, and snakes are all sensitive to chemicals in their environment, and can suffer great harm when encountering them. Use natural pest control and organic fertilizers and herbicides in order to keep your new friends safe and working to your benefit.

RELATED POSTS:

Garden Seeds - GE, GMO, Heirloom - What's It Mean?

13 PLANTS THAT KEEP UNWANTED ANIMALS OUT OF GARDENS

There’s nothing quite as crushing as putting your time and energy into cultivating a garden, only to have it destroyed … Read more

200+ Amazing Gardening Activities for Kids

We can not wait to get outside & do as many activities as possible! If that is also your goal then this list of gardening activ...


Sharing Your Backyard
With the Local Wildlife
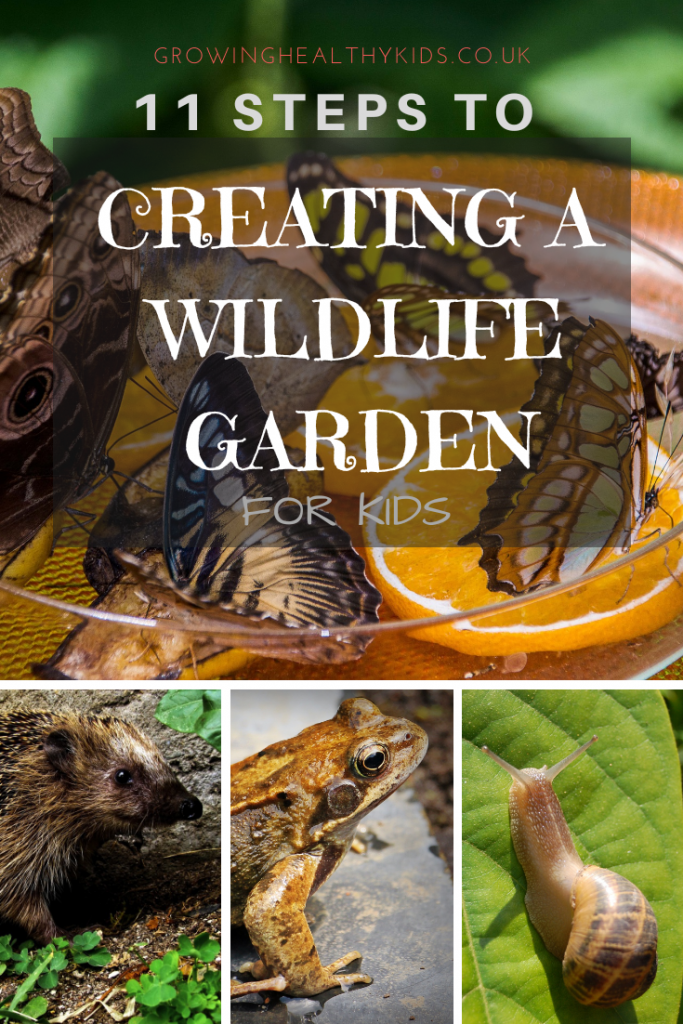
Attracting wildlife

With Spring coming, bringing lighter days (finally) I bet you’re wondering how you’re going to keep your kids entertained? Why not try attracting wildlife to your garden?

This can be a year round activity the kids can come back to over and over as the seasons change. It is a wonderful learning opportunity too. Teaching them how to care for the world around us, as well as having an appreciation about how the seasons work, understanding life cycles for animals and of plants.

Also, nice idea to teach kids is how their food chain works, as well as, from a wildlife point of view, and what happens if that is unbalanced.

This could also lead to learning how to reduce their waste and recycle in the most natural and basic way possible i.e. compost.

So, here are my favorite activities that you and your kids can enjoy doing together to attract wildlife into your garden. We enjoy these activities here and we’ve learned so much from them. As the weather begins to get warmer we’ll enjoy helping the wildlife in our area with even more ideas.

MAKE A BEE WATERING HOLE.

Bees need water to drink. Collecting all that honey is thirsty work! It can be dangerous too, as the bees can be drowned in a pond or larger body of water. So, providing a bee bath can literally be a life saver to the struggling bee populations. As always, the bees need this by the flower garden. Keep the bees away from your childs play area.
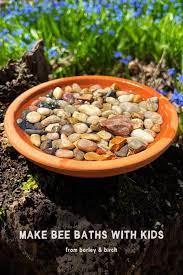
5 Minutes to a Bee-Friendly Backyard: Easy DIY Bee Bath Project

 TO MAKE A BEE WATERING HOLE

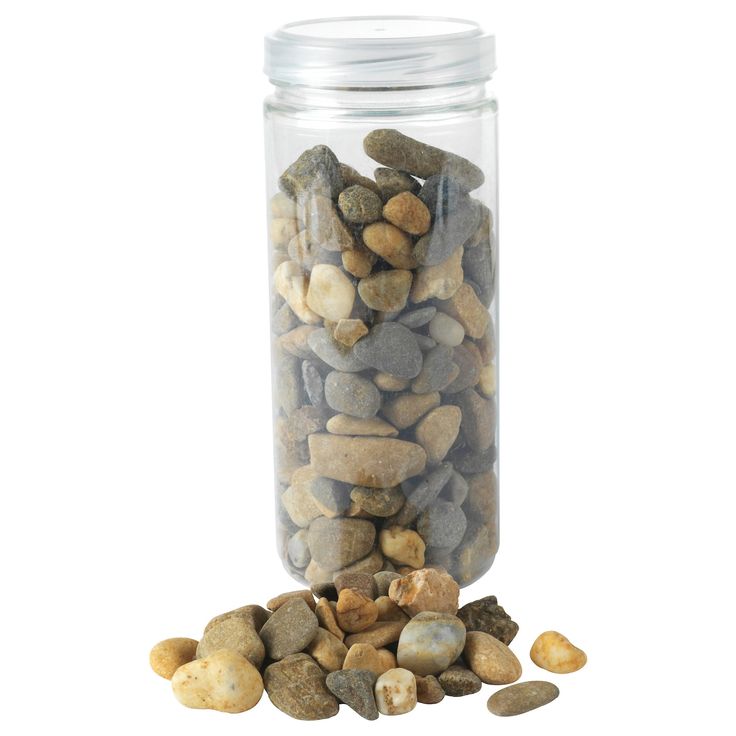
  • Fill a shallow dish with marbles stones or water-beads, 1 layer thick.

  • Place this at soil level near some bee friendly plants.

  • Now, fill the dish with water half way up the marbles. The bee can land on the dry marble and stick its long tube tongue through the marbles to get a drink safely. When the local bees find your safe drinking dish your garden will be the place to go for bees all over!

This post from Kidsinthegarden, shows another cute way to do this using a large plastic flower pot water tray. I’m making one like this this Spring in our old stone bird bath.


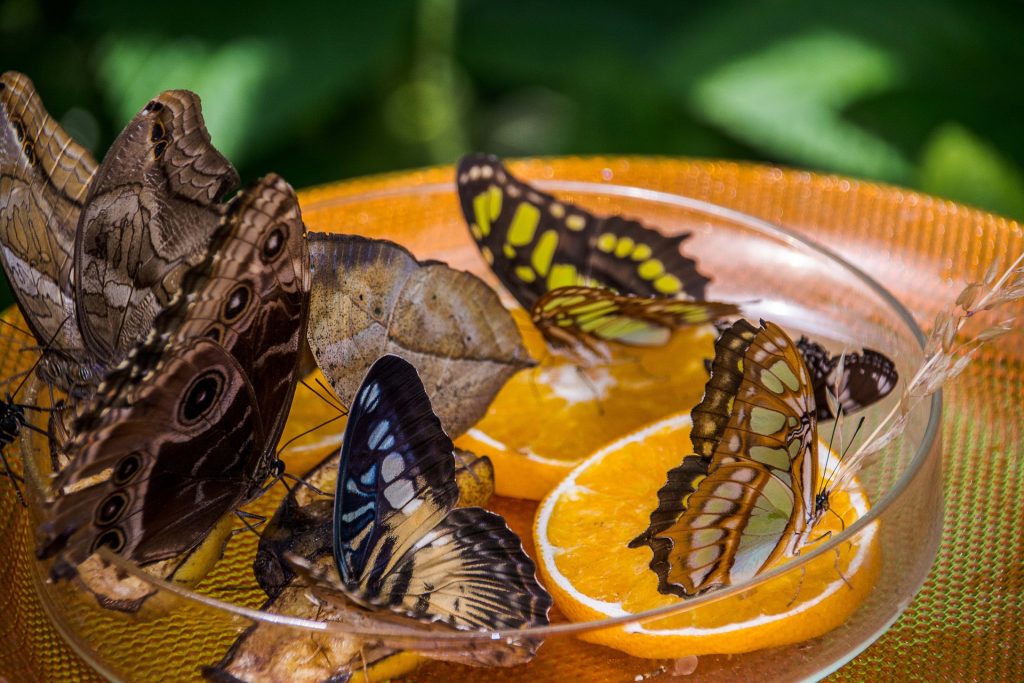
FEED THE MOTHS AND BUTTERFLIES.

This is a nice easy one for late Spring, Summer. It helps to make sure butterflies and moths get the nectar they need.

Now that they’re adults and nearing the end of their lives. They don’t eat they only drink nectar. So it’s important they can find enough of this. Their only function as an adult butterfly or moth is to find a partner and lay some eggs, and they do all this with the help of a major sugar rush ha!
 

11 ways to attract wildlife.
  • We just lay a shallow dish in the garden beside the flowers. I’ve made a small platform from some stacked up bricks to sit this on.

  • I then lay a flat sponge in the dish, the type with holes in it.

  • Then, I make up a sugar solution of half water and half sugar and stir it until it’s all dissolved.

  • You can lay some over ripe fruit in the dish too, oranges and bananas are wonderful and give an instant sugar rush.

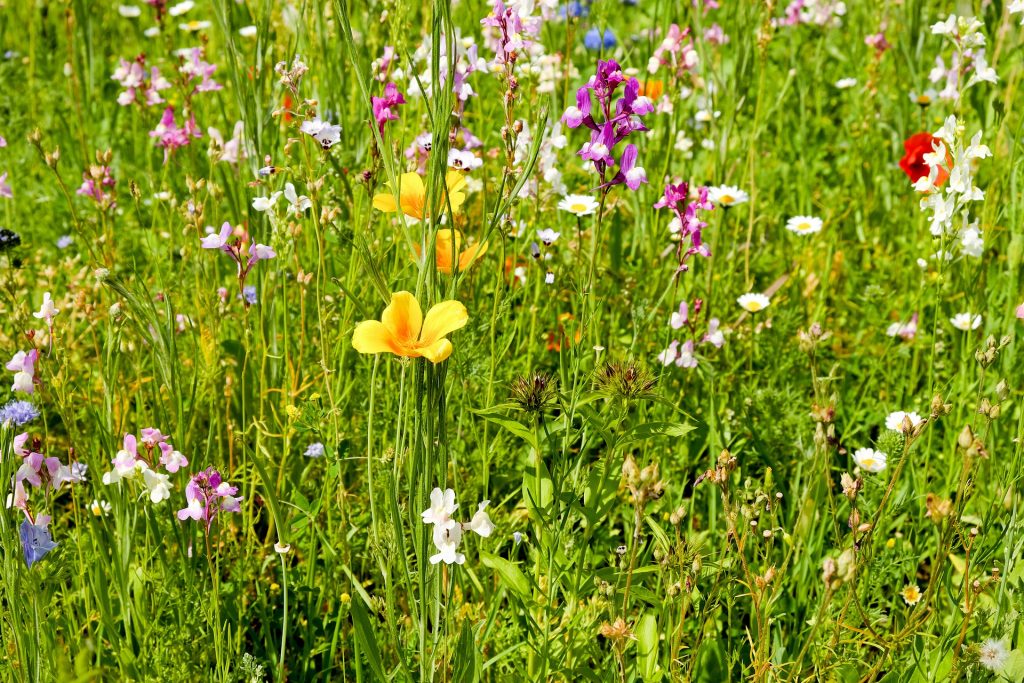
GROW WILDFLOWERS

Butterflies and bees are drawn to areas of wildflowers.
Ways to attract wildlife

Buddleia is a particular favourite of butterflies, and open structured flowers are good for attracting bees, foxglove and poppies.

Other annual plants that are so easy for kids to grow are Cornflowers, foxgloves, bluebells, crocus and sweet peas, Also think about moths and nightlife, Night scented flowers are wonderful for attracting moths and other night insects, which in turn attract bats to roost nearby. We had a resident bat here a few years ago that loved swooping in front of out sitting room window at dusk to catch all the moths and flies attracted by my Sarcococca Confusa plant that smells amazing.


So experiment with flowering times and seasons and see what you can attract. These are just a tiny selection of the plants you could choose to encourage wildlife.

If you need help on the gardening side, why not sivn up here to be the first to hear about my “Gardening with Kids” EBOOK coming soon??
A Beginner's Guide To Gardening With Kids

LINK

4. BUILD A TERRARIUM

The kids I care for LOVE creepy crawlies. They really enjoy exploring new habitats, doing bug hunts, getting muddy and slimy at the same time.

This craft is so easy but condenses wildlife down into manageable size for little ones. We have a whole city to explore this year like this one here.

SES Explore Children’s Insect City

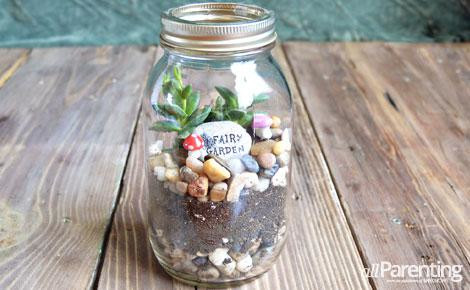
I can’t wait to fill it up in Spring and see who moves in. In the mean time we will make mini jar terrariums. Just like these ones here from Allparenting.com  
attract wildlife with kids.

You can also use the jars as bug collection jars.

Fill a large glass jar with a thin layer of stones or pebbles on the bottom for drainage,

Then fill the jar with a thin layer of soil, leaves, sticks, and flowers.

Put some holes in the lid carefully then let kids outdoors into the garden or forest and see what they bring back. It might be an idea to take spoons or mini spades to help lift the bugs safely.

Keep the jars for a few hours and let kids see a range of behaviours.

REMEMBER TO LET THE BUGS GO BACK TO THE PLACE YOU GOT THEM WHEN YOU ARE DONE.


If you don’t want to make your own terrarium, here are some of the other bug sets we’ve had over the year. 


Butterfly Farm


Insect Lore Butterfly Garden

This is easy to set up and so educational for the kids. My daughter CC checked the cocoons every minutes she could and the kids squealed and cried when the butterflies hatched. Such a wonderful experience and the set is reusable too.

Ant farm


Ant World

I was worried these little critters would escape but they didn’t. After a few days you started to see them making changes to their enclosure.

Wormery.


My Living World Worm World

This one was amazing. The different layers of material like soil and sand really helped us see how the worms make their way through the layers feeding and making tunnels leaving a clear network of tunnels through the layers.


5. PUT UP NESTING BOXES

Nesting boxes encourage birds to stay in your garden and raise their babies.


Chapelwood Wild Bird Classic Nest Box

We put up various sizes and shapes of boxes in a sheltered area under our roof line, away from the wind and hot sun. Every year we get some starlings nesting in the roof line and in some of the boxes. It’s wonderful to see the mum and dad birds flying in regularly to feed the chicks, and we get to hear the cheeping of the babies. I’m hoping, with the aid of our new bird nest cam, we will see a lot more this year and maybe actually see them leave the nest and fly. The kids will LOVE it!


Green Feathers 700TVL Wired Bird Box Camera with Audio, Night Vision and 20m AV Cable- Perfect Nest Box Pack, Bird House Kit, RCA, 940nm Invisible Infrared, Garden Wildlife Camera


This is a job that needs doing in Winter or even late Autumn. So that you do not disrupt the breeding season.

6. GET A BIRD TABLE AND BATH

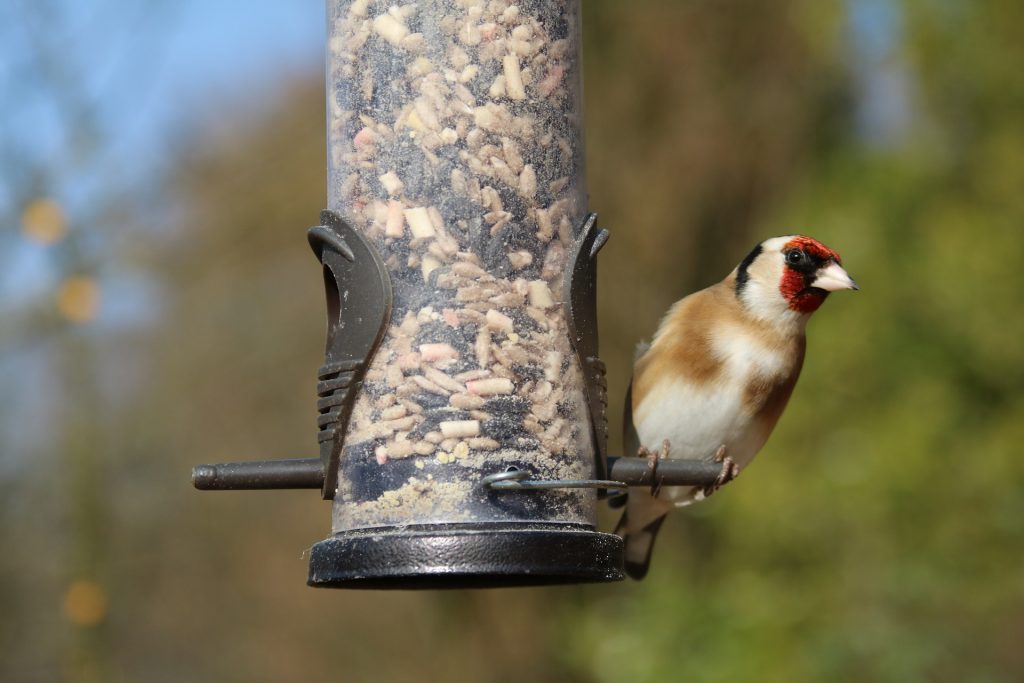
All birds feed differently, so need the food to be on a flat surface like the ground or on a table where others will feed from a hanging fat ball. Provide a range of options to attract the most birds.
Feed the birds with kids

Birds also need a drink and water to clean their feathers, with so make sure you provide a constant source of water so the birds can rely on it.

Just a note on feeders, Try not to put out to much food so it gets wasted. Rats and other vermin with feed off bird food tables if their short on other supplies

7. PLANT A TREE
Attract wildlife with kids

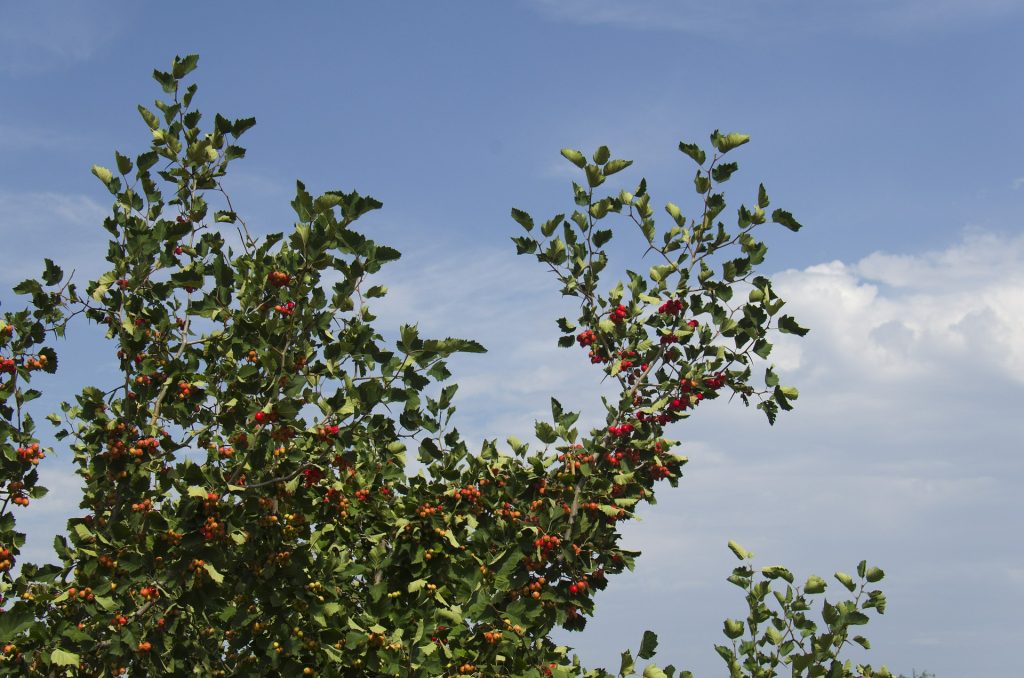
Native trees to your area will help attract birds and insects. In the UK, go for species like crab apple, conifers, silver birch, yew, alder, or if you have space for a large tree, try elm, beech or ash. Trees provide a nesting place for birds and squirrels, as well as lots of insect life, while if you want to attract bats, willow will give you the best chance.

If you have space to plant a few trees near each other, this will create more of a woodland habitat drawing a wider range of wildlife.

8. GROW A WILDLIFE HEDGE

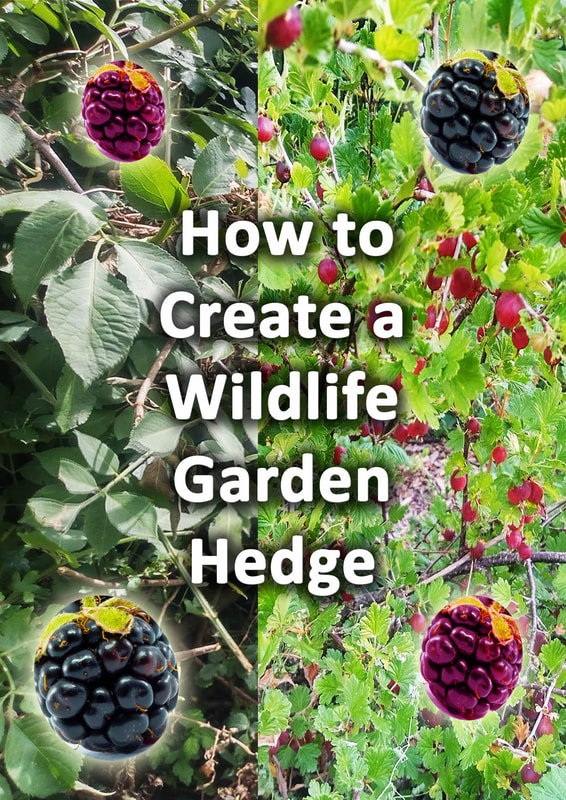
Hedges provide additional nesting areas for birds and small animals. They also help to shelter the garden and some even produce fruit or berries providing food for the wildlife or you! Suitable hedge plants include blackthorn, buckthorn, cherry plum, elder, hawthorn, hazel and privet. Climbers and creepers are great to grow up through the hedge as they provide further foliage to boost the insect population and draw birds. Clematis, dog rose and honeysuckle are good choices.

9. MAKE A WILDERNESS AREA

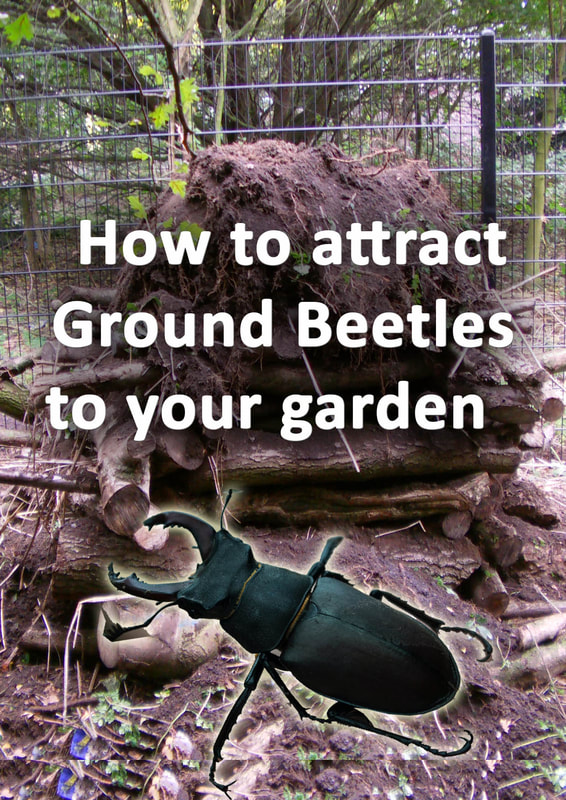
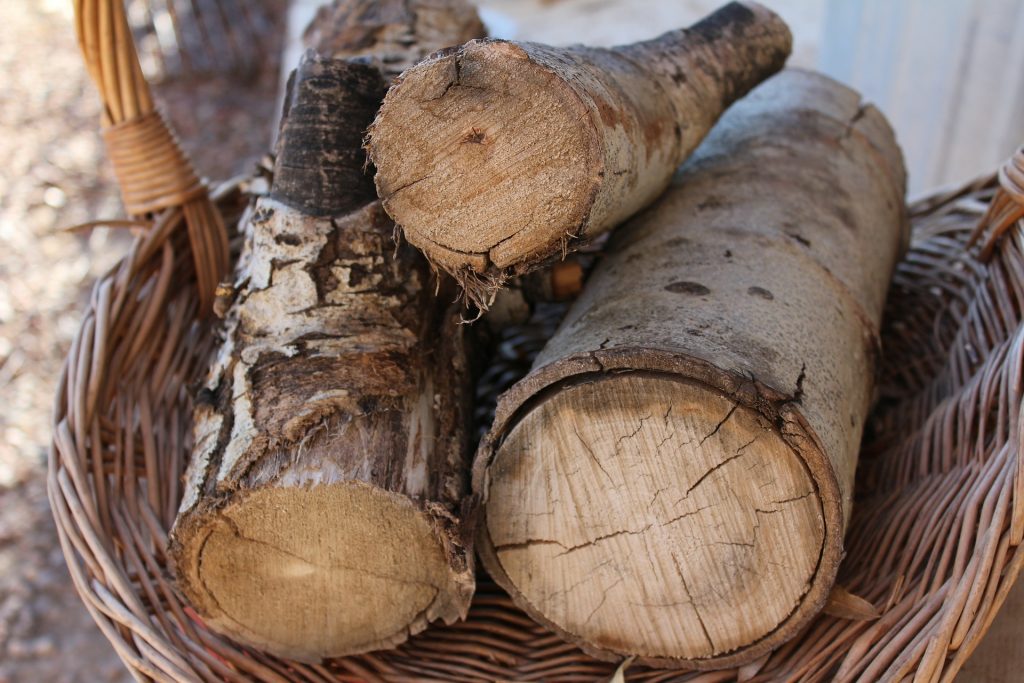
Leave an area of lawn to go to seed and grow long, or a pile of wood such as logs piled in a corned will give a home to beetles, bugs, centipedes and snails as well as much more.
10. HANG A BIRD FEEDER

Hang a bird feeder filled with peanuts or seeds. This post here has planty of feeders you can make with the kids. You can also get these wonderful feeders that attaches to a window with a suction pad for a close-up view. I finally ordered ours so we are looking forward to seeing the birds use this too. It takes birds a little while to get used to new feeders but I’m so excited to think that soon we will be able to see them up close.


Meripac Window Feeder

Fat balls and seed mixes are ideal for attracting a range of bird species. We also offer bacon rind raisins and grated cheese when we have them.

11. ATTRACT MAMMALS

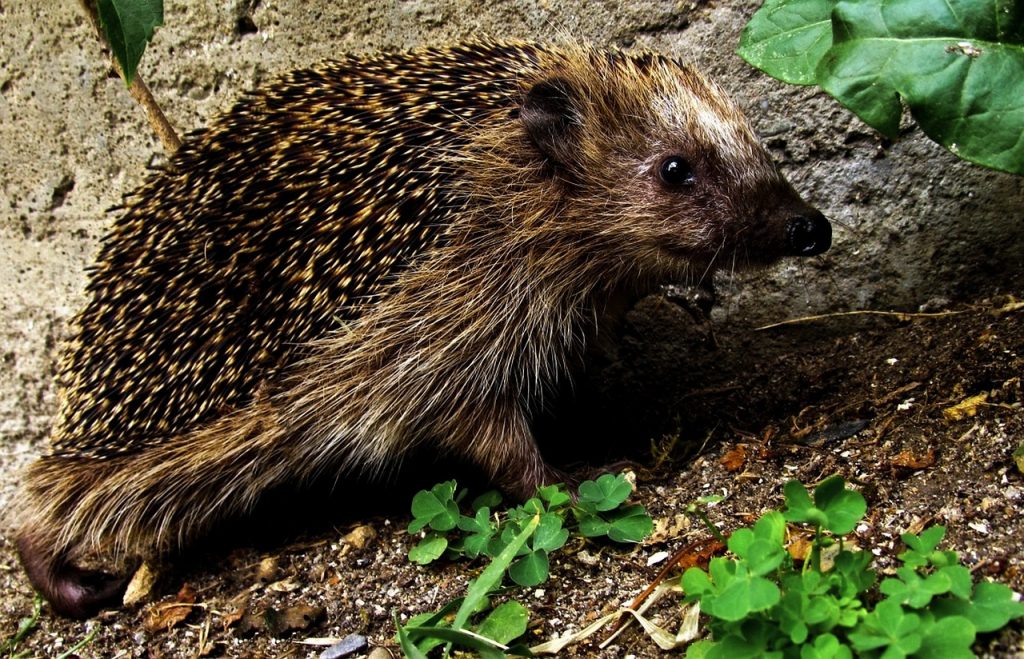
This year we are making a hedgehog home in our garden. We saw a hedgehog in the garden a few times last year and we would love to attract him back this year. They are wonderful for keeping on top of the local slug population, so I’m keen to attract him here. In Spring when they wake from hibernation very hungry so we will be putting out food for them and I will make sure to leave out water as well.
Wildlife for kids

NEVER GIVE MILK OR BREAD to hedgehogs as this can be very bad for them.You can buy special hedgehog food or give them dog food tinned meat.

My husband is convinced that he is hibernating under our shed but I will be attempting to build him a hedgehog home soon so he will use that next year.

So! these are the steps we will be working on this year to attract more wildlife to our garden. I hope you will try some too and support your local wildlife so they can in turn support you!

What challenges do you face getting outdoors with your kids?
Do you have a favourite activity or something that always gets in the way? 

Attracting wildlife

4 Reasons You Need Dragonflies In Your Backyard & How To Attract Them What could be better than a beautiful dragonfly zooming about the garden to brighten your day? Well, a flight of dragonflies or a static swarm has been known to top …

5 Ways To Attract Bluebirds To Your Yard A century ago, bluebirds experienced a steep decline due to habitat loss. We’re lucky to have them with us still today. Before our contemporary understanding of ecology, narrow management goals …

How To Attract Wild Ladybugs To Your Backyard & Why You Need ToAttracting ladybugs to your garden is one way to maintain diversity and manage it organically. Organic gardening always involves recognizing that we are not alone in our gardens. Successful gardens …

How To Stop Birds Flying Into Your WindowsCan you automatically recall, with a shiver down your spine, the sound of an object flying straight into your living room window? The thud, followed by the drop, and the …

How To Collect & Grow Milkweed Seeds to Save the Monarch ButterflyAsk any child over seven, and I’ll bet they can tell you what plant the Monarch butterfly eats. At 43 years old, I still remember learning about the Monarch butterfly’s …

7 Tricks To Keep Squirrels Out of Bird Feeders + Best Squirrel-Proof FeedersThere’s nothing worse than putting out a fresh feeder full of birdseed and, moments later, looking up to see this guy staring back at you. What was supposed to be …

4 Ingredient DIY Suet Cakes Backyard Birds Will LoveSetting up suet feeders is a great way to attract birds to your backyard. With their high metabolic rates, these tiny creatures need high-fat food content. Think of how quickly …

5 Worst Bird Feeding Mistakes That Means They’ll Never VisitThere was a time when birdwatching was a hobby strictly for our grandparents and the serious ornithologist. But, like many things, the pandemic changed all that. While we were stuck …

4 Ways to Deal with Bullying Blue Jays at Your FeederAs a backyard bird enthusiast, I’m sure you’ve stood at your window, watching a handful of birds nibbling away at your feeder, only to see them scatter when a squawking …

The #1 Secret to Attracting Cardinals to Your Yard + 5 Tips to ImplementEvery Christmas, it seems we all receive at least one card with a familiar scene on it. There’s a snow-covered tree or branches, sometimes with glitter, and amid the white …

4 Ways to Attract Lacewings to Your Garden (& Why You Need Them)A thriving garden ecosystem is like a world in miniature. Right under our noses, there’s a constant struggle for survival going on. Between battles for food and territory, mating rituals …

7 Bee Watering Station Ideas to Provide Drinking Water for BeesFrom sun up to sun down, bees are doing important work for the health and safety of the hive. Foraging bees will travel up to 5 miles from the colony …

5 Tips For A Dazzling No Mow MayYou are soon to discover that as enchanting as No Mow May is, it’s about so much more than beauty or helping the bees. Though for those two reasons alone, …

8 DIY Butterfly Feeder Ideas + 5 More Ways To Attract ButterfliesButterflies are among the most appealing insects found in nature. As indispensable members of the beneficial insect crew, butterflies are essential pollinators that pick up tiny grains of pollen on …

8 Ways To Attract Owls To Your BackyardWould you invite an owl to your garden party? If so, it’s time to add a new item to your checklist of gardening chores: how to create an “owl-friendly yard”. …

How to Create a Pollinator Paradise Without Getting Overwhelmed For decades the pursuit of the perfectly manicured lawn has consumed many a sunny weekend. Nary a dandelion could be found on the immaculate green carpet spread out in front …

How To Create a Beautiful and Practical Woven Willow Bird BasketThe ability to weave your own baskets is one of the many self-reliant skills that you shouldn’t be missing out on. Why? Because basket weaving requires few tools, making it …

10 Plants To Attract Hover Flies – Nature’s Super-Pollinators & Aphid EatersHover flies are truly unsung heroes in the garden. Operating like undercover agents, hover flies are easily mistaken for bees or wasps. When at rest on a flower, it’s nearly …

7 Simple Steps to Attracting More Fireflies to Your BackyardIf you grew up in rural America, a big part of summertime was fireflies. Or lightning bugs. Or lightning beetles.  No matter what you called them in your neck of …

The Ultimate Guide to Attracting Hummingbirds to Your YardI’m just warning you right now if you clicked on this to read, and you’re serious about attracting hummingbirds to your yard, it helps if you’re a little crazy – …

60 Plants to Attract Bees, Butterflies and Other Important InsectsAttracting bees, butterflies and other beneficial insects to your garden couldn’t come at a better time than now, at this particular point in history. With the decline in insect species …

Is Your Bee Hotel Actually a Deathtrap?Imagine you’re on a road trip. You’ve been driving for hours, and you decide it’s time to stop for the night. Maybe you find a place along the way, or …Read Moreabout Is Your Bee Hotel Actually a Deathtrap?

Actually, You Don’t Need to Save the Dandelions for The BeesPretty soon, the snow will melt, the grass will green, and just a few short weeks after that, great sweeping blurs of yellow flowers will cover fields and yards alike. …Read Moreabout Actually, You Don’t Need to Save the Dandelions for The Bees

Why You Need More Earthworms In Your Soil & How To Get ThemWhen you type your query with nimble and curious fingers into a search bar: “why attract earthworms”, what comes up? Why would you want earthworms in your garden? Are earthworms …Read Moreabout Why You Need More Earthworms In Your Soil & How To Get Them

13 Practical Ways You Can Help Pollinators – With Advice From a Distinguished EntomologistIt’s such an incredibly tiny act. We can be standing by while it’s happening and not even notice. Pollination. Almost three-quarters of the crops we grow for food are pollinated. …

15 Colorful Trees & Shrubs to Attract Stunning Birds To Your BackyardDo you enjoy watching birds from the window, peering out several times a day to see what is going on in the outside world? If you would like to increase …

5 Ways To Attract Beautiful Birds To Your GardenBirdscaping. Did you even know that was a thing or a necessary and environmentally-friendly act that you can easily carry out in your own backyard? If you’ve already encountered this …

How To Build A Bug Hotel + 5 Reasons Why You ShouldWith plenty of time on your hands, has your mind ever wandered to the garden, and to how you might go about attracting beneficial insects to your space? If so, …

How To Build A Bat House To Attract More Bats To Your YardJust as there are several ways to attract bats to your yard, there is more than one way to build a bat house. But before you blindly choose a bat …

Rewild Your Garden: 10 Easy Things You Can Do To Make A Big DifferenceHave you ever given thought to what it might feel like to rewild your garden? A garden being your backyard space, acres upon acres of field or forest, even your …

How To Make A DIY Rustic Hanging Bird BathBird baths help to make your garden or yard a more appealing stop for beautiful birds and butterflies. While having a bird bath in your yard is beneficial to the …

Simple Birdseed Ornaments – Made With Just 2 IngredientsEdible ornaments for birds? Yes, you read that right. Currently you are about to embark on a tutorial on how to make bird cookies. And healthy ones at that. There …

Garden Wildlife Photography Tips

When you think about wildlife photography, most people would think of visiting a wildlife reserve, national park, or just getting out in the wilds. However, you can take great wildlife photos much closer to home.
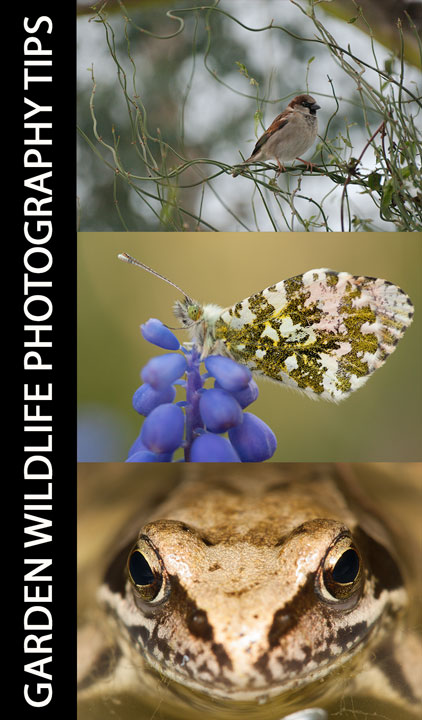
Garden Wildlife Photography Tips

There are quite a few benefits of photographing wildlife in your garden. The most obvious one being that you don't have to travel anywhere to get there. It's also much more comfortable - if you get thirsty or hungry you can just pop inside for a drink or snack. You don't need to carry a large amount of equipment with you - you can just fetch what you want when you want it.

It also enables you to do a quick bit of wildlife photography whenever it's convenient. Of course you can't guarantee that there will always be an obvious subject out there whenever you want it. But that would be just the same if you were traveling many miles to a nature reserve.
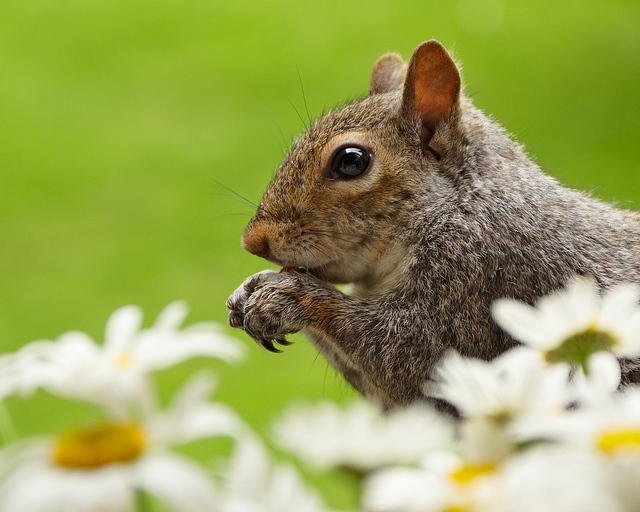
Squirrel eating a nut in a garden


Squirrel eating a nut in a garden by James Blunt on Flickr (licensed CC-BY-ND)

In nature, habitats tend to cover large areas. But in your garden you can have a wide range of habitats in just a small area. A couple of trees can become a woodland, the lawn becomes fields, and a small pond becomes a lake (well maybe not quite, but near enough). This allows you to attract a large variety of different wildlife to your garden.

When thinking about wildlife photography in your garden, you need to think about the type of wildlife you would like to attract, and then plan your garden appropriately. If you want to photograph birds, then trees / shrubs for them to perch / hide in, water to drink and wash in, and a good supply of food will all help bring them to your garden.
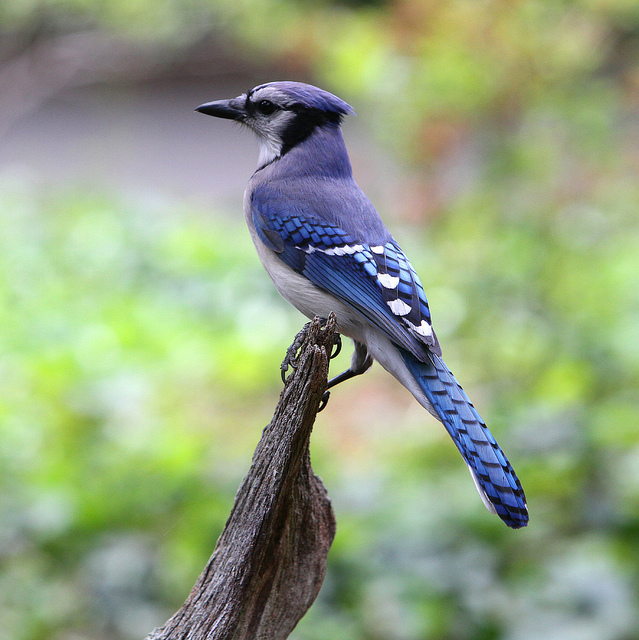
American Blue Jay


American Blue Jay by anoldent on Flickr (licensed CC-BY-SA)

You can go further than this, if you're looking to photograph a particular type of bird, for example. Look up what it likes to eat, what sort of habitat it likes, and then make sure that your garden will cater to its needs.

Enticing animals into your garden to feed can certainly help you get some photos of them. But if you can get them to live in your garden, then this opens up even more regular photo opportunities. Putting up nest boxes for birds or bee houses for solitary bees, for example.
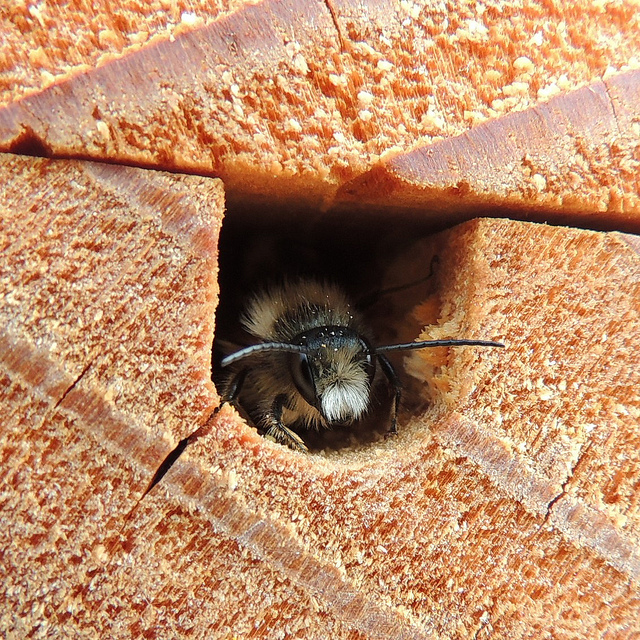
Male red mason bee (Osmia bicornis) in a bee house


Male red mason bee (Osmia bicornis), Sandy, Bedfordshire by Orangeaurochs on Flickr (licensed CC-BY)

Do be mindful not to disturb animals when they're nesting though. For example, if you're not usually out in the garden much, but then go out when you get some nesting birds with chicks, the adults will be very wary of you and may stay away from the nest. This could result in the chicks missing out on vital feeds, or even the adults deciding to abandon the nest altogether.

If you're out in the garden regularly though before they choose the nest site, then they'll be much more likely to tolerate you being around, so long as you keep your distance.

If you're after frogs, then a small (or large) pond is a great idea. Put piles of rocks nearby that the frogs can hide under - they don't spend all their time in the water. A pond is also great for many insects, such as dragonflies, damselflies, and hoverflies. And these in turn attract other animals that feed on them.
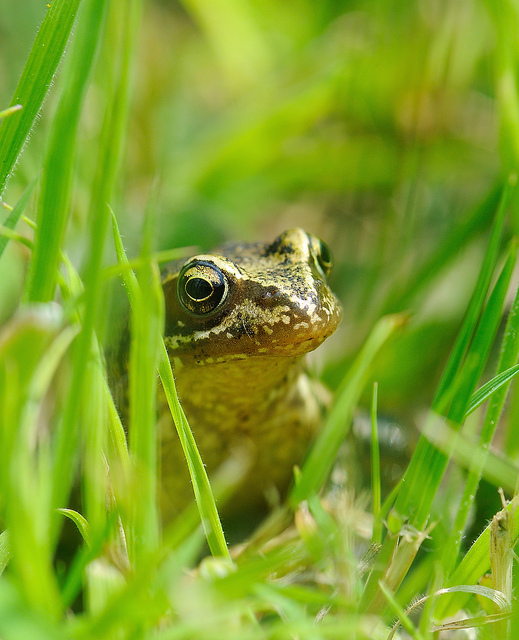
Frog


Frog by Kev Chapman on Flickr (licensed CC-BY)

A corrugated metal sheet laid out in an area that gets some sunlight can prove a magnet for snakes and lizards. As they are cold blooded, they need to warm up at the start of each day. The sheet heats up much faster in the sun than the surrounding ground. This makes it an ideal place for them to hide under, out of the sight of potential predators above.
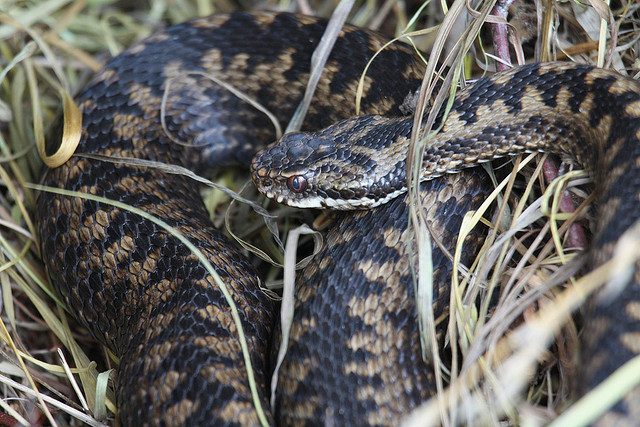
Adder that had been hiding under a corrugated tin sheet


Adder by Alastair Rae on Flickr (licensed CC-BY-SA)

For butterflies and caterpillars think about the types of plants you have in your garden. While flowers attract butterflies with their nectar, think also about plants that the caterpillars eat. Many have quite specialized tastes. By planting their foodplants you can attract butterflies looking for somewhere to lay their eggs. And it also gives you the chance to record the complete life-cycle, from caterpillar to butterfly.
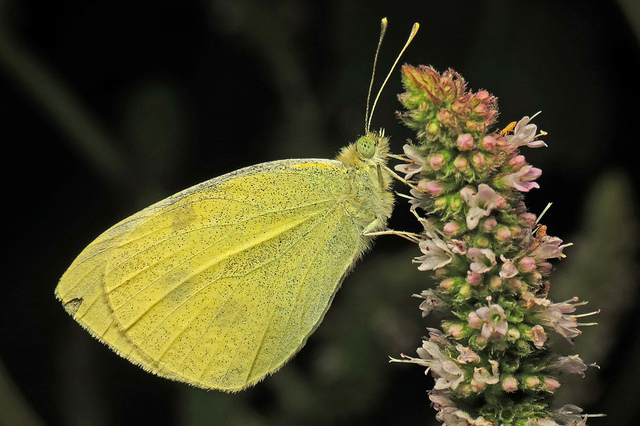
Roosting butterfly


Roosting butterfly by Martin Cooper on Flickr (licensed CC-BY)

As well as thinking about the wildlife you would like to attract when setting up your garden, also think about it from a photographic perspective. For example, when putting up a bird feeder, you want to place it somewhere that you can get reasonably close to without scaring the birds off. If you can place it near a point where you can easily photograph from the house, so much the better.

A bush growing near the feeder will provide a nice place for birds to perch, allowing you to get nice, natural shots of them. You may want to trim back parts of the bush to reduce visual clutter and make it easier to get a clean shot. You can even go further and just use a cut branch placed near the feeder for the birds to use. This results in much more appealing photos than a bird sitting at a plastic feeder.
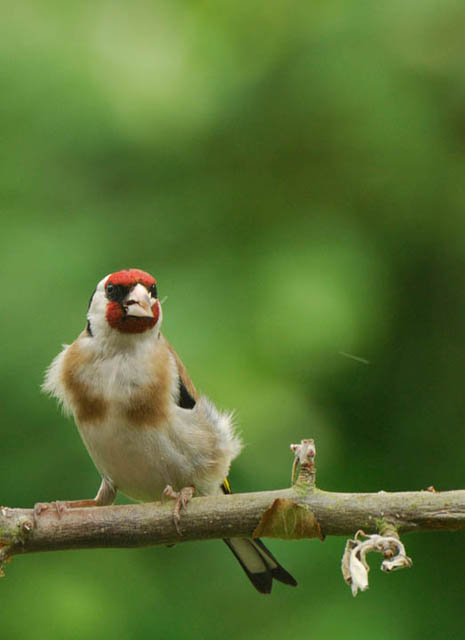
European Goldfinch perching on a twig
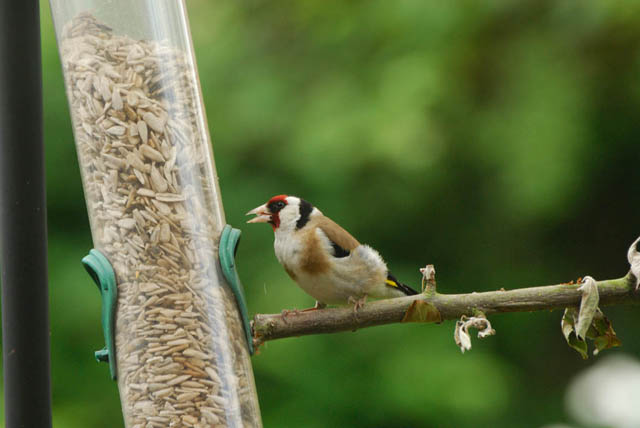

European Goldfinch perching on a twig

European Goldfinch perching on a stick attached to a feeder


The bird was actually perching on a stick attached to a feeder

Think about the backgrounds too. Having climbing plants covering walls and fences will usually provide a nicer, more natural looking backdrop than bare brick or wood.

Although photographing wildlife in your garden allows you to get pretty close, for most subjects you're still going to need a telephoto lens (300mm or greater) if you want to capture them at a reasonable magnification. Smaller subjects, such as insects, will generally let you get a bit closer, but due to their small size the maximum magnification ratio of the lens can become an issue. For these subjects a macro lens is highly recommended.
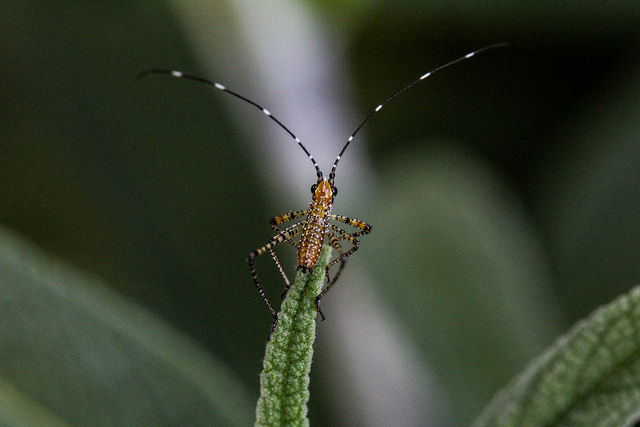
Mexican Bush Katydid


Mexican Bush Katydid by siamesepuppy on Flickr (licensed CC-BY)

For photographing birds, you can use your house as a hide. It is best (though not essential) to shoot through an open window or door as shooting through the glass of a window can reduce the contrast of an image. You may have to deal with reflections caused by the window too if shooting through the glass.
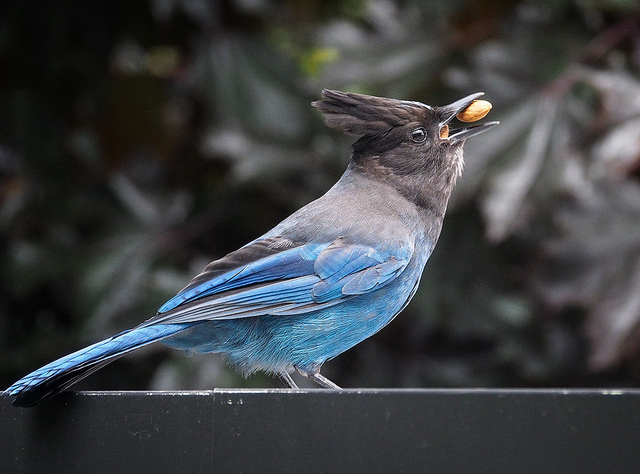
Steller's Jay caching nuts, photographed through a window


A Caching Steller's by Ingrid Taylar on Flickr (licensed CC-BY)

If you have a door that can slide open, this is perfect as it will let you shoot to the left or right without getting in your way. Whereas with a window you can only shoot in the direction that it opens.

It is best to open the window or door, then wait for birds to arrive. If you open the window / door after the birds have arrived, then you'll likely scare them off. So long as you're not too noisy, and don't move around too much, the birds should ignore you.
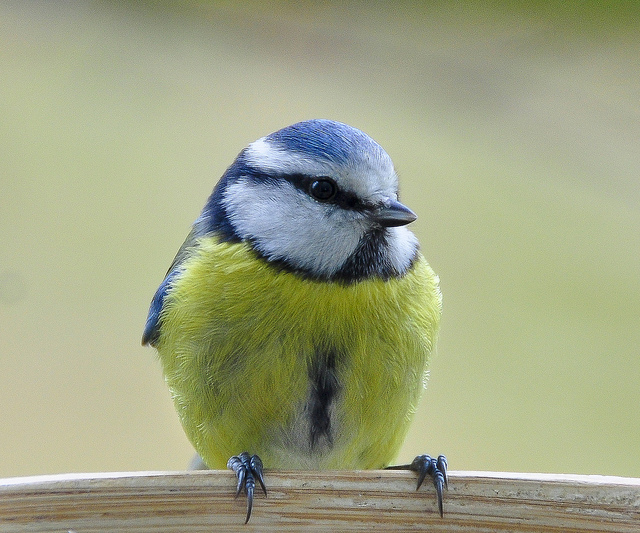
Blue Tit close-up


Blue Tit close-up by keith ellwood on Flickr (licensed CC-BY)

Lastly, if you don't have much wildlife in your garden at the moment, making it wildlife friendly won't change the situation overnight. You need to think of it more as a long term project. The results can be great, both for your photography, and also just for the general enjoyment of wildlife watching.

Herbs in the
Garden

Grow Your Own Herbs Every Year Without A Lot Of Effort!

Perennial herbs gardens are a gardener’s best friend. They provide an almost never-ending supply of fresh ingredients for salads, soups, and sauces. The only problem is that there are so many different perennial herbs to choose from! In this blog post, we will break down the growing information for each type of perennial herb, so you can find what you need with ease. This guide is not an exhaustive list, but these 12 garden herbs will help you get started answering the question about which herbs are perennials vs. annuals.

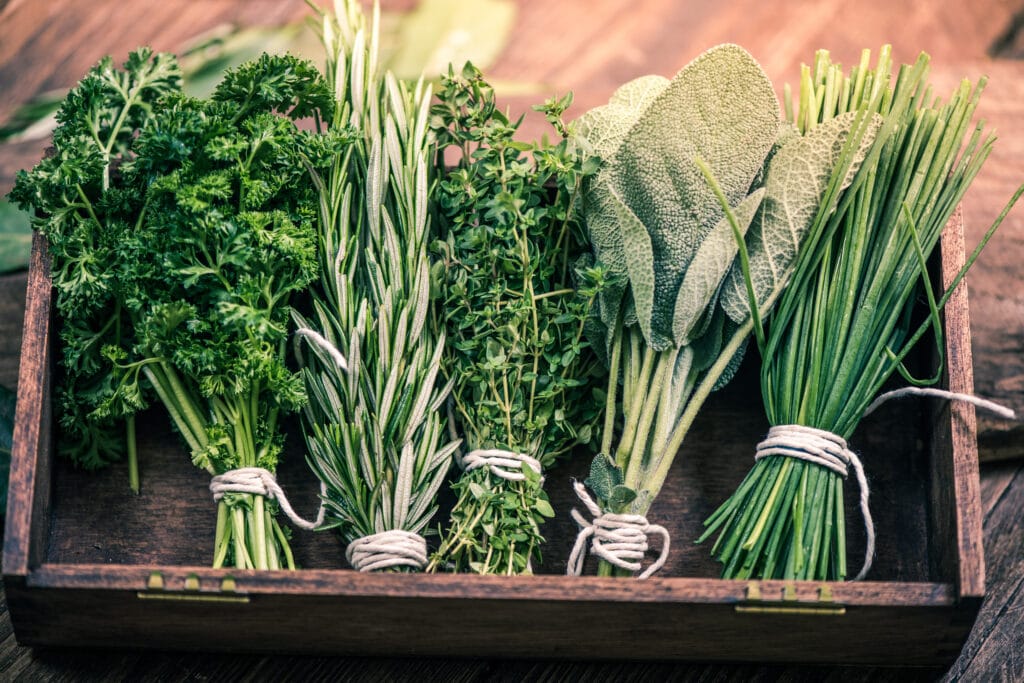
close view on fresh  perennial herbs bunch in a rustic wooden box.

Sage

Sage is a perennial herb that can survive in zones five to nine. It prefers dry, well-drained soil and requires very little water. The plant grows two feet tall and has dark green leaves with small white flowers on red stems.

You should harvest the sage by cutting off the stem just above where it meets the plant’s root ball.

Perennial in Zones 5-9

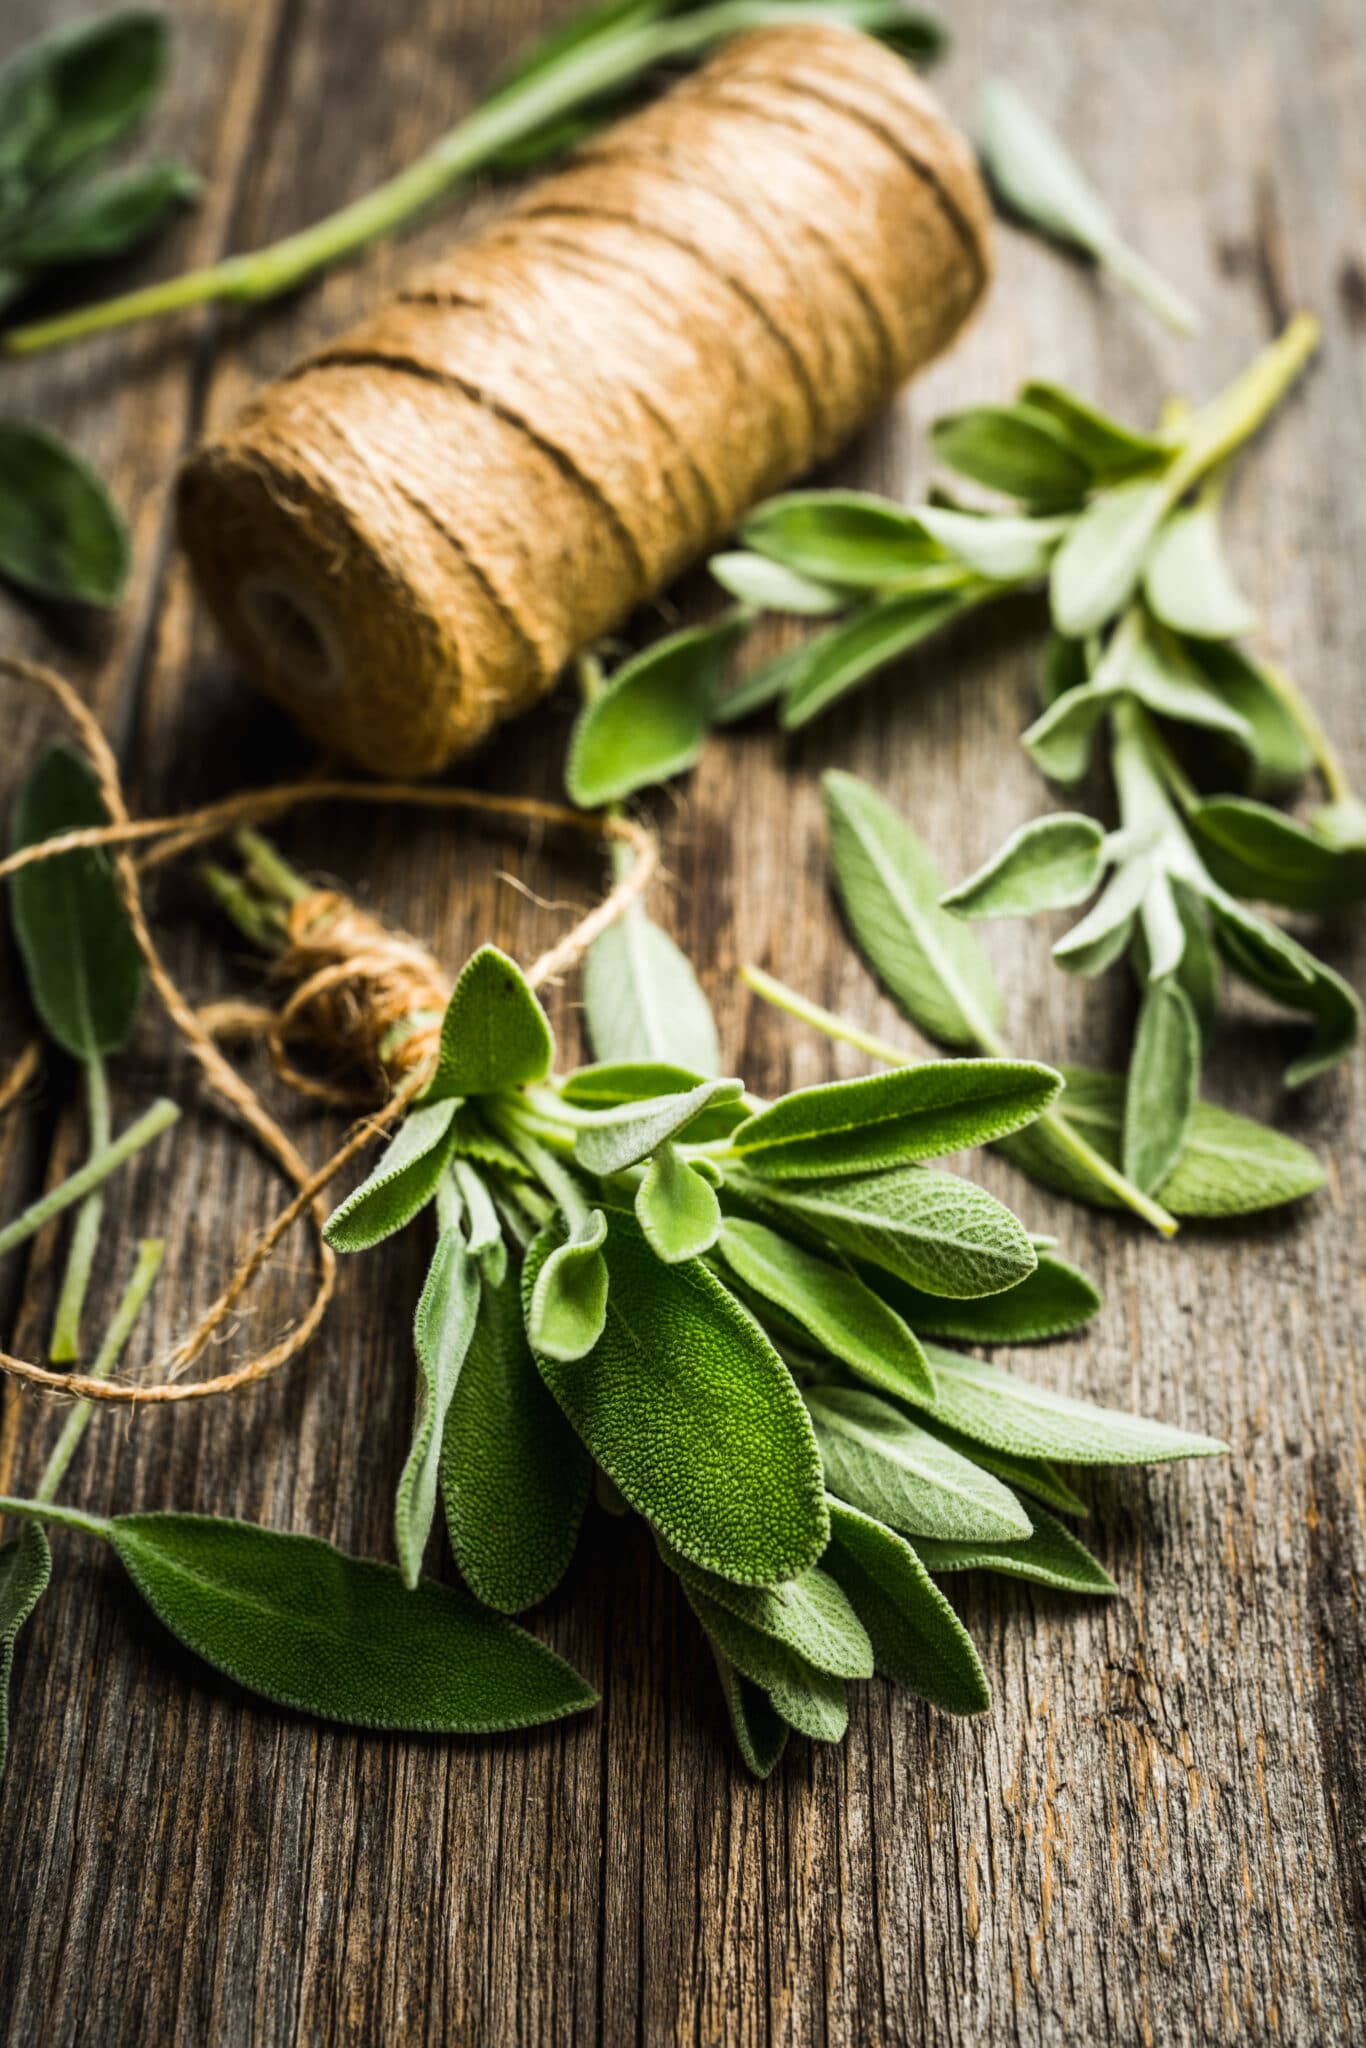
Rustic image of a fresh cut perennial herb (sage) on a rustic wooden background with a ball of twine.

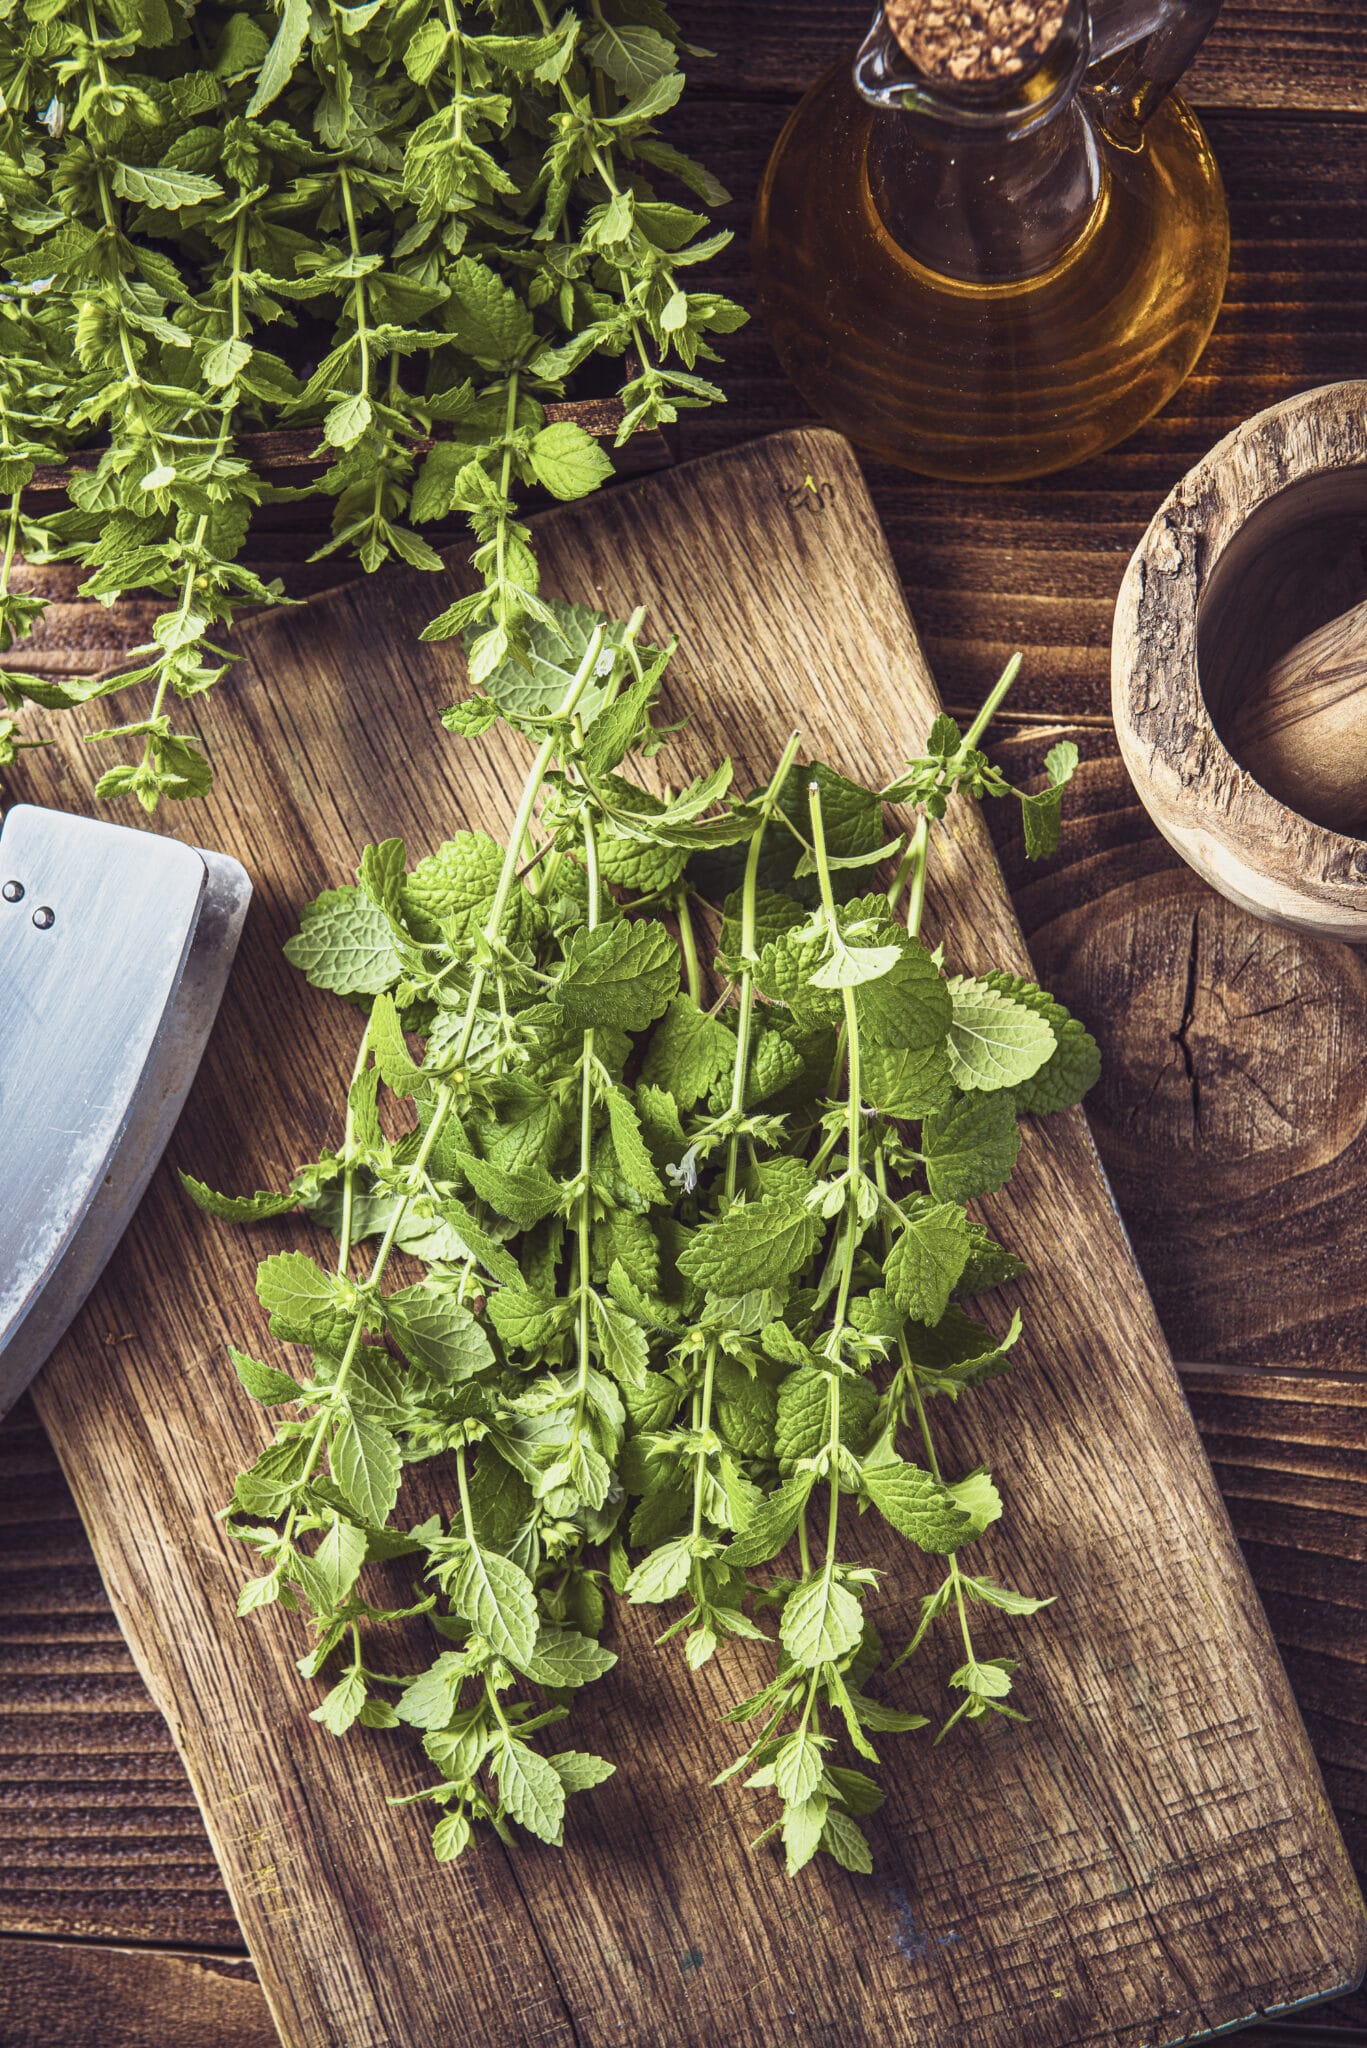
Lemon Balm

Lemon balm is a perennial herb that can survive in zones four to nine and prefers moist soil with full sun exposure. It grows up to two feet tall and has slender stems with small leaves on top of the stem that make it look like grass or wheat blowing in the wind.

Lemon balm has a mild lemony smell and taste, making it more versatile than many other herbs with an assertive or strong scent or flavor.

To harvest lemon balm, cut off the stem above to meet the plant’s root ball.

Perennial in Zones 5-9

Garden Fresh Melissa Officinalis or Lemon Balm Herb on Wooden Table..

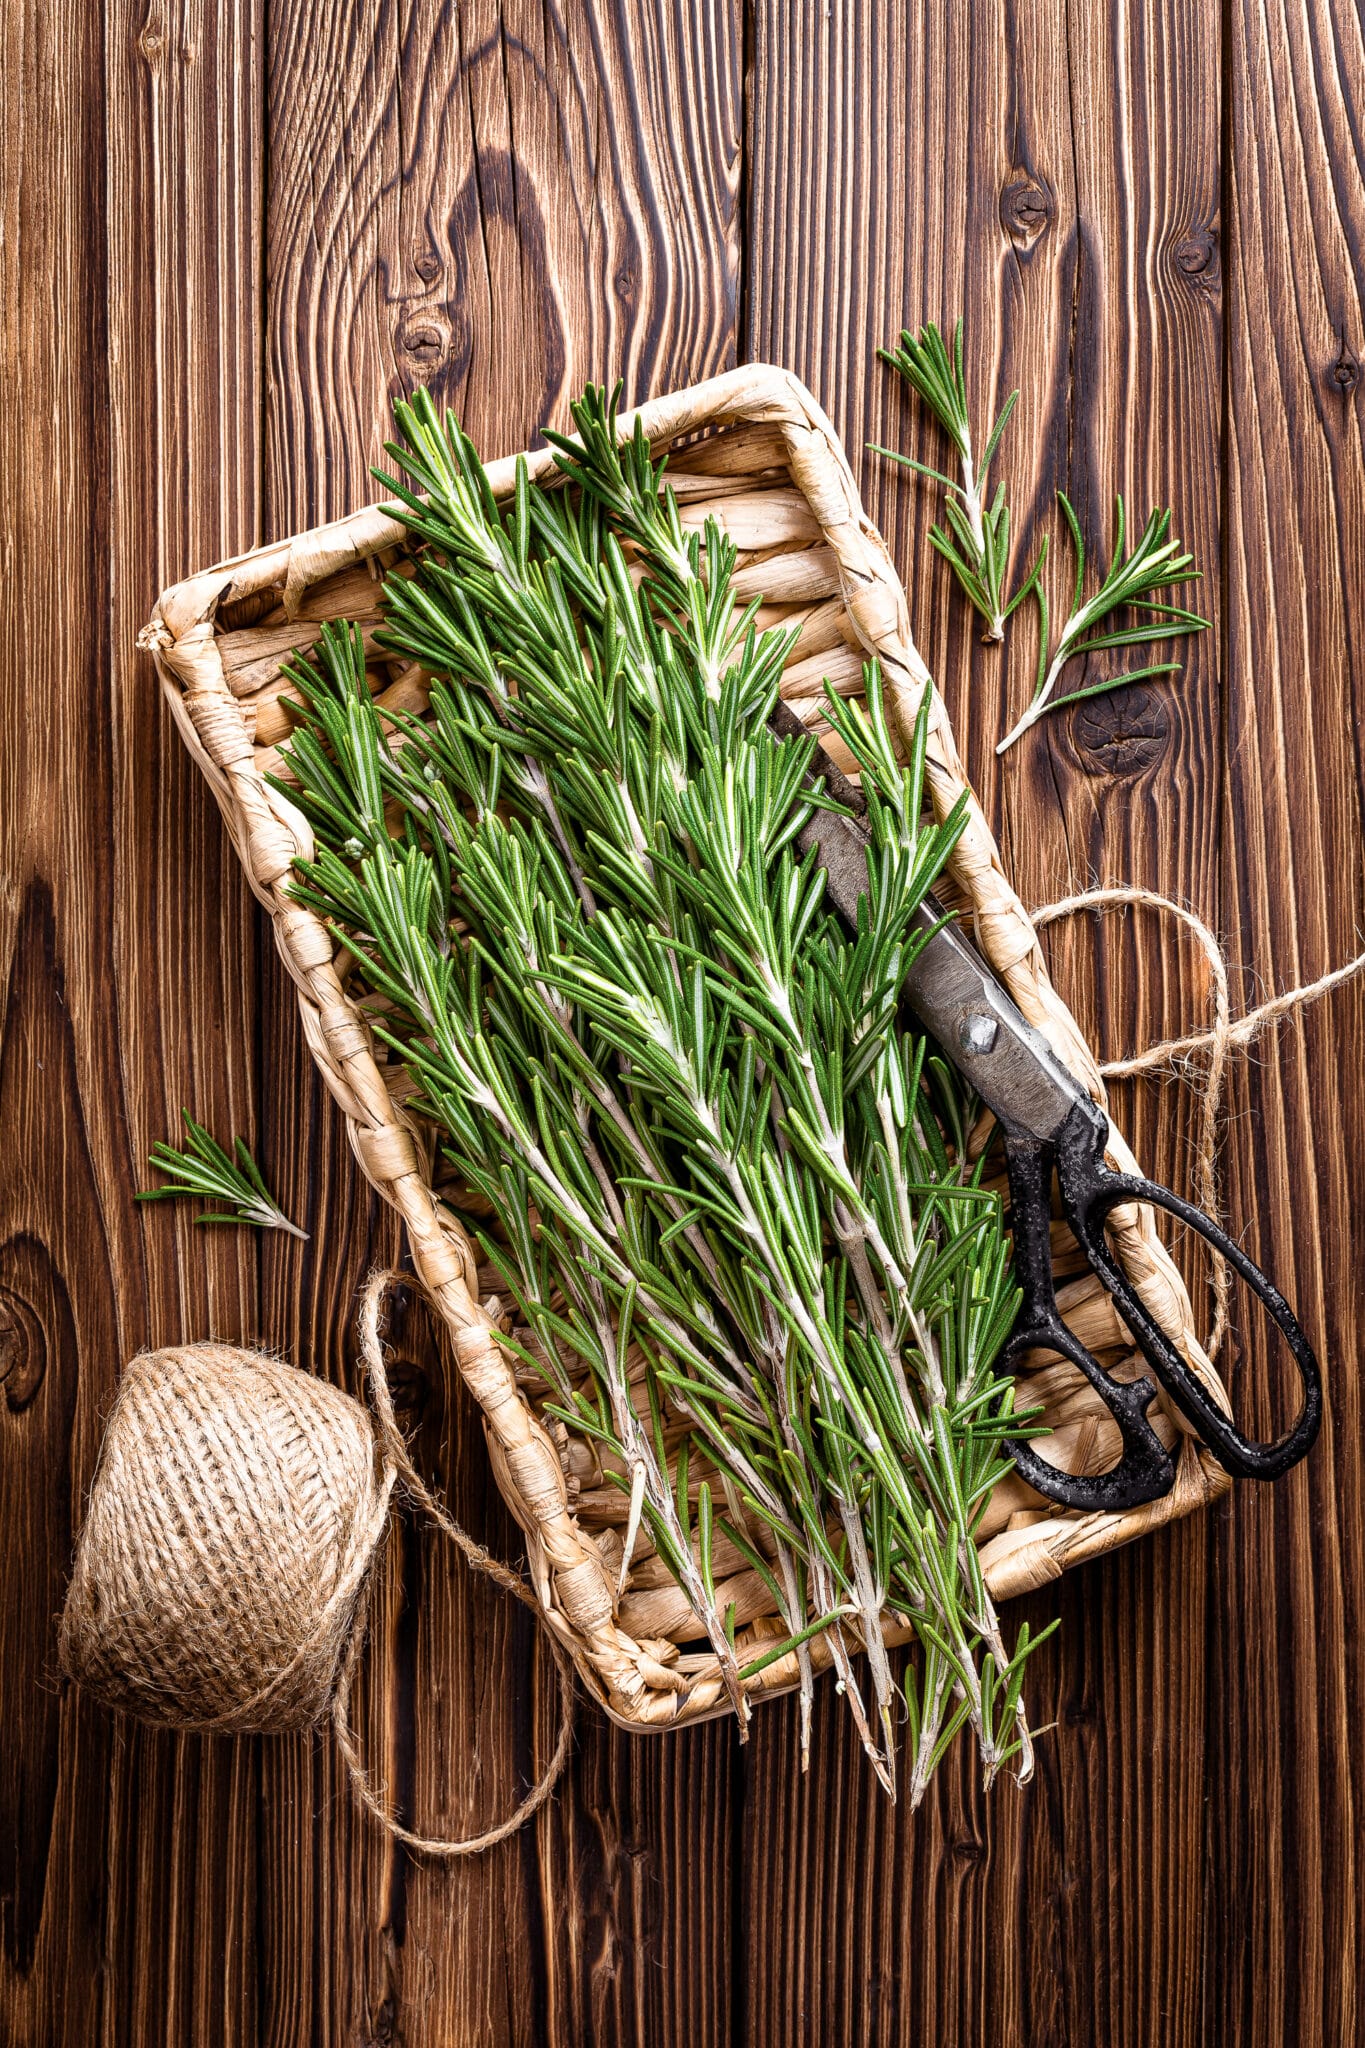
Rosemary

Rosemary is perennial in zones five to nine and has a piney, resinous aroma. It prefers total sun exposure in soil well-drained but not too dry. Rosemary can grow up to two feet tall with spiky leaves on top of the plant as it grows taller from the ground.

To harvest rosemary, be sure to cut the stems and not pull them up. Also, their leaves should be dry to touch before being used in a recipe.

Perennial in Zones 5-9

Rustic image of a fresh cut perennial herb (sage) on a rustic wooden background in a wicker basket with a ball of twine and vintage black scissors.

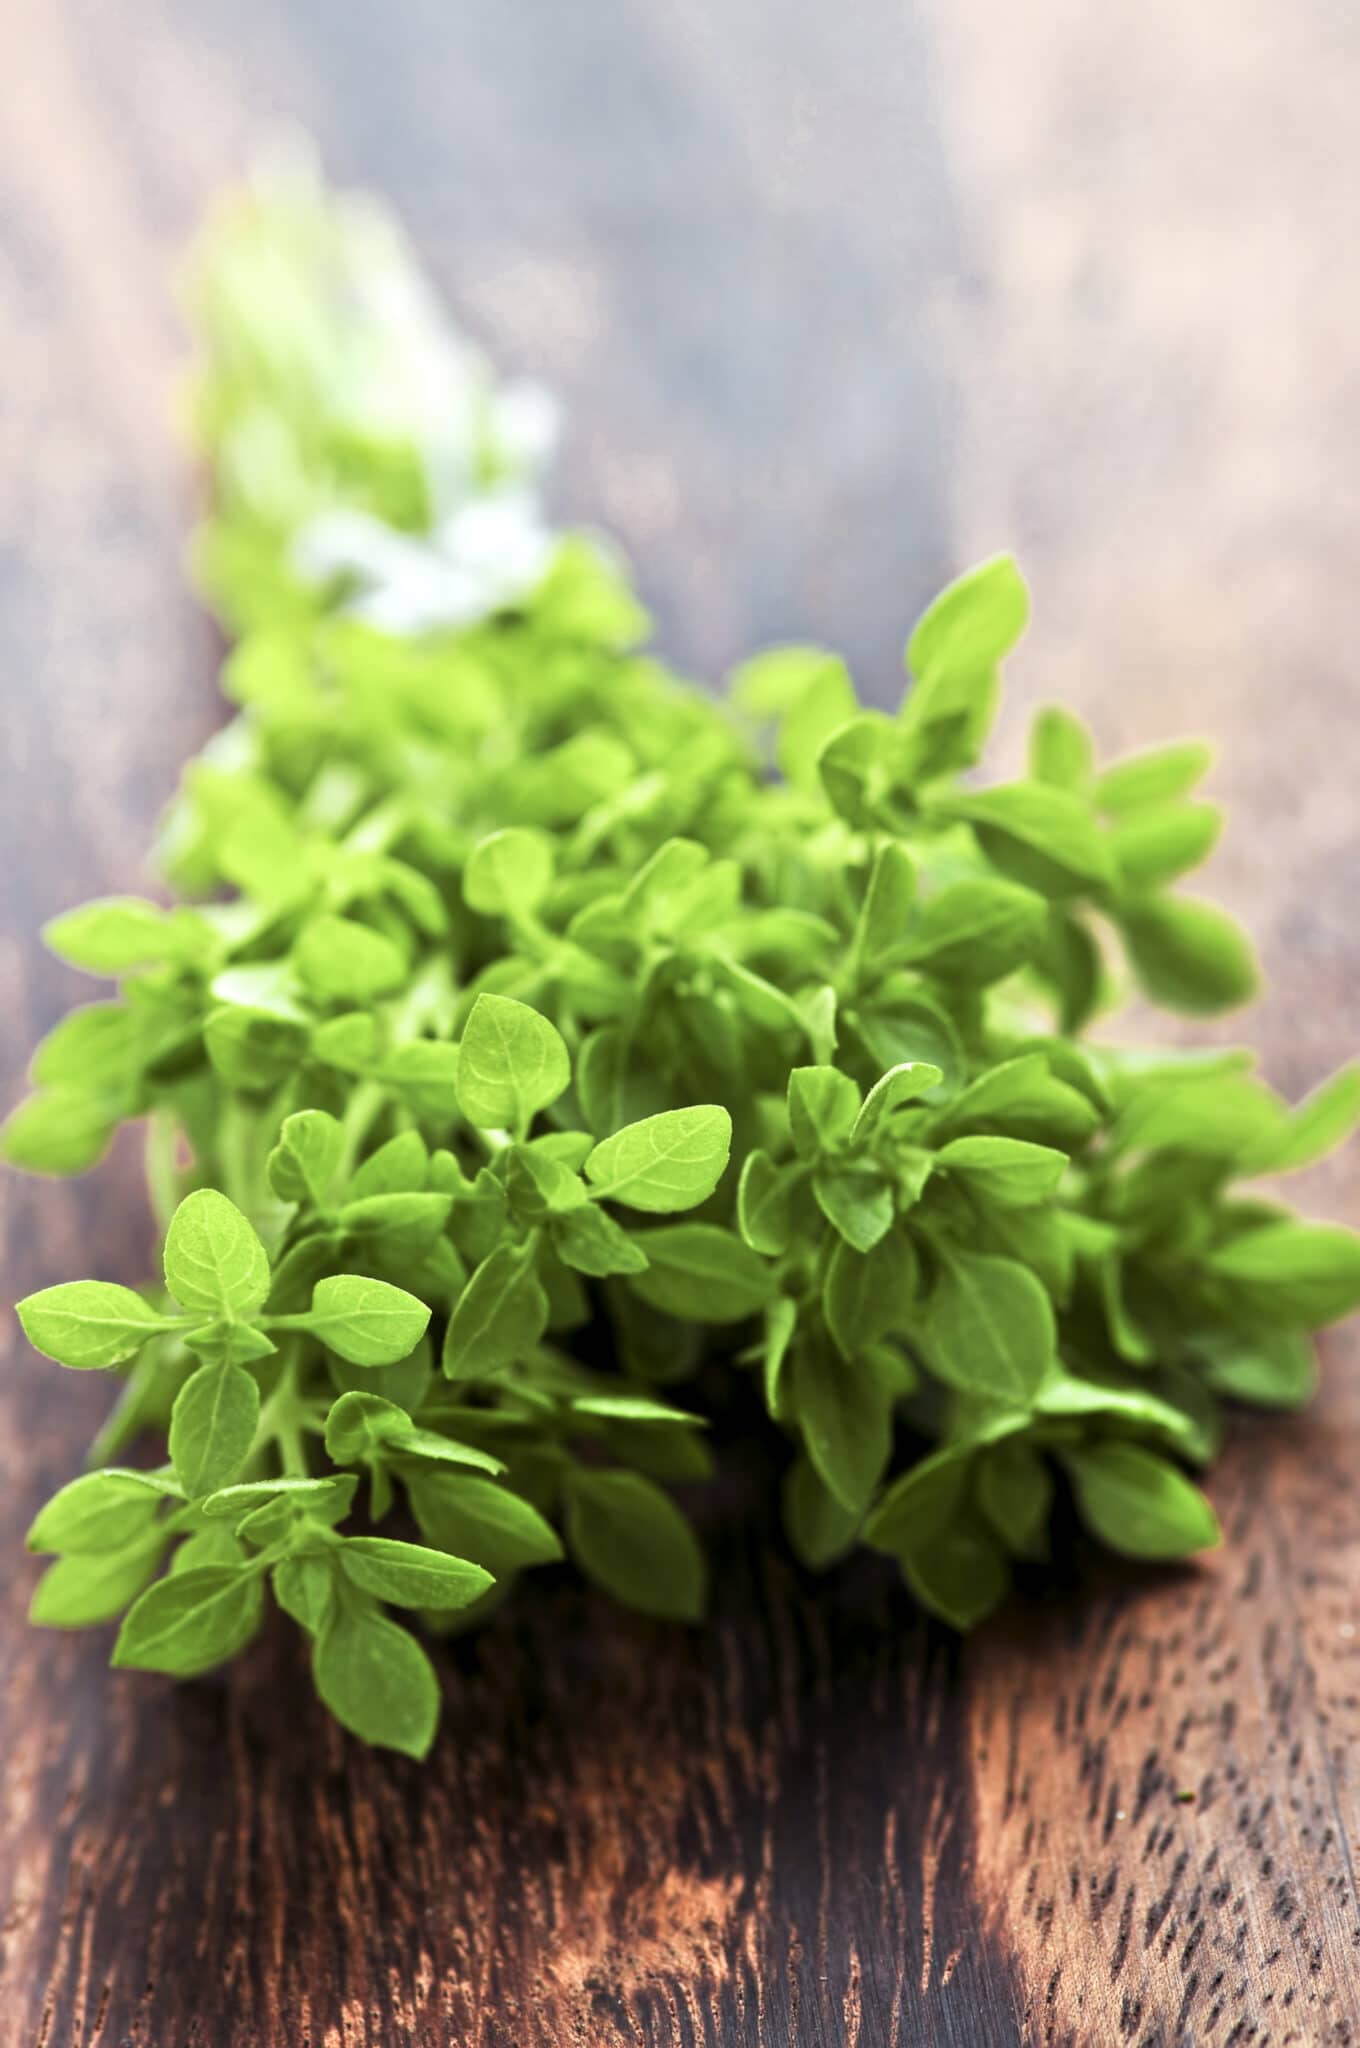
Oregano

Oregano is a beautiful perennial herb that can be grown in zones five to nine—the herb tastes of pine, anise, and pepper with a hint of clove.

The plant will grow up to three feet tall, but the leaves are pretty small, so you should harvest them frequently during the summer months.

Oregano should be watered only when dry through the roots but not over-watered so that its leaves turn yellowish-brown.

It is best used dried for maximum flavor.

Oregano has several different varieties like mint and cilantro, all with other culinary uses.

Perennial in Zones 5-9

Bunch of fresh herb oregano close up on wooden cutting board

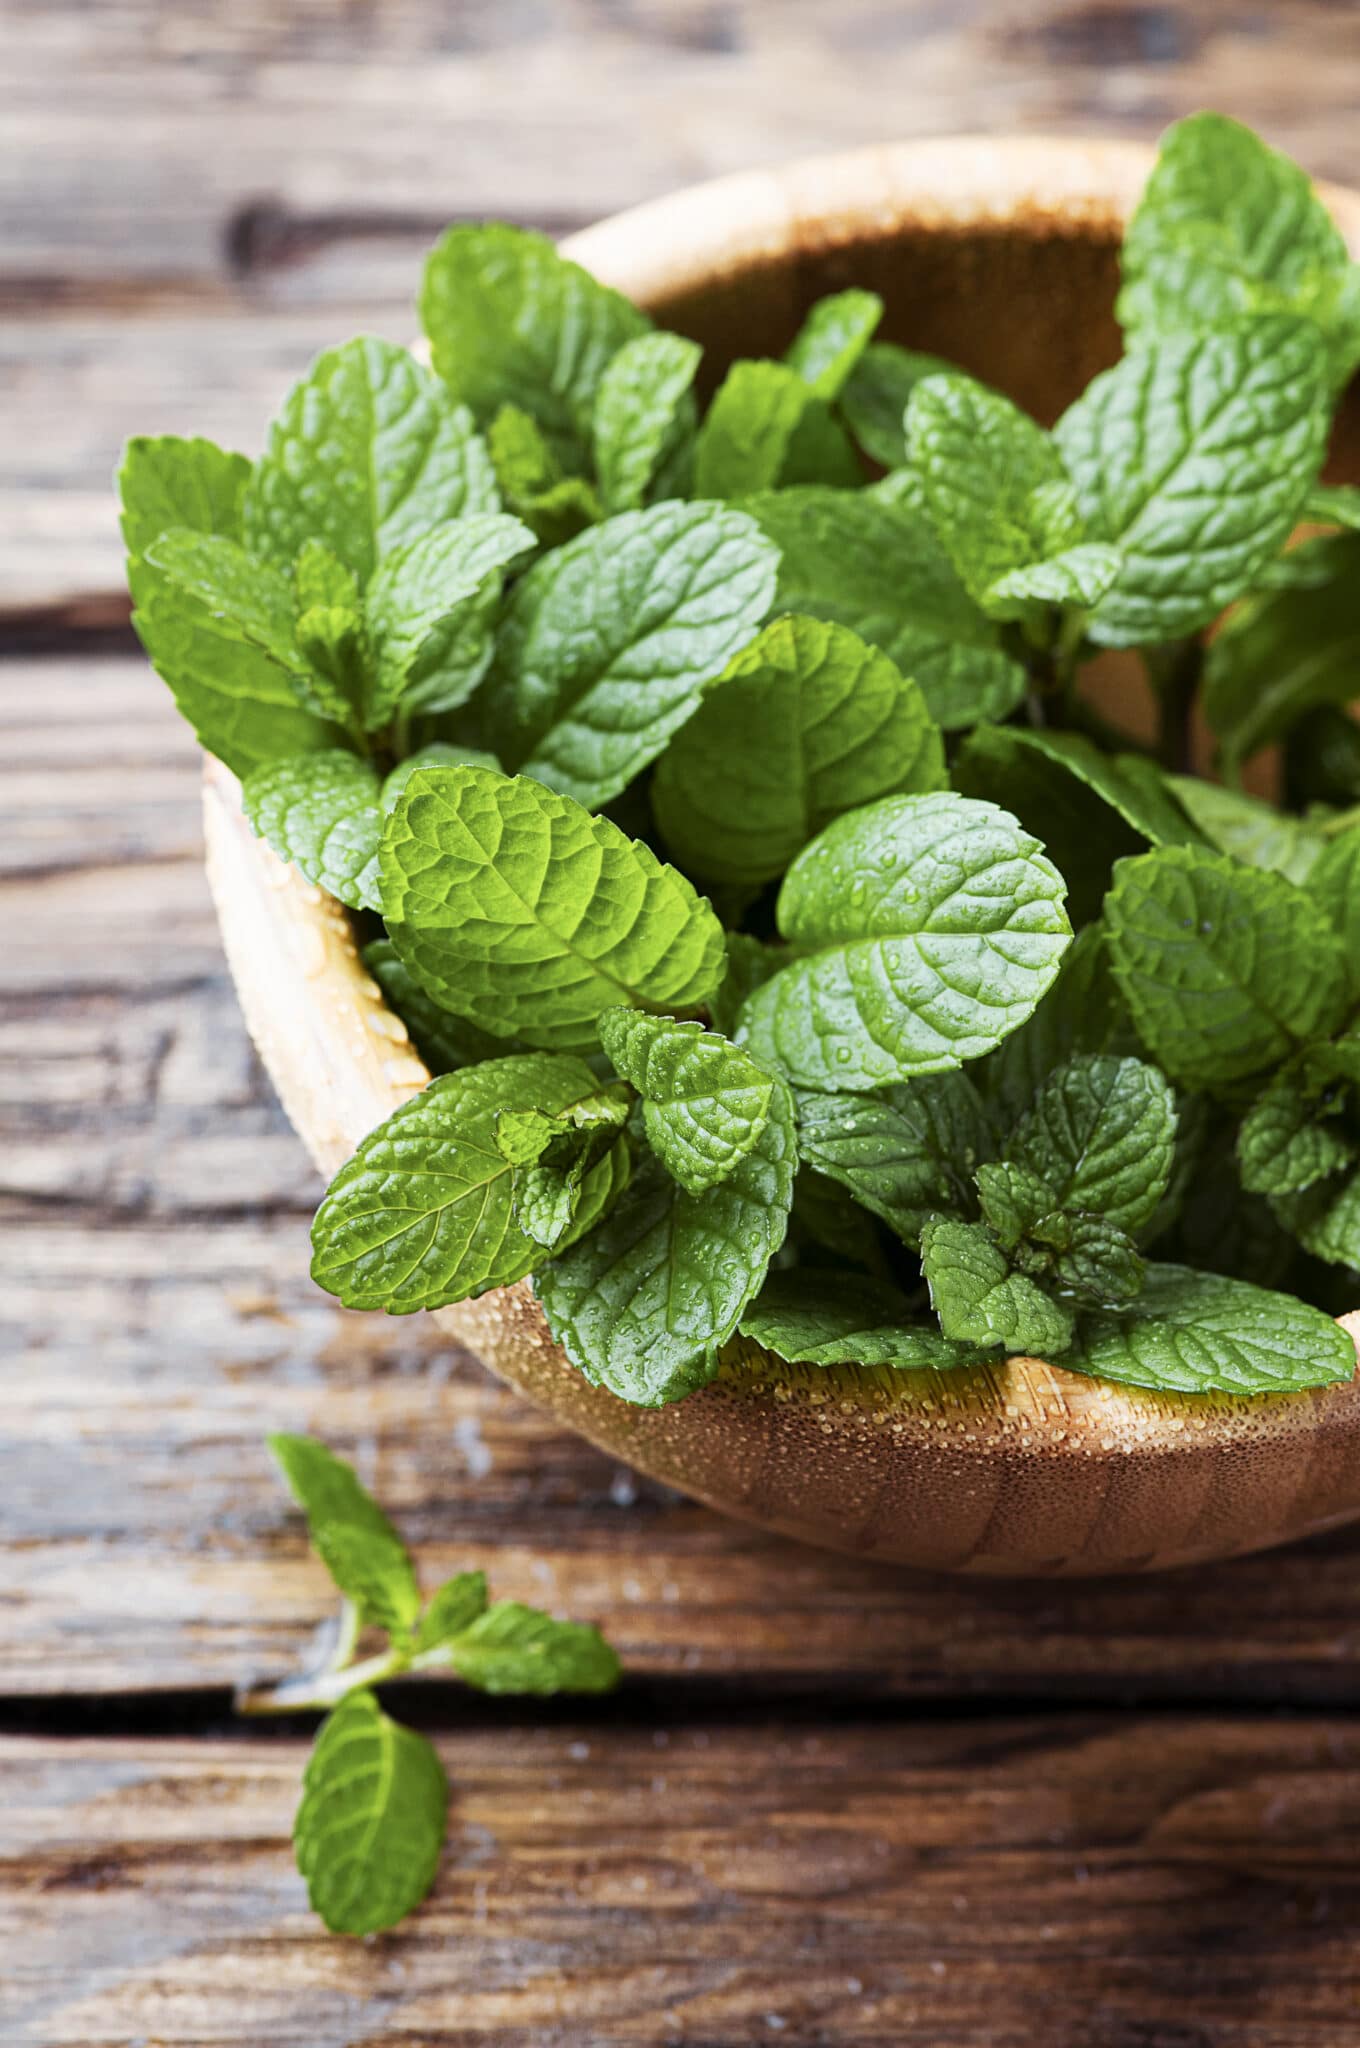
Mint

Mint can be invasive and will tend to take over your garden. So before you consider planting mint as a perennial herb, be sure to contain it in its garden bed or pots sunk into the ground.

Mint will grow best in fertile, well-watered soil in full sun.

Mint can be used dried or fresh; for maximum flavor, you should harvest it regularly during the summer months when it’s at its peak of growth.

Did you know there are different flavors of mint? Chocolate, lemon, spearmint are just a few!

Perennial in zones 2-9

Green fresh mint om the wooden table, selective focus.

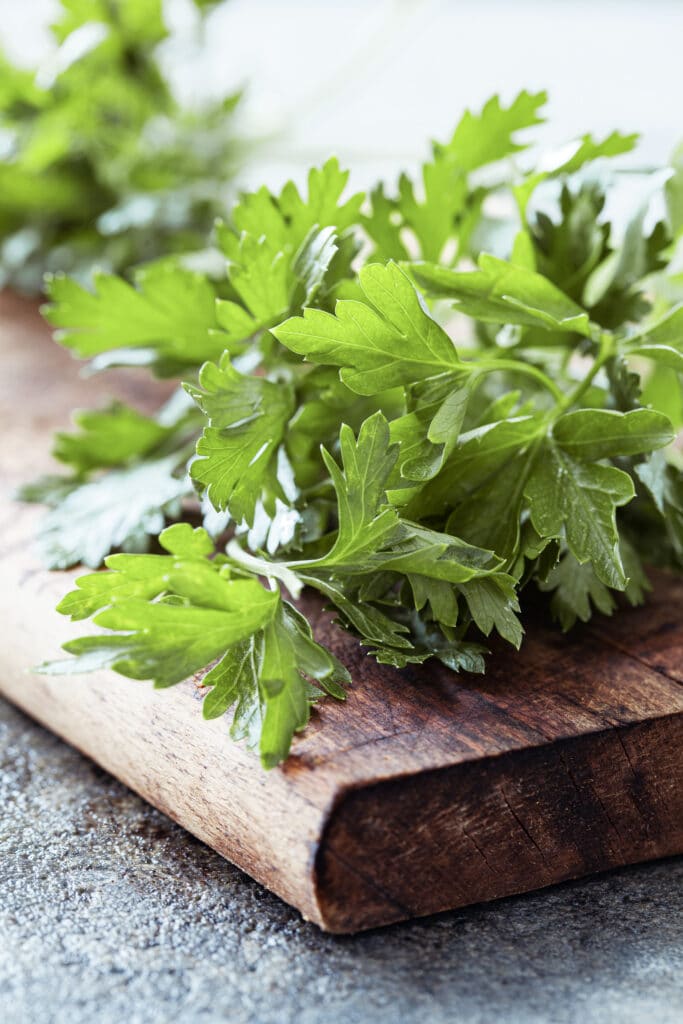
Parsley

Parsley is the perfect perennial garden companion. It is not technically a perennial, it’s a biennial, but it will set seed and continue to grow year after year. You may need to replant parsley as an annual in spring in future years, but if allowed to set seed in the garden, it should continue producing.

Parsley grows best in damp soil and full sun. Parsley is best harvested young, while the leaves are tender; you can use both fresh and dried for maximum flavor.

The best time to harvest parsley is when it’s whole-rooted, which means leaving at least a couple of inches attached to the root ball and harvesting before it bolts or goes to seed. If using in salads, you should remove only leaves from the bottom of the stem that is still.

Post Recommendation: Different Types of Parsley and How to Use Them

Perennial in Zones 0-11

Freshly cut parsley on a rustic wooden board.

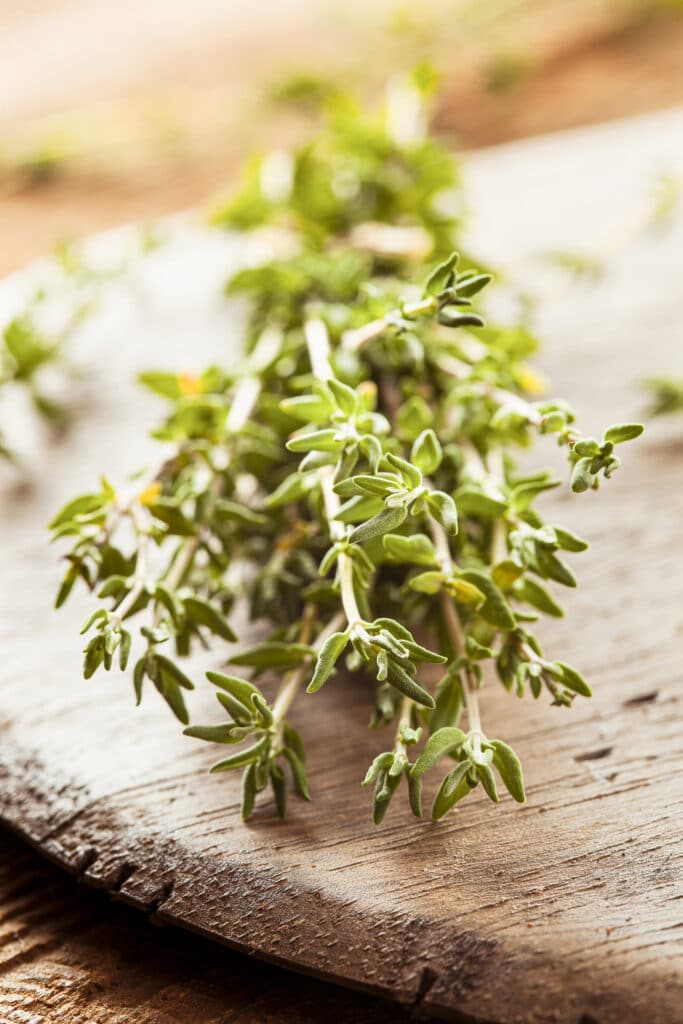
Thyme

Thyme is also a great companion plant in the garden. This herb prefers well-draining soil and can tolerate some drought, making it an ideal choice for hot climates.

It tastes like a mix of mint and lemon, making it a great all-purpose herb. It’s best fresh or dried but can also be preserved by freezing the leaves in olive oil (which is what I do).

Thyme leaves should be harvested before they bloom or flower by simply cutting them off at the base with a sharp knife.

Perennial in Zones 0-11

Raw Organic Green Thyme in a Bunch on a rustic wooden background.

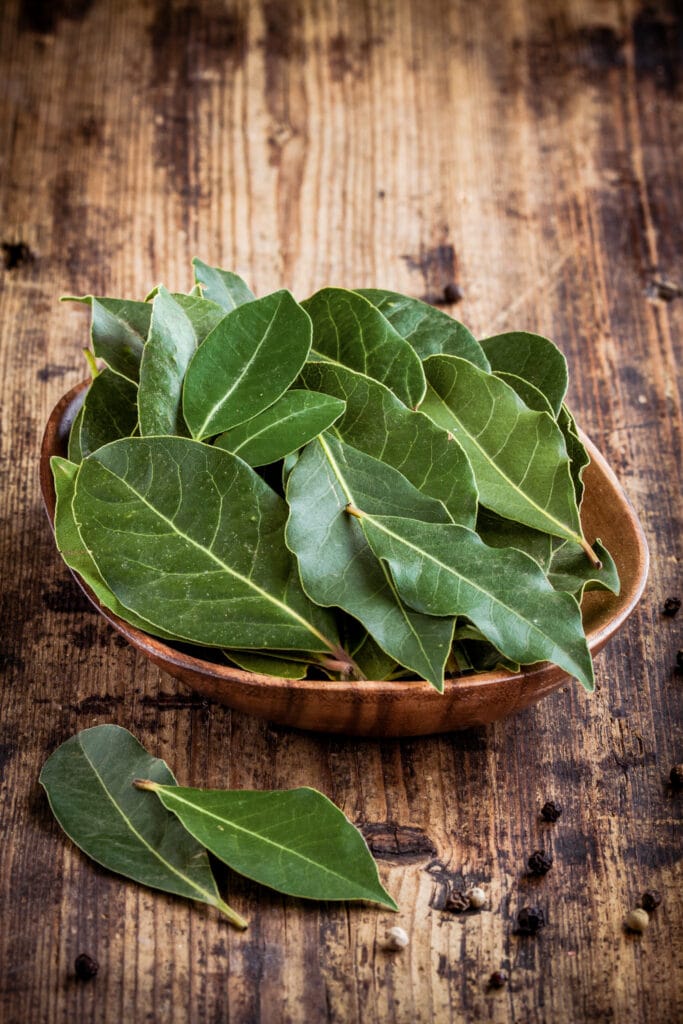
Bay

Bay plants are perennial in zones 0-11 and can tolerate drought, salty soil, alkaline soil (pH > pH) up to a certain point.

The Bay plants are grown from two types: sweet bay and spicy bay; both have culinary uses, but some people use them interchangeably without any distinction.

To harvest bay leaves, cut them off the plant as they grow.

While You can keep bay in a pot for many years, it is best to set out plants with suitable root structures every couple of years and give them room to spread their branches.

Perennial in Zones 0-11

Fresh perennial herb bay leaves in a wooden bowl on a rustic wooden background

Chives

Chives grow exceptionally well in most zones and prefer to be planted in full sun.

They can grow from seeds or root divisions, but the easiest way is by setting out plants with good bulbs every couple of years.

To harvest chives, cut them off above ground before they flower and when it rains.

Chive plants will die back in harsh winters, but they will emerge back in the spring.

Perennial in Zones 2-11

A bunch of freshly cut chives on a rustic wooden background.

Lavender

I adore lavender, and although it’s an unusual culinary herb, it is delicious in drinks, cookies, and baked goods. In addition, lavender is one of the most fragrant spices available, and I highly recommend trying it in your garden. Finally, as a herb, it has so many uses!

Lavender prefers to be planted in full sun but can grow in light shade with minimal water.

Lavender plants are best grown from transplants, cuttings, or root divisions and should be harvested when flowers are just beginning to bloom for the most aromatic oils.

Perennial in Zones 2-11

Recommended Post: How To Dry Lavender

Aromatic lavender on old wooden table.

Lovage

Lovage is a hardy perennial herb native to Eastern Europe and other parts of Western Asia.

It has a celery-like taste with anise, peppermint, and parsley hints.

It likes moist soil in full sun or partial shade.

The leaves are harvested by cutting them off when they are about 18 inches long.

You can add lovage leaves to soups, stews, and other dishes as a flavor enhancer.

Perennial in Zones 4-11

A bowl of freshly chopped lovage in a white bowl.

Roman Chamomile

Chamomile grows well in many different soils and likes full sun to partial shade.

Roman chamomile is often used in teas or as a garnish for dishes like a chicken pot pie with mushrooms.

Chamomile can also be grown indoors year-round by planting the seeds around February of each year.

To harvest chamomile, cut the leaves about 18 inches long.

Perennial in Zones 4-9

Herbal tea with chamomile in glass cup on wooden table, top view.

Hopefully, this article has given you a few ideas for incorporating perennials into your garden. If any other herbs pique your interest, please let us know in the comments! And don’t forget to check out our other gardening posts on plants and flowers so you can get some more inspiration when it comes time to plan next year’s herb garden. Happy planting!

Interested In Growing Other Fresh Herbs? 

The Best Herbs for An Indoor Window Sill Garden

My Herb Planting Trick For Growing Huge PlantsWise gardeners know that herbs make excellent companion plants. And any gardener who enjoys cooking will surely have culinary herbs among their vegetables each year. But many folks don’t realize …

8 Easiest Herbs To Grow Outdoors Or In ContainersWhen cooking dinner, do you ever wish to pluck a few fresh leaves from the nearest pot of aromatic greens to spice up whatever dish you are creating? If so, 

6 Reasons to Grow Marshmallow In Your YardLet’s get your burning question out of the way. No, I’m sorry, but marshmallow plants do not grow marshmallows. However, should you plant marshmallow in your yard, you can harvest...

From Supermarket Seedling To A 6ft Basil Bush – A Basil Growing Genius Reveals His SecretsOh, my friends, I hope you like basil. Like, really like basil because we’re going to share the secret to growing potted basil taller than you are. In the end, …

How to Prune Sage for Big, Bushy Plants – A Quick GuideGrowing herbs can be a rewarding experience in the garden and the kitchen. If you’re used to dried herbs from the supermarket, you may be surprised the first time you... 

The Easiest DIY Herb & Flower Drying Screen Anyone Can MakeWhile there are entire books dedicated to drying herbs at home, you’ll find all you need to know right here. At the same time, we’ll also walk you through a …

How to Grow Massive Sage Plants From Seed or CuttingsSage has always been a popular herb in the kitchen. Its unmistakable scent signals there is delicious stuffing or sausage cooking somewhere. But this beautiful silvery-green plant often leaves gardeners …

6 Common Basil Growing Problems & How To Fix ThemBasil is an annual herb well known for the role it plays in the Italian dish pesto and for use in the cuisines of countries like Thailand, Indonesia and Vietnam. …

Kratky Method: The “Set It & Forget It” Way To Grow Herbs In WaterHydroponics often bring to mind complex setups in someone’s basement with fancy grow lights and rows of unnaturally perfect lettuce peeking up out of plastic tubes. A quick look on …

11 Brilliant Ways to Use Chamomile FlowersChamomile happens to be one of the oldest medicinal herbs known to man, referenced on ancient Egyptian papyrus as far back as 1550 BC, according to Traditional Roots, and yet …

How To Grow & Harvest Chamomile – A Deceptively Hardworking HerbWhen it comes to herbs, most of us immediately think of thyme, rosemary or parsley. But when asked about herbal tea, generally, the first one to come to mind is …

4 Reasons to Grow Dill & How to Do ItDill (Anethum graveolens) is an annual herb with an unmistakable flavor and aroma. The complex scent is a mash-up of other members of the Apiaceae family – a bit of …

14 Lesser-Known Herbs That Deserve A Spot In Your Herb GardenYou know the most commonly grown herbs by name, sight and scent: rosemary, mint, oregano, thyme, parsley, basil and chives. But, can you recognize at least 10 more, lesser-known herbs …

9 Herb Seeds To Sow in January & February + 7 Not to Start at AllAround the middle of the winter, many a gardener starts to get “the itch”. It usually starts when we open our mailbox and find that first seed catalog. Right there …

11 Herbs You Can Grow Indoors All Year RoundDo you ever have the urge to reach across the kitchen counter and pluck a few fresh leaves of basil for your pasta, like in one of those cooking shows? 

How To Grow & Harvest Lemon Balm: The Total GuideOnce dubbed the “elixir of life”, lemon balm (Melissa officinalis) is an ancient herb from the mint family that has been used as a medicine, and as a flavoring for …

How to Grow Enormous Basil Plants: From Seed, Cuttings Or Starter PlantBasil is sometimes referred to as “the king of herbs”. And no wonder. Basil is easy to care for and will quickly grow into big, bushy plants that abound in …

How to Grow Thyme From Seed, Cuttings Or Starter PlantThe aroma of thyme is pleasant and complex – peppery and a little sweet with woody, earthy, minty and flowery notes. Flavor-wise, it lands somewhere between lavender and rosemary. For …

12 Genius Uses for Chives & Chive BlossomsChives are not necessarily the most popular herbs to grow in the garden, but they certainly should be. They look fantastic, whether in a herb patch or as a stunning …

14 Innovative Ways To Use Sage LeavesSage is a favorite herb among gardeners, home DIYers, and home cooks alike. Not only is it an incredibly easy herb to grow, thriving in the worst of conditions, but …

21 Brilliant Uses For Rosemary You’ve Got To TryExuding that telltale sweet piny fragrance, rosemary is an easy plant to grow that demands very little from the home gardener. And because a single plant can grow at least …

12 Common Container Garden Mistakes You Might Be MakingContainer gardening can be a rewarding pursuit that can really help you make the most of all the space you have available. A container garden can be indoors, under cover …

How to Grow Massive Bunches of Parsley From Seed Or Starter PlantWidely cultivated as an herb, spice, and vegetable, parsley (Petroselinum crispum) is so much more than a decorative garnish. Native to the Mediterranean region, its name is derived from Greek …

How To Grow Rosemary From Seed Or Cuttings – Everything You Need To KnowNative to the Mediterranean, rosemary (Rosmarinus officinalis) is a woody perennial herb in the mint family. The plant’s genus, ros marinus, is derived from Latin and means “dew of the …

12 Easy & Inexpensive Space-Saving Herb Garden IdeasEveryone has the space to grow at least a few herbs at home. Whether you grow them for culinary, medicinal or other uses, herbs can be valuable plants to grow. …

How to Keep Fresh Supermarket Herbs Alive ForeverThere’s nothing better than fresh herbs to flavor your food, and when the supermarket sells them in cute little pots, they’re pretty irresistible, especially for those of us who love …

How to Stop Your Herbs & Vegetables from BoltingAlthough the gardener grows plants as a source of food and beauty, it’s easy to forget that the plant’s sole purpose in life is to reproduce. Bolting – or going …

15 Herbs to Propagate From Cuttings & How To Do ItIt’s incredible how many plants there are in the average garden that you can grow again next season for free. Many gardeners take this fact for granted and purchase seed …

37 Edible Plants You Can Easily Grow In a Hanging BasketHanging baskets don’t just have to look good. They can also produce food for you and your family. By choosing edibles to grow in hanging baskets, you can create something …

How To Grow & Use Lovage: The Forgotten Herb That Everyone Should GrowLovage (Levisticum officinale) is a hardy perennial herb native to the Mediterranean. As part of the Apiacaea family, it is closely related to carrot, celery, and parsley. This culinary...

12 Herbs That Happily Grow in the ShadeHerbs are savory and aromatic plants, grown for flavoring, fragrance, and medicine. About as easygoing as can be, most herbs will thrive with very little intervention from the gardener. They …

7 Reasons Every Gardener Should Grow ComfreyOnce you start growing a garden, you will keep finding more reasons to add more and more diverse plants. That’s just the way it works. You get excited by growing …

Top 10 Cooking Herbs To Grow In Your Culinary Herb GardenIn my mind, it’s simple – if you enjoy cooking, you should have a culinary herb garden. The plants beautify your home, the flavor and scent of fresh herbs are …

15 Exciting Basil Varieties To Grow In Your Herb GardenA mainstay in herbal gardens the world over, basil (Ocimum basilicum) is an intensely fragrant culinary herb in the mint family. Basil is a sun loving plant, native to the …

How To Propagate Mint (& Other Herbs) By Root DivisionMint is a reliable perennial herb that needs little attention in the garden. That’s in part what makes it such a wonderful plant to grow. It is one of those …

10 Reasons To Grow Lemongrass No Matter Where You LiveLemongrass is a key ingredient in plenty of Asian cuisines and as you will discover as you read on, it is also useful in a wide range of other ways. …

8 Brilliant Uses For Oregano + How To Grow & Dry ItAm I the only one that grows herbs and then thinks, “Okay…now what the heck do I do with these?” I mean, for some herbs, it’s obvious. Mint you make …

10 Reasons To Grow Hyssop In Your GardenOne of the most pleasurable jobs in any garden is choosing which plants to grow. It can be great fun to seek out new options and explore all the different …

10 Uses for Thyme – Go Beyond Sprinkling It On Your ChickenOne of my favorite scents of summer is thyme. I love the way it smells when the plant has been baking in the sun for hours, and you brush your …

18 Plants To Grow In Your Herbal Tea Garden – Blend Your Own Teas For Pleasure & ProfitI drink herbal tea nearly every day, often multiple times throughout the day. I love the variety of flavor combinations available. There is an herbal tea for every mood or …

18 Self-Seeding Plants You’ll Never Have To Plant AgainThe key to a low maintenance and low cost garden is to grow a variety of plants that readily self-seed. While most of the typical garden cultivars would require you …

12 Reasons To Grow Sage In Your GardenSage is a wonderful plant to choose to grow in your garden. It can thrive in a wide range of different settings, and bring many benefits. It will be beneficial …

16 Reasons To Grow Mint – Without Fear Of It Taking Over Your GardenMint is aromatic and pleasantly intoxicating, with cooling/soothing menthol flavors which have both culinary and medicinal properties. Plus, it is a perennial herb that is easy to grow. Yet, it …

10 Reasons To Grow Chives In Your GardenChives are one of those herbs that is incredibly useful, both in the garden and in the kitchen. If you do not already have some space for them on …

25 Shade Loving Perennials To Brighten Up Shady SpotsShade loving plants are adapted to very little sunlight because of their place in the forest understory. Since the canopies of larger trees and shrubs block as much as 95% …

20 Uses For Lemon Balm In The Kitchen & BeyondLemon balm is an easy and versatile plant to grow that will provide an abundant harvest throughout the growing season. It’s also a perennial herb so will return year after …

35 Perennial Herbs To Plant Once & Enjoy For YearsHerb gardening is a fantastic gateway into gardening for those who are new to growing their own. There are many herbs you can easily grow even if you don’t have …

7 Essential Medicinal Plants to Grow and How To Use ThemThe use of plants for healing is as old as humankind. Analysis of plants found in the 60,000 year old grave of a Neanderthal man were determined to be of …

10 Reasons To Grow Calendula and 15 Calendula RecipesCalendula (Calendula officinalis), also known as Pot Marigold, is a great plant for many gardens. Whether you are an experienced gardener, or a true beginner, calendula are easy to grow. …

How to Grow Mint Plants IndoorsMint (Mentha spp.) is an aromatic, perennial herb of the Lamiaceae family. A vigorous grower and spreader, mint has enjoyed a long history of use in cuisine, traditional medicine, and …

3 Common Garden Weeds To Harvest & EnjoyThe heat and humidity of summer makes many things grow bushy and tall. If you have a garden, you’ll find that this also applies to the abundance of greens you …

How to Dry Fresh Herbs at Home – Two Ways!Drying fresh herbs at home has many benefits, and it’s so easy there’s really no reason not to! Drying your own herbs is certainly more cost effective than buying them …

How to Prune Basil for Big, Bushy Basil Plants (With Photos)Would you like your basil plant to look like this? A lot of your basil growing success is in the pruning. In this article we’ll reveal how to correctly harvest …

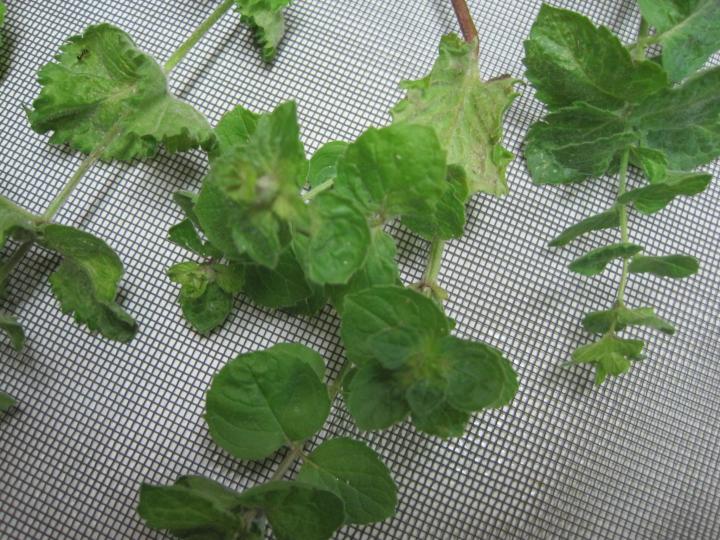
Grab the bounty of fresh herbs while you can—and let's dry those leaves for tea. It's simple. See both how to dry your herbs and also how to make a good cup of herbal tea!

Grow Your Own Herbs for Tea

If you grew some of the plants mentioned in this Calming Herbs post, hopefully you have been enjoying them in iced and hot teas this summer. Even though fall is on the horizon, the party doesn't have to end!

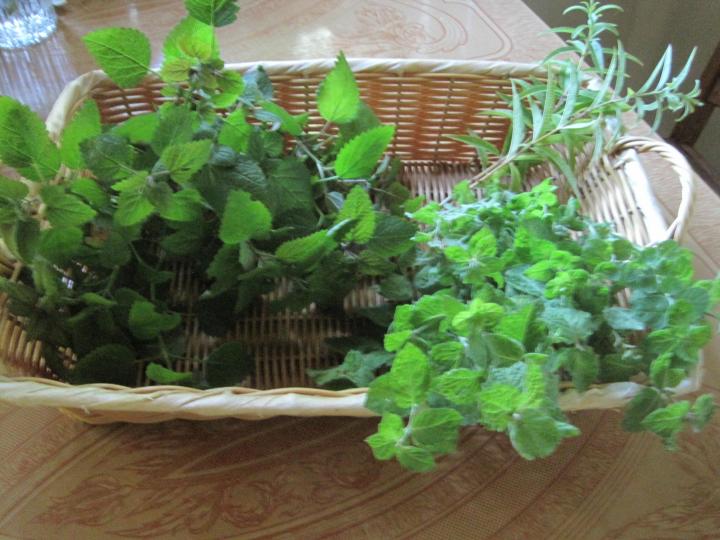
Chamomile, lemon verbena, lemon balm, and any of the mints—peppermint, orange mint, and spearmint—are all ideal for tea. 

Read Next

tea_001_full_width.jpg

Image: Lemon balm ready to cut.

How to Dry Herbs

Before your plants are killed by frost, get a couple last harvests in and dry your remaining leaves to use over the winter.

Ideally, you should harvest before the plants flower for the best flavor—but this is last call!

  1. Harvest the leaves in the morning after the dew has dried. (When the growing season has ended, you can cut the plants right back to the ground if you wish.) 

  2. Carefully brush off any dirt. Don’t wash the leaves off with water, as they may mold instead of drying.

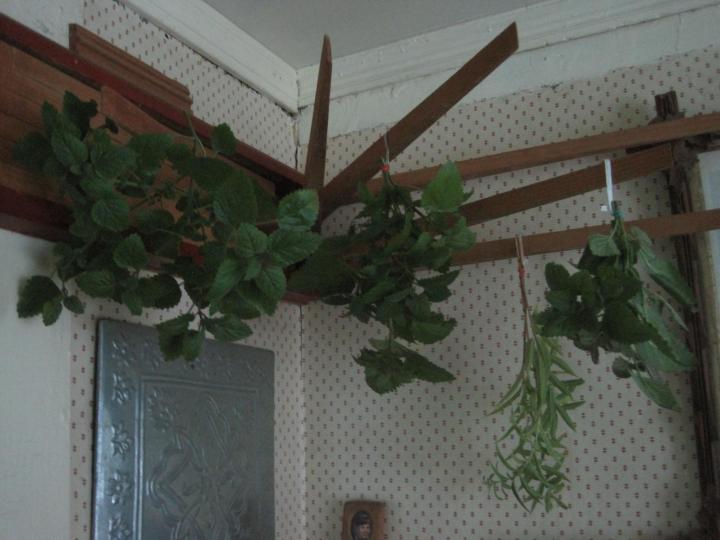
  3. Proper drying will preserve the leaves and concentrate the flavors. Make small bunches and hang them upside down in a warm dry place out of direct sunlight.

tea_007_full_width.jpg

Image: Just a few of the last bunches harvested before frost.

Or, you could spread the plants out on a clean screen (or paper towels laid over a wire rack) in a cool, dry spot. If you are having trouble drying in humid weather, you could resort to the oven, but that isn't optimal for tea.

→ Learn more about how to dry and freeze herbs.

tea_006_full_width.jpg

Image: Drying on a screen gives good airflow and can be faster than drying in bunches.

It can take up to a week or more for them to dry depending on the humidity in the air. Temperatures that are too hot—over 85 to 90°F—will cause volatile oils to evaporate. When the leaves are fully dried, strip them from the stems and store in an airtight glass jar kept in a dark, cool place.

Put the kettle on and brew up a cup!

tea_008_full_width.jpg

How to Make Herbal Tea

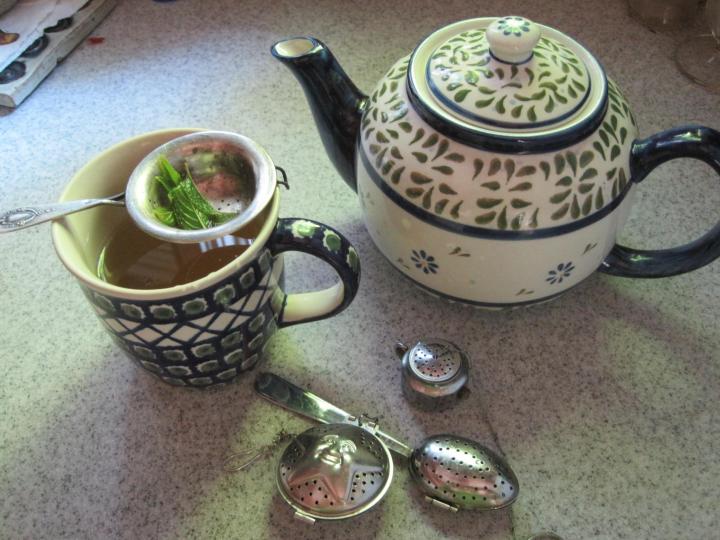
Bring the water just to a boil, add anywhere from 1 teaspoon to 1 tablespoon of dried herbs per cup of water to your teapot, and then let steep for 3-5 minutes, depending on how strong you like your tea. Since herb teas are naturally light in color, test by taste rather than by sight. Keep in mind that overbrewed tea can be bitter.

You can use a teaball to keep leaves from clogging the teapot's spout or use an infuser to brew just a single cup. Many tea aficionados don't like to use the metal strainers, claiming they give the tea a metallic taste and don't allow the herbs to fully swell and release their flavors. I have a friend who uses her French press to make tea. 

A dry summer helps to concentrate the flavors, making for some tasty teas. The chocolate mint was extremely strong and aromatic and the holy basil especially sweet and fruity this year. It grew so prolifically I couldn't keep up! The bees appreciated the blossoms though and the bubblegum aroma wafted over the garden on hot days.

tea_003_full_width.jpg

A combination of lemon balm, lemon verbena, and spearmint make a refreshing tea, served hot or cold.

Tired of tea made from a single herb? Try these delicious combinations or experiment and make up some of your own. If you like your tea sweet, add a dried stevia leaf to each cup.

  • Relaxing and Refreshing: 2 parts lemon balm to 1 part spearmint. This is my favorite combo.

  • Citrus Spice: equal parts lemon basil, bee balm flowers, and orange mint.

  • Luscious Licorice: equal parts anise hyssop, sweet cicely, and fennel leaves.

  • Victorian Tea Garden: equal parts pineapple sage, chamomile flowers, and lemon balm.

  • Mediterranean Blend: equal parts summer savory, marjoram, and rosemary. Better than bouillon!

  • Calming Stress Reliever: 3 parts chamomile flowers, 2 parts lemon balm, and 1 part holy basil.

Enjoy a reminder of the garden this winter over a cup of homegrown herb tea.

Related Tea Content

SUPERSCRIPT

CreatingPopular Wildlife Habitats For Outdoor Family Time

Eco-spaces in your yard add so much interesting flavor and personality to any yard and I don't understand why it isn't more popular. Our 'Brunch and Babes Play Group" pretty much inspired all of us to go alittle bit crazy and over the top in our ecospaces for family fun.  Eco-space just made sense to our whole yuppie dynamic for hosting our playgroups. 

Our family eco-spaces always allowed our kids to observe and explore nature in real time. As your children grow they can learn how to interact with nature as well as how that interaction effects the inhabitants and the eco-space itself. Not to mention the fact that they can become little botanist in the process.

Creating their eco-lab space became a delightful part of my day because it also became a creative outlet for myself and it became fabulous oasis for family recreation and celebrations and a sanctuary for the foster children that passed through our home. 

15 Exciting wildlife garden activities

Lesson Plans

LESSON 1 | Building our Compost Bin

LESSON 2 | Composting with Toddlers {Filling our Bin}

LESSON 3 | Creating Garden Rules with Toddlers

LESSON 4 | Teaching Toddlers How Things Grow | Planting our Garden


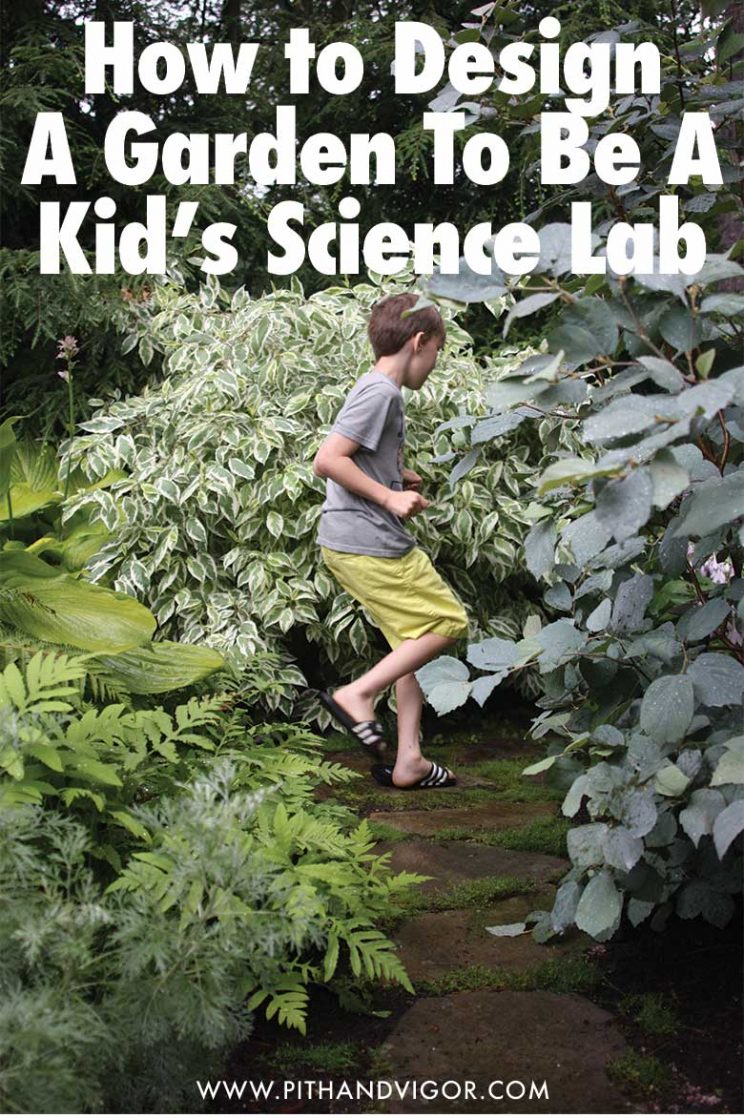
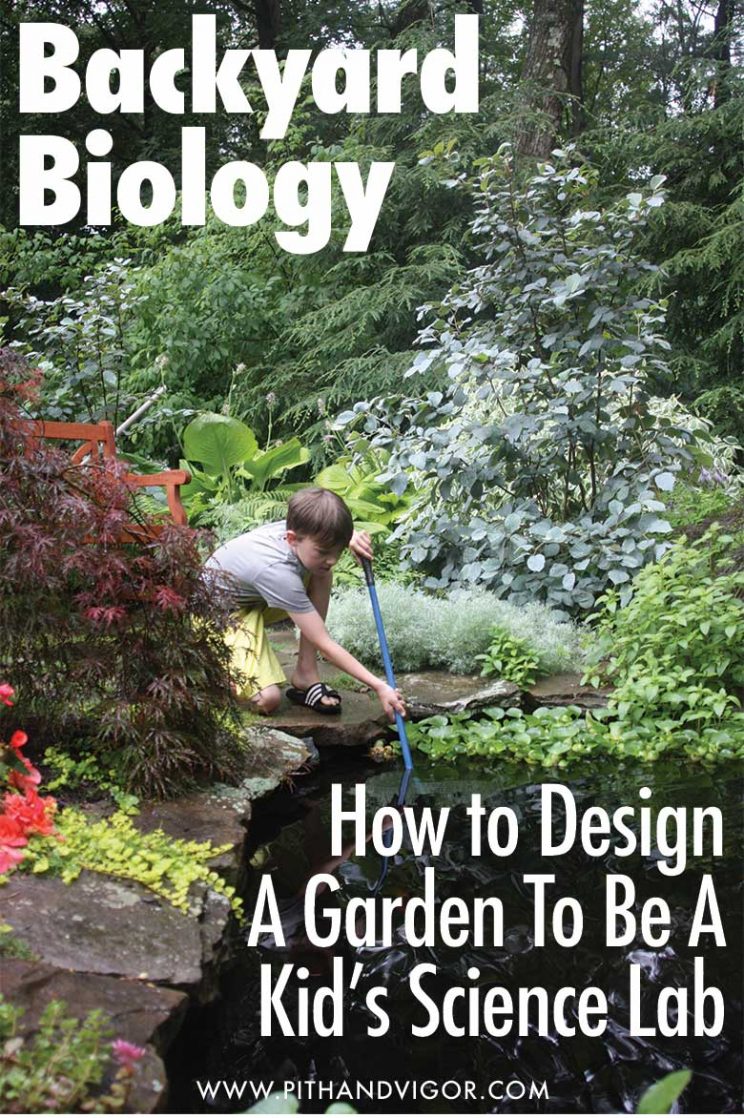
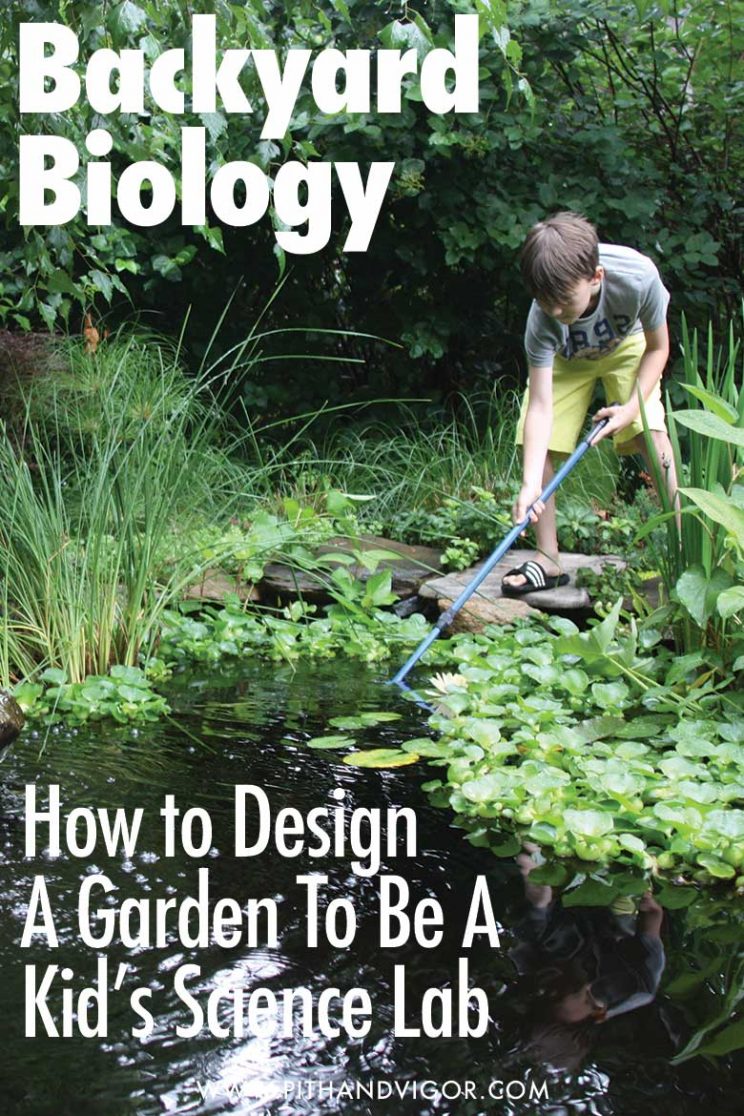
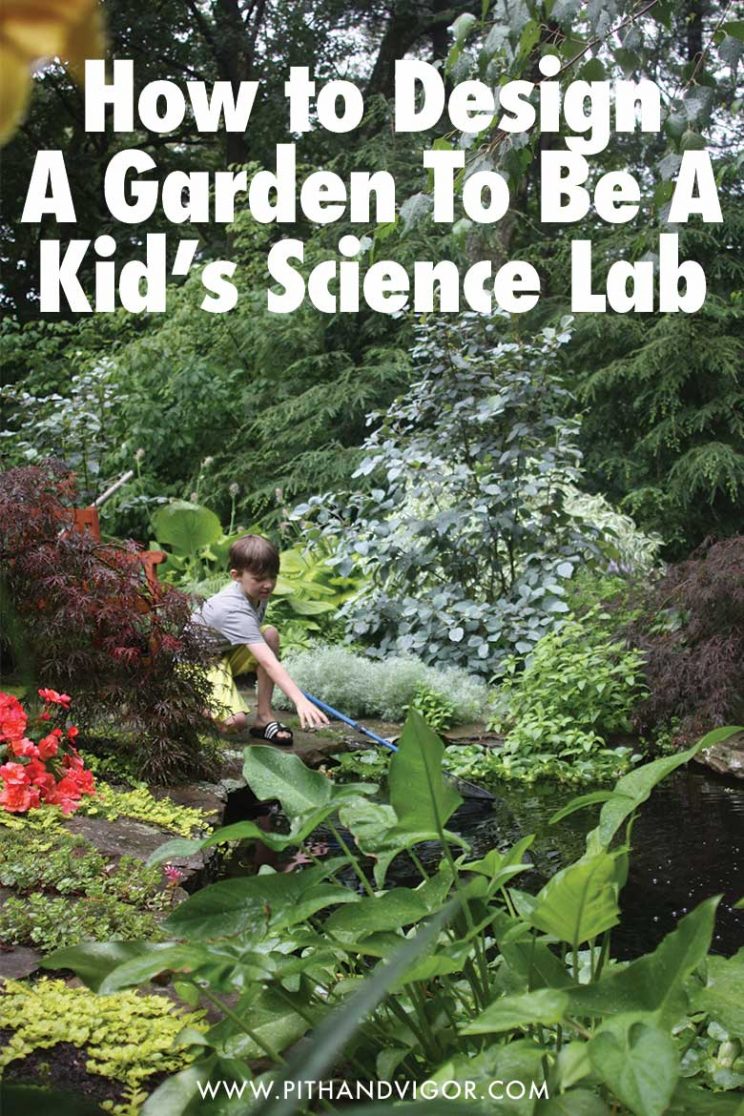
Backyard Biology – How to Design A Garden For a Fun Science Lab

ALLURING FAMILY GARDENS-- As a huge botany and wildlife observation area for our older children

grass isn't the only area in the garden where kids can run

We need kids that can tackle the environmental and health problems of the world around us. There is no better way foster their natural enthusiasm than to create a science filled backyard that draws them outside.

I’m not talking about a patch of grass with some bushes around the edges (boring). Rather, a place that starts to teach and inspire them towards the art and science of caring for our environment. Yes, they need a place to burn energy. But they also need a place to feed their curiousity and minds and with a little thought, the battle over screen time can become easier. An inspiring and enticing backyard garden doesn’t just make you happy and increase your property value. It is place where people (especially the littles) are encouraged to explore and learn about nature, biology and natural wisdom in general.

HOW CAN WE MOTIVATE KIDS TO ENGAGE WITH THEIR ENVIRONMENT?

One answer can be found at the home of two Massachusetts scientists. These parents have been experimenting with a living laboratory in their small, suburban backyard. The couple have a strong background in molecular biology, and have designed a space that functions as a small, relatively self-sustaining ecosystem. They use it as an al fresco classroom – a garden science lab and a place for backyard science-  for their three children.

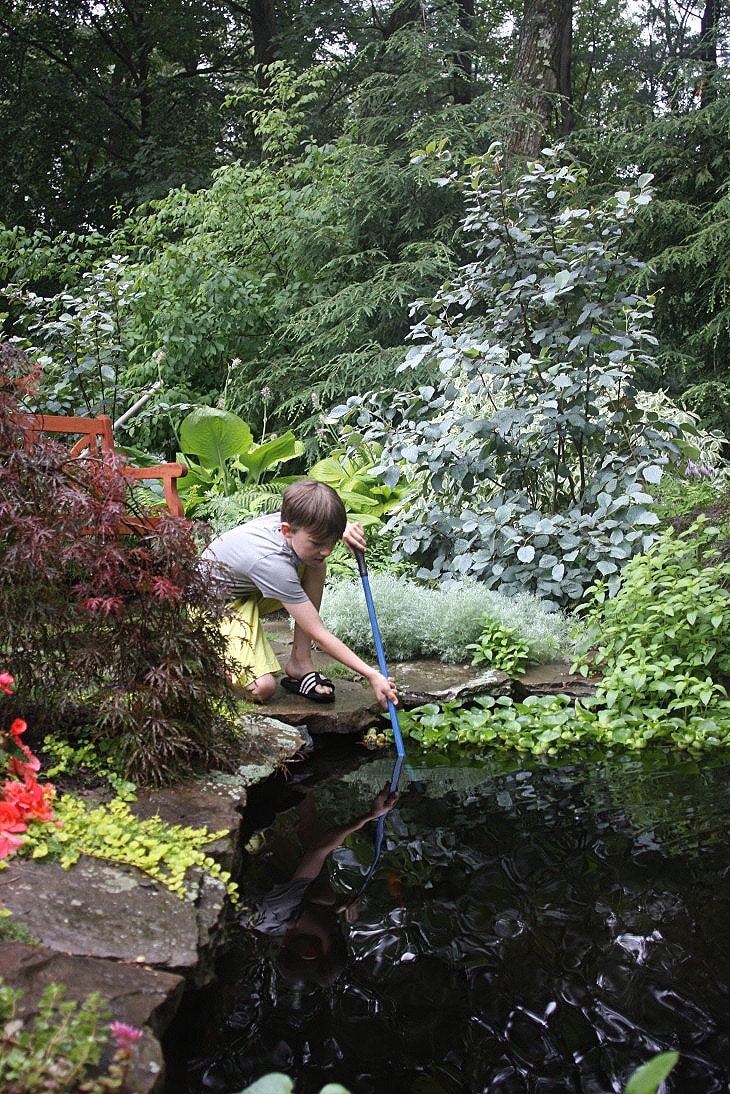
koi pond play area

HOW TO DESIGN A BACKYARD SCIENCE LAB

The garden, was designed to invite wildlife and the encroaching woodlands into the backyard, encouraging a seamless flow between nature and the suburban household. Many of the plant species are native to the area, requiring minimal maintenance. The garden revolves around its small pond, complete with koi fish, frogs and a snake, while birds linger and nest in branches overhead. Tall evergreens line the yard, hiding the neighboring properties from sight and drawing the eye outward, over the garden and into the woods.

turning your garden into a lab for kids to learn everything from biology and math to marketing and economics

Tom Wilhelm from A Blade of Grass, the designer of the garden, took the traditional elements of a children’s garden, small benches, thick shrubbery, hidden places to explore, and imbued each with unique properties to enhance learning. Wilhelm explains:

“these moments can be as simple as including butterfly bush or fruit-bearing shrubs that attract birds, thereby allowing children to observe the mutualism between flora and fauna. They can also be somewhat more complex, such as encouraging children to collect and study the tadpoles in a pond, or the dragonfly eggs floating near the water’s surface.”TOM WILHELM – A BLADE OF GRASS

PROMOTE AN APPRECIATION FOR NATURE AND EMPATHY FOR THE CREATURES IT SHELTERS

As a alluring prompt for learning disguised as adventures the eco-space garden should promote an appreciation for nature and empathy for the creatures it shelters, as well as an understanding that everything is connected. The backyard biology of the garden, becomes a microcosm for the world’s environment as a whole.

Encourage children to embrace the outdoors and nurture it by making a garden a place not just to run. But also make it a place to hide, a place to climb and a place to learn, even where space is limited. (We can only hope they will carry this perspective with them into adulthood).

Backyard Biology - How to design a garden to be a Kid's science lab

SCIENCE IN THE BACKYARD – LESSON IDEAS

There are so many lessons that can be learned in and through a garden.  While most of the learning that takes place in outdoor gardens is experiential, educational gardens can serve as great ways to start conversations on a variety of topics.

IDEAS FOR GARDEN SCIENCE LAB LESSONS:

  1. Science: conservation, evolution, seasons, food (buying locally, pesticides, organic), symbiosis.

  2. Horticulture: tending particular plants (shade v. sunlight, varying soil types, water regulation), photosynthesis, plant identification.

  3. Literature: as simple as reading outdoors on a shaded bench, or as creative as designing a Victorian-themed garden and reading classics.

  4. Art: paint or draw the creatures, plants, and structures in the garden, design new paths/flower beds, create topiaries.

  5. Nature & Wildlife: Ecology, habitat maintenance, insects and pollinators.

  6. Business: Many garden products can be sold at local farmers markets. Give kids an opportunity to plan small businesses that go beyond the lemonade stand.

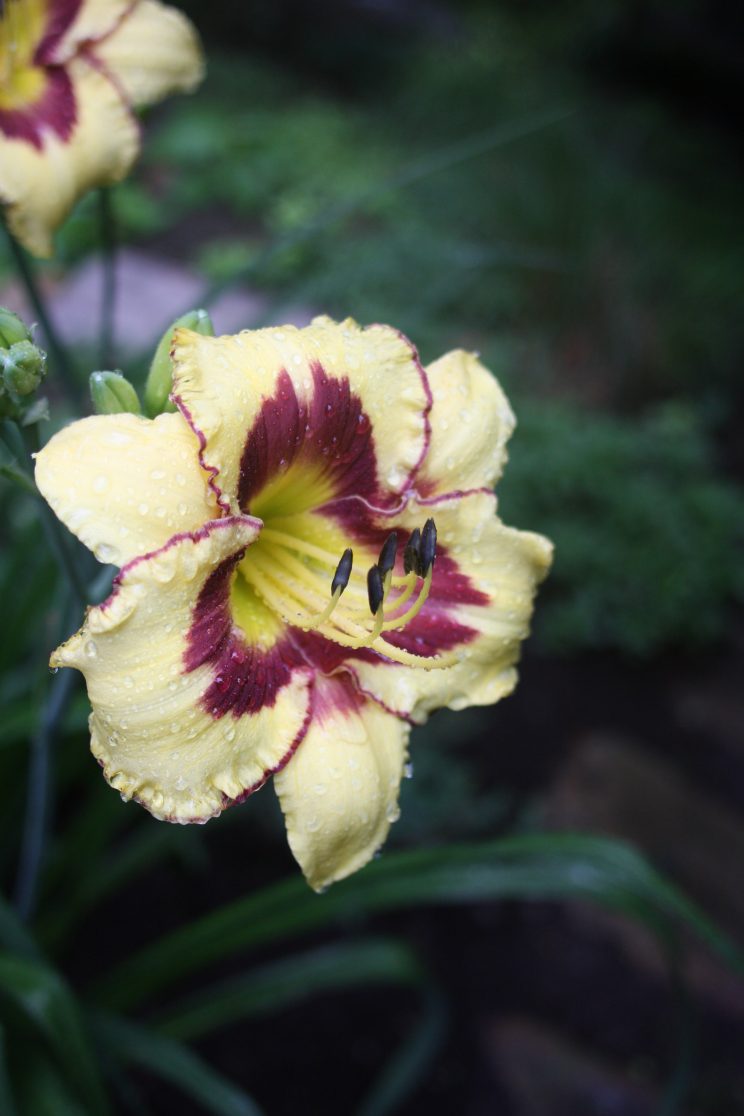
Daylily flowers are great for teaching garden science

Lilies (along with other common garden plants like tomatoes, morning glories, snapdragons, petunias and irises) are ‘perfect’ flowers – meaning that they have both stamens and pistils (the male and female parts of a flower. Perfect flowers are the most common type of flowers and are easy subjects for a wide variety of experiments in hybridization, pollination and genetics as well as investigations in flower structure and basic biology.

a koi pond is a great resource for backyard biology

TIPS FOR MAKING YOUR OWN BACKYARD GARDEN SCIENCE LAB:

  1. Sometimes the best learning is experiential. Gardens that include interactive elements (like a koi pond or a vegetable patch) encourage kids to learn through observation and take a personal interest in various plants or animals. Alternatively, taking a child to a nursery and asking them to pick a flower to grow and tend (ideally from a seed) gives them responsibility and fosters attachment. Herbs are good because they encourage touching, smelling, and tasting. If the plant is a vegetable, it can lead to conversations about where food comes from, buying locally, etc.

  2. Choose plants or features that will attract a variety of wildlife. Hang bird feeders with breed-specific feed (or plant a shrub with berries), and see how many varieties you can identify. Plant bright, tubular flowers for hummingbirds and butterflies.

  3. Do prior research. Know what you hope the garden will teach your children, or allow them to discover on their own. Decide whether you want largely native species, so kids can recognize them at home or away. Include features that suit your educational goals.

  4. Don’t assume you need a large space to make a big impact. This suburban garden in Newton, MA, is only several thousand square feet.

  5. Gardens are not static. They change over time in terms of structure and function, so don’t be afraid to tweak either. An educational garden can evolve into a place to read or reflect as children age.

By Alexandra Cronin

Backyard Biology - How to design a garden to be a Kid's science lab


Backyard Biology - How to design a garden to be a Kid's science lab

EDITOR’S NOTE:

As a testament to the design, these photos were easy. I wanted to photograph the garden with a kid. (and since I had one that lives with me…)

But he wasn’t enthusiastic about an afternoon posing in someone else’s garden. There were bribes involved. But in the end, I didn’t have to pay up.

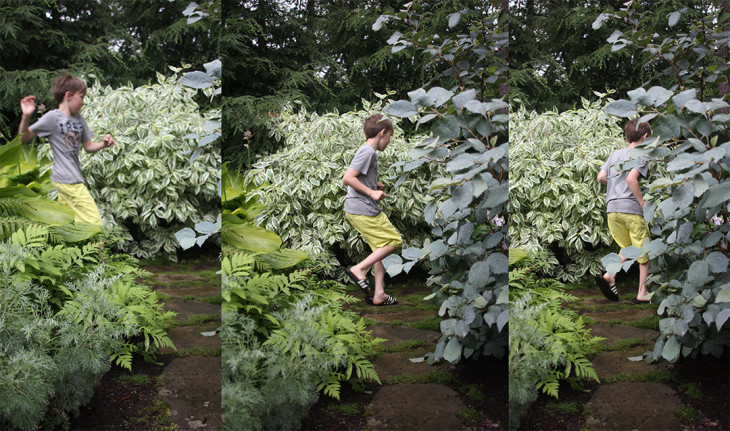
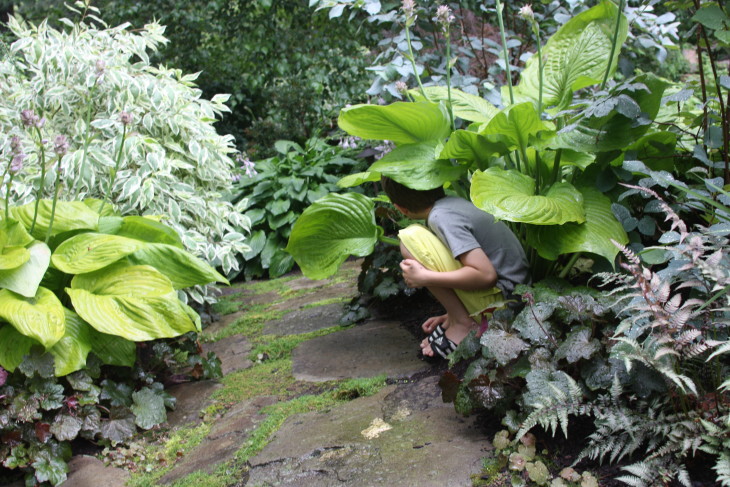
The koi pond distracted and entertained my son for as long as I needed (and then some). He was having so much fun in this garden science lab he forgot about not wanting to help. We both loved this place. Maybe because there were no distracting and garish plastic toys? Rather, there was mystery and surprise around every corner.

It also felt bigger than it was. The trails that curled around themselves and the obscured views create a greater sense of space. It is not only a small, relatively self-sustaining ecosystem, which the owners use as a beautiful al fresco classroom but a place that he and I both found to be encouraging of play and movement (more than any old patch of grass!) .

Eco-space plans below are to develop awareness and interest in wildlife across the planet makes this section so important to our planets future. We must be determined to mold our children to be great stewards of their own space as adults and leaders for global  awareness in wildlife issues in their day.1. Wetland habitat

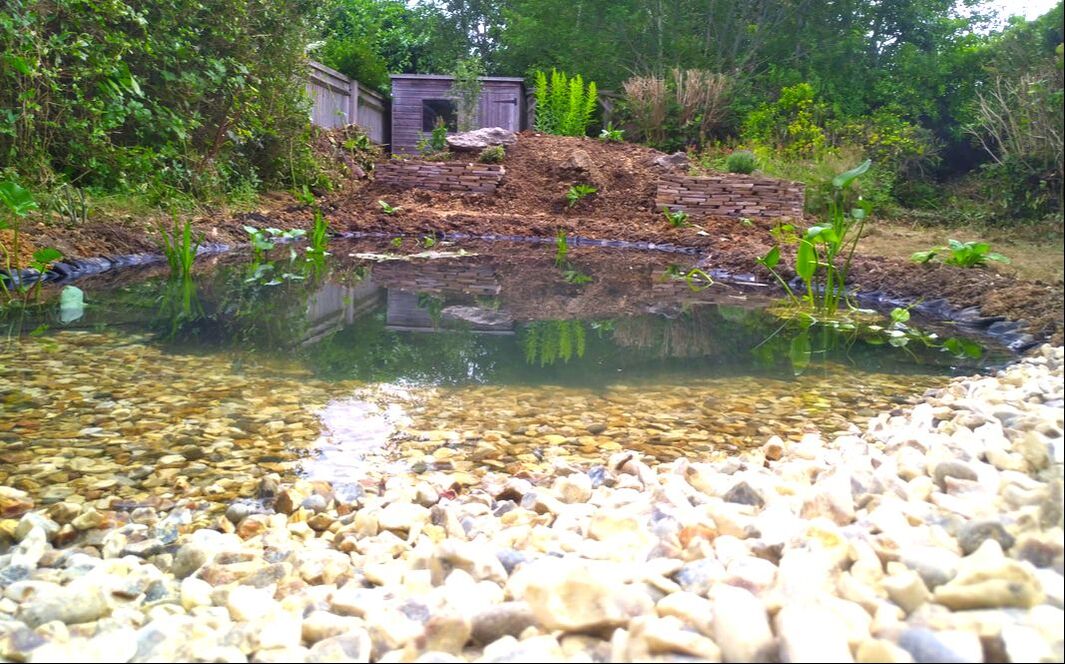
​Wetland habitats are some of the most crucial to wildlife garden species. This is because they serve aquatic creatures as well as air and land dwelling organisms.

Mammals and birds come to the water’s edge to drink and bathe. While under the water’s surface, whole ecosystems of fresh, water, aquatic life thrive. 

Wetland habitats typically take the form of ponds but can also be bog gardens or small water features. Ponds can be created with pre-formed plastic pond tubs or excavations lined with butyl rubber liner. 

Wildlife pond

2. Woodland 

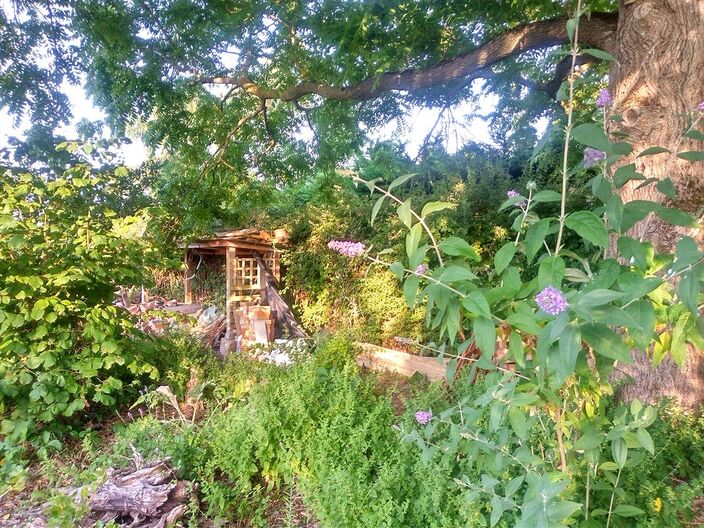
​It is easy to believe that most gardens are too small to incorporate woodland habitat. However this could not be further than the truth! You do not even really need trees to recreate an actual, woodland garden, habitat. A selection of shade loving woodland plants in a dark corner is effective enough.

Most of the time planting a small tree and some woodland shrubs will provide perfect woodland habitat.

If you have overhanging trees from neighbouring gardens this is the perfect opportunity for a woodland garden. 

Woodland

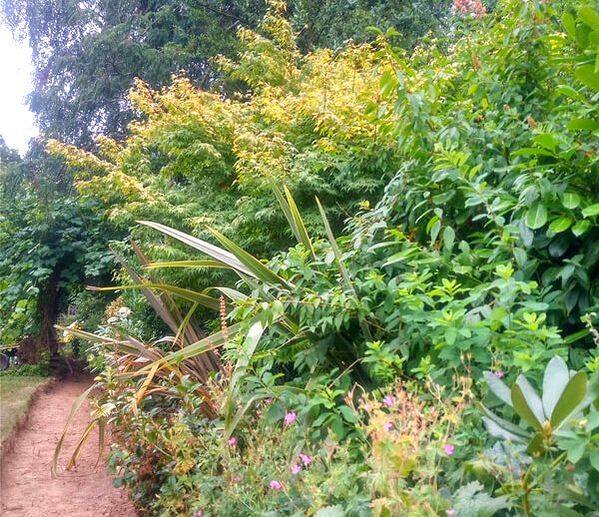
3. Scrub

Scrublands in nature are typically transitional habitats between woodland and meadows. These typically consist of small trees and shrubs, these habitats are great for species seeking shelter.

Many species of birds seek sanctuary in the canopies of scrublands. Mammals and reptiles utilise the patches of cover to hide and hunt prey.

In Wildlife gardens, scrub can be replicated by planting shrubs which attract wildlife. Many of which produce attractive flowers, foliage and fruit which also look amazing! 

Shrub habitat

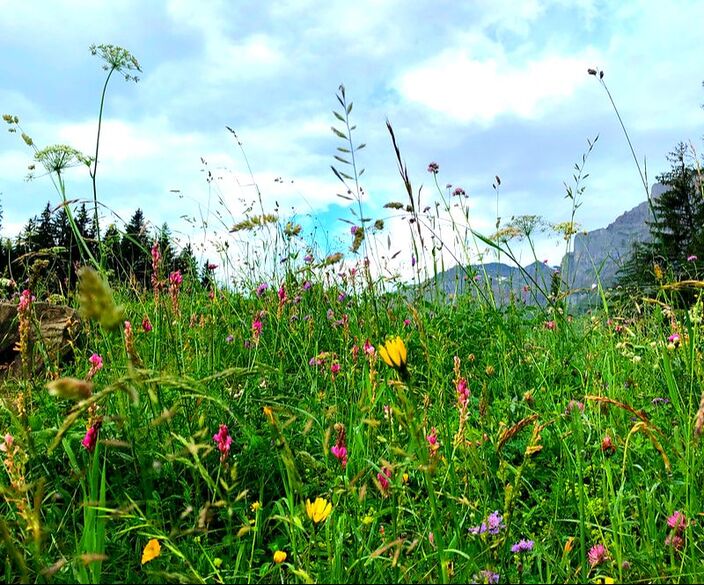
4. Meadow

Wildflower meadows are wild grasslands which are only cut seasonally. Before modern, agricultural, animal, feeds these were grown to provide winter food and bedding for farm animals.

These grasslands became rich with tapestries of wild flowering plants. Many species thrived on the seasonal flora of wild meadows including many pollinator species.

Reptiles, birds and small mammals would also use meadows for shelter and ambush hunting. In wildlife gardens meadows are a great alternative to a conventional lawn.

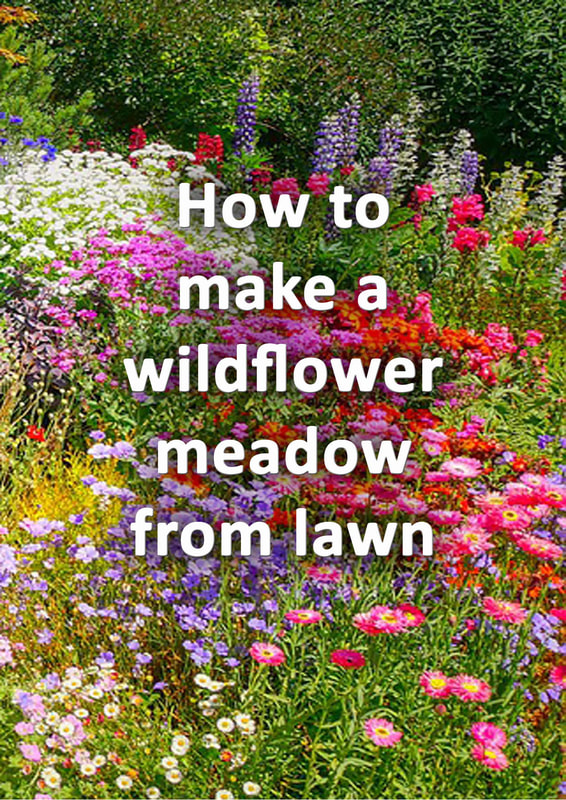
Wildflower meadows can be seeded; plug planted into existing lawns, or laid using wildflower turf. 

Meadow habitat

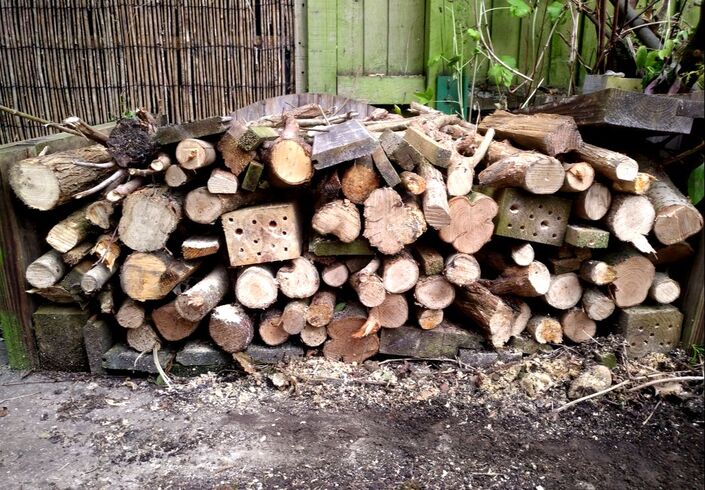
5. Deadwood

Deadwood habitats were once typical when most continents were covered in forest. However, since the felling of most ancient woodland deadwood has become a rare habitat.

Deadwood is vital for the survival of important recycler species in the environment, many of which are crucially important in the formation of healthy soil.

The good news is you can easily create deadwood habitats within your wildlife garden. Simply stack up sticks and logs or half bury them into the soil.

Try to use logs from native trees and shrubs and never use processed, lumber, products. Spreading local woodchip to your flower borders will also help your deadwood habitat thrive.

Deadwood habitat

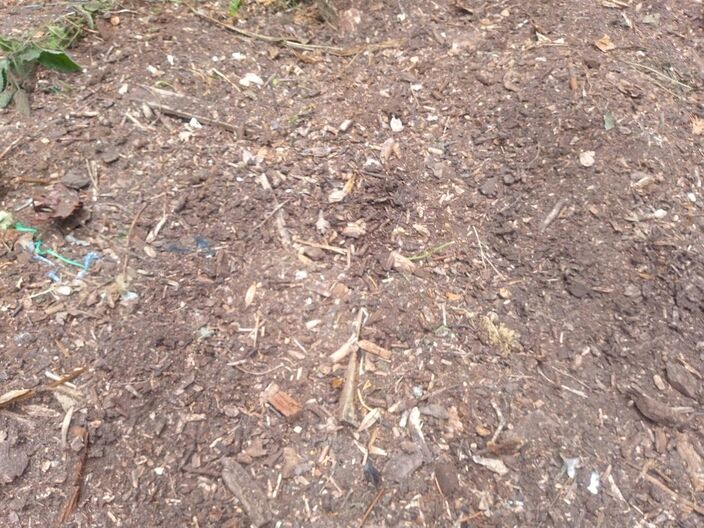
6. Bare earth

​Bare soil is difficult to maintain at the best of times with the continuous germination of weeds. However it is surprising how many rare species of insect rely upon this habitat.

In nature, bare ground would occur on sandy heath or in areas with unstable ground erosion. Such places provide perfect places for sunbathing insects and reptiles.

Some types of specialised insect require bare soil to complete their life cycles. 

Bare earth habitat

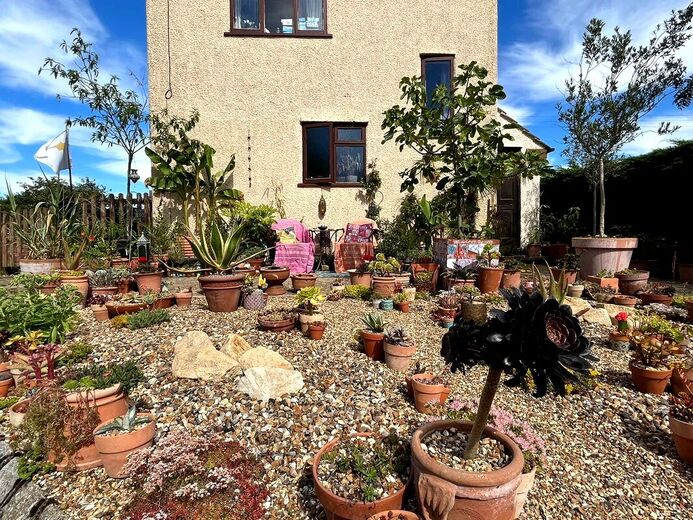
7. Dry habitat

​Dry habitat can come in many forms but in gardens it typically takes the shape of gravel areas. These areas can warm up quickly within the sun and create warm microclimates.

These can be utilised by sunbathing butterflies and reptiles such as the common lizard. There are many species of insect which prefer dry soils and gravels to lay their eggs.

Dry habitats can also look very effective as a part of Mediterranean or dry, succulent gardens. 

Dry habitat

8. Mixed border habitat

​Although garden mixed borders would not be found in the natural world they are fantastic wildlife habitat.

Traditional flowerbeds are packed with a wide variety of flowering and fruiting plants. This provides a great diversity of food for many different wildlife species.

The dense plantings create dense jungles of low growing vegetation. These are the perfect places for insects, reptile’s amphibians and small mammals to thrive! 

Hollyhock mixed border

9. Lawn

Conventional lawn is not always thought of as viable wildlife habitat. However lawns are dense environments where a great number of insects and invertebrates flourish.

Many people are surprised to learn most lawns do have a great number of wildflowers. Due to continuous mowing regimes however the flowers are rarely seen in bloom.

The longer your lawn is kept the more wildlife value it will have. It is always advised to let the lawn get a little longer every now and then!

Lawn habitat

10. Walls

​Many may assume that walls do not constitute any form of habitat for wildlife. The fact is there are many different species which do utilise masonry walls.

During early spring and autumn, solitary bees and other insects warm their bodies up on sunny walls.

Shady damp walls become complex colonies of mosses and various lichens and algae’s.   Walls which are cracked and fragmented offer the best nooks and crannies for organisms to shelter. 

This can be seen below in a dry stone wall we included in one of our wildlife gardens.

Dry stone wall habitat

11. Hedges

Hedges create lines of dense vegetation within the landscape which are perfect habitat for multiple wildlife species.

Birds nest inside the lattice of sheltered branches and twigs in the hedges centre.

The densely packed vegetation provides insects and small mammals safe areas to feed and hibernate.

Furthermore, hedges can create green corridors within the landscape linking fragments of habitat together. 

Edible hedge

12. Compost heaps

​Although composting is a method of recycling organic matter it is also a habitat type too.

Very much in the same fashion as dead wood compost heaps are rich in garden ecology.

The breaking down of dead plant matter invigorates decomposer organisms and soil ecosystems. This consequently feeds other wild species higher up the gardens food chain.

​The result is a habitat thriving in bacteria, fungi, invertebrates and insects. The warm mass of the compost heap can become an attractive place for reptiles to lay their eggs.

Compost heaps

13. Rocky habitats

In the natural world rocky habitats include cliffs, crags, mountain ranges and outcrops. However gardens can also provide these rich habits.

Old stone walls and rockeries can have many of the same characteristics of these natural environments. Gabions and dry stone walls are fantastic ways to integrate these habitats into your wildlife garden.

​Mediterranean species of spider such as the Zebra spider love to hunt amongst the warm rocky crevices.

The rocky hollows provide perfect nest for insects, small mammals, amphibians and even reptiles. 

Rocky garden habitats

​Buckinghamshire landscape gardeners are experts in wildlife garden design and construction and wrote this section of rare and amazing information.

"Acting as the domestic landscaping part of Ecospaces we have over 20 years experience in ecological landscaping and sustainable construction. If you are interested in our wildlife garden services please do not hesitate to contact us.Acting as the domestic landscaping part of we have over 20 years experience in ecological landscaping and sustainable construction. If you are interested in our wildlife garden services please do not hesitate to contact us or visit us online for more ideas..

biodiversity landscape architecture

Your wildlife garden may inspire your children to seek training for a career in the following fields:

  • Wildlife garden design

  • Wildlife garden maintenance

  • Nature reserve design

  • Habitat creation

  • Native woodland design

  • Native planting design

  • Ecological planting plans

  • Sustainable landscaping

  • Planning for biodiversity

  • Ecological masterplannng

  • Hard landscaping

  • Soft landscaping

  • Wildlife garden consultancy

​Thank you for reading our article on the 13 main types of wildlife garden habitats. For further reading we have included more wildlife garden articles you may find interesting. Thank you!

Visit This Wonderful Website for links to the following pages

Picture


Picture


Picture


Picture


Picture


Picture


Picture


Picture


Picture


Picture


Picture


Picture


Picture


Picture


Picture


Picture


Picture


Picture


Picture


Picture


Picture


Picture


Picture


Picture


Please Notice This


In designing a garden with a specific purpose, don't destoy plantlife that that can become a natural source of food for you or the local wildlife!!!

Tree & bushes can also be a home for the local insects, birds and other animals. 
PictureThis: Identify Plant, Flower, Weed and More App – Mobile and Tablet  Apps Online Directory – AppsDiary

Download "Picture This" AppLoad the app, snap a picture and everything you need to know comes up. It's always in my pocket!!!

Wild Raisin Fruits

WILD EDIBLE PLANTS

Besides the abundance of wild fruits available, there are also wild nuts, seeds, and greens.  While fruits are the most inviting to our palates, there are many other types of wild foods available for harvest year-round.  Be sure to positively identify any plant before consuming, as the risk of inadvertently eating a poisonous plant is very real.

Always consult a good field guide, and I’d suggest verifying your ID with at least two sources.

Recommended Content

Read on…

Don't Miss out on Bounties Like This

50+ Edible Wild Berries & Fruits ~ A Foragers Guide
CHOKECHERRY JELLY (AND JAM!)
Chokecherry Jelly (and Jam!)

BLACK RASPBERRY JAM

Black Raspberry Jam
20+ EDIBLE WEEDS IN YOUR GARDEN (WITH RECIPES!)
Foraging Red Blackberries (Rubus pubescens)
FORAGING RED BLACKBERRIES (RUBUS PUBESCENS)


This contains an image of: Violet Jam & a Recipe Round Up! - They're Not Our Goats

 Violets (Viola spp.)

Though there are not as many edible flowers around in early spring as there are during the rest of the year, you may like to keep your eyes open for violets. 10 fun ways to use violets

There are a number of viola subspecies, wild and cultivated, that you could add to your early spring salads.

Violet Syrup @ RuralSprout.com

Foraging for Wild Violets @ growforagecookferment.com.

One more thing to mention...

While forging in early spring is that you should look up as well as looking down.

You should also check out my article on trees with edible leaves (which is soon to be published here on Rural Sprout), as these are also a great source of foraged greens when leaves first unfurl.

Of course, certain trees can also be harvested for their sap in spring. The maple is of course the most obvious example, though other trees can also be tapped, and their sap used to make syrups.

By now, you should begin to see that there are plenty of wild food sources out there. Of course, you always have to be careful when foraging.

But learning more about which wild foods you can eat throughout the year is a great way to become more resilient. It can be a good way to supplement your home-grown diet. 

Recommended
Recommended ContentRecommended Content

10 Fruits And Veggies To Grow Vertically For Epic Yields In Tiny Spaces35 High Yielding Fruits And Vegetables For Huge Harvests

This contains an image of: Perennial Herbs to Grow in Your Garden | HealthyGreenSavvy
Herbs that may already be in your yard

How to Dry Fresh Wild Herbs at Home – Two Ways!

Drying fresh herbs at home has many benefits, and it’s so easy there’s really no reason not to!

Drying your own herbs is certainly more cost effective than buying them at the grocery store, but there are other benefits too.

Drying your herbs is a great way to use the plant most effectively, as most herbs produce more than we can eat in a single season.

It’s also comforting to know that the herbs you’re cooking with were grown with love and in excellent conditions.

Drying your herbs means that you’ll get to benefit from their uses all year long, not just when they’re growing in the height of summer. 

Dried herbs are wonderful for cooking, baking, making tea, DIY beauty products, and crafting things for the home, like herb sachets!

There are two main methods to drying fresh herbs, air drying and using a machine such as a dehydrator.

We’ll go over the steps for both methods, as well as how to prepare your herbs to be dried.

How to prepare your herbs for drying

Step 1: Harvest the herbs

The first thing to do is cut the herbs from the plant.

Be sure to do some research before this step and find out how to prune/harvest from that specific plant.

Most herbs benefit from cutting the stem right above a set of growing leaves, like basil and mint, so new branches can form where you make the cut.

Related Reading: How To Prune Basil For Big, Bushy Basil Plants

Other herbs benefit from removing individual leaves and leaving the stems in tact. It will help you and the plants in the long run if you do a little reading up before this step.

The ideal harvesting time and method of different herbs vary.

If you are harvesting mid season, be sure to remove no more than 1/3 of the plant so it can keep growing.

If you’re harvesting at the end of the season, it’s perfectly fine to cut the whole plant down.

Step 2: Wash and dry the herbs

Wash the herbs thoroughly under cool running water. This will remove any insects, dirt, and pollen from the herbs. Make sure to be very gentle when washing herbs like basil, which are easily bruised and torn.

Shake the herbs or send them through a salad spinner to remove most of the water, then blot dry with a towel.

Set them on a clean towel to air dry for a few hours, making sure to spread the herbs so they’re not overlapping. Setting out a fan on the herbs will help them to dry quicker.

The goal is to remove as much of the moisture from the herbs as possible, so they’re not likely to acquire mold or mildew while they dry.

This step is especially important if you are air drying your herbs, as you don’t want to bundle them together to dry while they’re still covered in water.

How to air dry herbs

Air drying herbs certainly looks beautiful and homey as they gently sway and spin in the breeze of an open window, but air drying during the summer will only work in certain regions.

If you live in a region that gets extremely humid in the summer, air drying will be very difficult if not impossible without introducing mold and mildew. 

The big benefit to air drying is almost anyone can do it, all you need is a little string and a well ventilated space. There’s no need for fancy equipment or complicated tasks. 

The big downside is it takes quite a long time for the plants to air dry, and as mentioned before, if you live in an area with high humidity, you need to keep an eye out for mold.

Step 1: Bundle and tie the herbs

After you’ve washed and dried the herbs, gather them together in a bunch. The bunch should have no more than 12 branches or stems. Make sure you’re gathering the same type of herbs in this bunch, you don’t want to mix together different kinds of herbs, as they’ll all have different drying times. 

Leaving a little tail of string, wind the string around and around the base of the stems until the herbs are tightly bound together, then tie your wrapping string to the tail you left.

Step 2: Hang them to dry

Use the remaining string to hang the herbs to dry.

Be sure to hang the herbs in a space that is well ventilated and has constantly moving air. We like to hang our herbs in the breezeway of our home. We hang them near the always open windows so they get a constant flow of air.

Hang the herbs leaf side down.

How to dry herbs with a dehydrator

Drying herbs with a dehydrator is ideal because it’s quick, easy, and has very little risk of mold or mildew on the finished product.

Dehydrators can be simple or complicated, cheap or expensive, but for drying herbs it truly doesn’t matter what kind you have. Any dehydrator can handle this task easily.

This is one of the cheapest dehydrators available on Amazon and is more than capable of drying herbs.

And if you’d like to learn more about dehydrating, then here’s an article explaining how to dehydrate all types of fruit at home.

Step 1: Preheat the dehydrator

If your dehydrator has the option to preheat it, do so now. Every dehydrator is different, however, if yours only has an on/off button, skip this step.

If the machine has a temperature setting, set the dehydrator between 95 to 115 degrees. If it only has high and low settings, set it to low. 

Step 2: Place the herbs inside the dehydrator

This step can differ depending on the type of herbs being dried. 

Some herbs, like basil and mint, have large leaves that are easy to remove from the stem. For these herbs, you’ll want to remove the leaves and place them in a single layer inside the dehydrator shelves. Of course you can place the whole branch inside of the dehydrator, but removing the stem saves space on the shelves, and makes for better drying as there’s no overlap of leaves.

If you’re drying herbs that have small leaves or flowers, like rosemary, lavender, or thyme, it’s more beneficial to place the entire branch or stem inside the dehydrator with the leaves or flowers intact.

This will keep those tiny leaves from falling down inside of the dehydrator, and it will be much easier to remove the leaves from the stem once they’re dried. 

How to know when the herbs are done

Both of these methods have the same final step.

Check the herbs frequently to see if they’re sufficiently dry. Herbs in the dehydrator will be dry within a few hours, while air dried herbs will likely take a week or more.

Check for dryness by pinching the herbs, when they’re done the leaves will crumble easily and the stems will break when bent. If there’s still flexibility in the leaves or stem, leave them to dry for longer.

If using a dehydrator, make sure to leave the herbs out to cool after removing them. Once they’ve cooled completely, they can be crumbled or left whole and stored in air tight glass containers.

Don’t forget to label the container with the type of herb and date, dry herbs can all look alike!

Dried herbs are wonderful to cook with year round, and they taste even better when you know you made them yourself!

Recommended Content


How To Hand Pollinate Tomato Flowers To Triple Fruit Production

How To Make Quick Spiced Carrot Refrigerator Pickles


SUPERSCRIPT

Creating Art and Play Space in the Garden

14 Mind-Blowing Outdoor Art Spaces You Can Set Up Today

When it comes to innovation, parents can get pretty crafty with just a handful of items. Case in point: these killer outdoor art studios, set up by parents for their creative geniuses. Scroll down to see the ideas and get inspired to make one yourself.

Backyard Nature Weaving Frame

Mother Natured

Give your children the gift of mindfulness and relaxation when you craft a backyard nature weaving frame to express themselves. This version from Mother Natured is made from a simple construction of wood and twine, and is perfect for little hands to create works of art using leaves, flowers, grass and more.

Mounted Outdoor Easel

Made With Happy

Give the kids a constant place to be artistic outside, rain or shine. Craft a mounted outdoor easel like this one from Made with Happy and let the creative juices flow!

Art Station

Where Imagination Grows

Where Imagination Grows proves it's easy to create a colorful outdoor art space without breaking the bank. A simple wooden shelf and metal buckets in an assortment of bright hues and patterns house the supplies, and an upcycled coffee table is the perfect height for young artists. Check out the rest of this outdoor craft corner and find a list of materials you'll need to create your own here.

Use the Windows as a Creative Space

Mess for Less

Washing windows just got a lot more creative. Give your kids brushes and spray bottles, and watch them paint, clear, and paint again. Head to Mess for Less for ideas on how to get the paint/water mixture just right.

Recycled Box Art Studio

Kids Play Box

An ordinary cardboard box easily transforms into an extraordinary art studio by adding a few supplies and your artist's latest creations. Head over to Kids Play Box to see how to make your own portable gallery.

DIY Chalkboard

Amanda Hunter via Dallas Moms Blog

Color, erase, repeat. An oversized chalkboard makes a great reusable canvas, and doubles as a scoreboard for afternoon games. Head over to Dallas Moms Blog to find out how to personalize and hang one in your backyard.

Garden Art Studio

Meri Cherry

This amazing backyard studio was built by the very handy dad over at Meri Cherry. The lucky artists in residence love having their own creative hideaway. Head over to the blog for a peek inside this magical space and a look at some of their awesome projects.

Design Fort

Baddle Dabble Do

A step up from a cardboard box, this outdoor fort is an art project in itself. Babble Dabble Do used a kit to create the frame for this awesome playhouse, draped it with butcher paper and let aspiring designers go to work personalizing the space inside and out. Head over to the blog to find materials and sources.

Cardboard Easel

Pink Stripey Socks

This awesome DIY easel from Pink Stripey Socks is super easy and inexpensive to make with very few materials. Plus, it can accommodate up to three artists at once! Grab a cardboard box and check out the blog to learn to make your own.

Balcony Studio

Not-So-SAHM via Honest to Nod

Even if space is at a premium, it's still possible to set up an outdoor creative space for your little artist. Not-So-SAHM designed this craft room on the balcony of her home. Head over to Honest to Nod for a closer look at the space.

Upcycled Water Table

No Time for Flash Cards

No Time for Flash Cards took finger painting to a whole new level by using her daughter's water table as sensory tub painting project. Find all the materials you'll need to create your own colorful canvases here.

DIY Plexiglass Easel

All the Little Lights

Thinking beyond dry erase and chalkboards, All the Little Lights crafted her daughter's easel out of plexiglass. The attached paint palette is made from a plastic vegetable tray, great for separating paint colors. Easy to wash and reuse, it's the perfect outdoor canvas for artists of all ages.

Picnic Art Studio

Tinkerlab

You never know when inspiration will strike, especially when you're out exploring nature. Tinkerlab set up an impromptu art studio using just a picnic blanket and a few select supplies. Find tips for setting up a garden studio here.

Slate Painting

Doodlebuds

The mom behind Doodlebuds stumbled upon this interactive gallery wall during a visit to the Children's Museum of Manhattan. The medium of choice: water. These quick-drying framed pieces of slate make for perfect reusable canvases, and can easily be recreated in your backyard. Just remember to take a photo of each masterpiece before it dries! The exhibit served as inspiration when creating an outdoor art space for her son. Check it out here!

RELATED STORIES:

10 Outdoor Art Ideas That Are Easy to Clean Up

Messy (& Fun!) Outdoor Painting Projects

Backyard Garden Safari Space

If you hate garden work and yard work, let it grow...rewilding the backyard is all the rage!!!

Is there apart of the yard that you hate to take care of? LET IT GO...and see what grows. You can still do tons of things with it.

Just tell your world that you are rewilding it for or green space a nature play space. You can tell them all about the wild wild ideas for play in a natural environment. I won't tell...

Create Nature Art

Pack small canvases and travel-sized tubes of green and brown paint. Invite your child to create camouflage art with paint, grass, leaves, dirt, and twigs. The paintings can dry in the sun while you enjoy lunch or explore a creek. Collect items for nature crafts

Collect Leaves for Stamping

Invite your child to collect interesting leaves, like tuliptree or sassafras leaves. Back at home, use those leaves to make colorful leaf-stamped shirts.

Build a Gnome Home

Building a gnome or fairy home sparks imagination and creativity! Best of all? All the supplies you need for this nature walk activity are found outdoors!

Gnome and Fairy Home Building on a Nature Walk

Make a Flower Crown

The moment you place a flower crown on your child’s head, they become king or queen and are swept into the magical world of imaginative play.

Play a Game

My young boys love to play the color match game, I Spy, and participate in nature scavenger hunts.

Build a Log Fort

Kids love to work with friends and siblings to build log forts. It’s so fun to see what they create!

Children Building Forts in Nature

Things to Look for on a Backyard Safari

There is so much to see and discover outdoors! When I take kids on nature walks, some of the things we look for include:

1. Plants

  • Deciduous trees

  • Evergreen trees

  • Leaves

  • Flowers

  • Buds

  • Mosses

  • Sticks

  • Pine needles

  • Fruit, such as apples, pawpaw, blueberries, and black raspberries

  • Edible plants, such as cattails, wild garlic, and dandelions

  • Aromatic plants, such as wintergreen

  • Bark

  • Sap

Child Examining a Leaf on a Nature Walk

Photo: catalin30682 | Adobe Stock

2. Seeds and Nuts

  • Acorns

  • Pine cones

  • Walnuts

  • Chestnuts

  • Maple keys (helicopters)

  • Milkweed pods

Child Holding Chestnut on Nature Walk

Photo: Anna Kubczak | Adobe Stock

3. Fungi

  • Shelf fungi

  • Mushrooms

  • Slime molds

  • Lichens

Child Looking at Shelf Fungus on Nature Walk

Photo: hakase420 | Adobe Stock

4. Animals

  • Mammals, such as squirrels and deer

  • Birds, such as hawks and woodpeckers

  • Reptiles, such as turtles and snakes

  • Amphibians, such as frogs and salamanders

  • Insects, such as fireflies, ladybugs, and mantids

  • Crustaceans, such as crayfish and pill bugs

Child Looking at Insect on Nature Walk

Photo: Tono Balaguer | Adobe Stock

5. Evidence of Animals

  • Nests, such a bird and squirrel

  • Cracked seeds or shells

  • Munched leaves (leaves with holes)

  • Spider webs

  • Shells

  • Exoskeletons

  • Scat (wild animal droppings)

  • Feathers

  • Bones

  • Dens

  • Burrows

  • Tunnels

  • Anthills

  • Eggs

  • Woodpecker holes

  • Snakeskin

  • Fur

  • Animal tracks

  • Cocoons and chrysalids

  • Beaver lodges

  • Beehives and hornet nests

Bird Nest on Nature Walk

Photo: Amy Buxton | Adobe Stock

6. Evidence of Humans

  • Trails and/or roads

  • Trail markers

  • Stone cairns

  • Carved trees

  • Footprints

  • Vehicle tracks

  • Litter (pick up and throw away)

  • Geocaches or letterboxes

  • Buildings

  • Fairy homes

  • Tapped maple trees

  • Hunting and/or bird blinds

  • Bird feeders

  • Birdhouses

  • Bat houses

  • Bridges

  • Shelters, forts, and tree forts

  • Docks

  • Arrowheads

Maple Tree Tap

Photo: Martin | Adobe Stock

7. Geological Features

  • Rocks and minerals

  • Fossils

  • Concretions

  • Sand

  • Clay

  • Landforms, such as mountains

  • Rivers, creeks, streams, and freshwater springs

Child Playing in Creek on Nature Walk

Photo: Paloma Ayala | Adobe Stock

8. Additional Ideas

  • Rotting logs

  • Ice and/or icicles

  • Snow

  • Rain

  • Mud

  • Vernal pools

  • Frost

  • Puddles

  • Dew drops

  • Sunsets and/or sunrises

Child Exploring on a Nature Walk

Photo: Alexey Fedorenko | Adobe Stock

Loose Parts Hunting for Nature Art 

Pack small canvases and travel-sized tubes of green and brown paint. Invite your child to create camouflage art with paint, grass, leaves, dirt, and twigs. The paintings can dry in the sun while you enjoy lunch or explore a creek. Collect items for nature crafts

2. Collect Leaves for Stamping

Invite your child to collect interesting leaves, like tuliptree or sassafras leaves. Back at home, use those leaves to make colorful leaf-stamped shirts.

3. Build a Gnome Home

Building a gnome or fairy home sparks imagination and creativity! Best of all? All the supplies you need for this nature walk activity are found outdoors!

Gnome and Fairy Home Building on a Nature Walk

4. Make a Flower Crown

The moment you place a flower crown on your child’s head, they become king or queen and are swept into the magical world of imaginative play.

5. Play a Game

My young boys love to play the color match game, I Spy, and participate in nature scavenger hunts.

6. Build a Log Fort

Kids love to work with friends and siblings to build log forts. It’s so fun to see what they create!

Children Building Forts in Nature

Things to Look for on a Backyard Safari

There is so much to see and discover outdoors! When I take kids on nature walks, some of the things we look for include:

1. Plants

  • Deciduous trees

  • Evergreen trees

  • Leaves

  • Flowers

  • Buds

  • Mosses

  • Sticks

  • Pine needles

  • Fruit, such as apples, pawpaw, blueberries, and black raspberries

  • Edible plants, such as cattails, wild garlic, and dandelions

  • Aromatic plants, such as wintergreen

  • Bark

  • Sap

Child Examining a Leaf on a Nature Walk

Photo: catalin30682 | Adobe Stock

2. Seeds and Nuts

  • Acorns

  • Pine cones

  • Walnuts

  • Chestnuts

  • Maple keys (helicopters)

  • Milkweed pods

Child Holding Chestnut on Nature Walk

Photo: Anna Kubczak | Adobe Stock

3. Fungi

  • Shelf fungi

  • Mushrooms

  • Slime molds

  • Lichens

Child Looking at Shelf Fungus on Nature Walk

Photo: hakase420 | Adobe Stock

4. Animals

  • Mammals, such as squirrels and deer

  • Birds, such as hawks and woodpeckers

  • Reptiles, such as turtles and snakes

  • Amphibians, such as frogs and salamanders

  • Insects, such as fireflies, ladybugs, and mantids

  • Crustaceans, such as crayfish and pill bugs

Child Looking at Insect on Nature Walk

Photo: Tono Balaguer | Adobe Stock

5. Evidence of Animals

  • Nests, such a bird and squirrel

  • Cracked seeds or shells

  • Munched leaves (leaves with holes)

  • Spider webs

  • Shells

  • Exoskeletons

  • Scat (wild animal droppings)

  • Feathers

  • Bones

  • Dens

  • Burrows

  • Tunnels

  • Anthills

  • Eggs

  • Woodpecker holes

  • Snakeskin

  • Fur

  • Animal tracks

  • Cocoons and chrysalids

  • Beaver lodges

  • Beehives and hornet nests

Bird Nest on Nature Walk

Photo: Amy Buxton | Adobe Stock

6. Evidence of Humans

  • Trails and/or roads

  • Trail markers

  • Stone cairns

  • Carved trees

  • Footprints

  • Vehicle tracks

  • Litter (pick up and throw away)

  • Geocaches or letterboxes

  • Buildings

  • Fairy homes

  • Tapped maple trees

  • Hunting and/or bird blinds

  • Bird feeders

  • Birdhouses

  • Bat houses

  • Bridges

  • Shelters, forts, and tree forts

  • Docks

  • Arrowheads

Maple Tree Tap

Photo: Martin | Adobe Stock

7. Geological Features

  • Rocks and minerals

  • Fossils

  • Concretions

  • Sand

  • Clay

  • Landforms, such as mountains

  • Rivers, creeks, streams, and freshwater springs

Child Playing in Creek on Nature Walk

Photo: Paloma Ayala | Adobe Stock

8. Additional Ideas

  • Rotting logs

  • Ice and/or icicles

  • Snow

  • Rain

  • Mud

  • Vernal pools

  • Frost

  • Puddles

  • Dew drops

  • Sunsets and/or sunrises

Child Exploring on a Nature Walk

Photo: Alexey Fedorenko | Adobe Stock

Loose Parts Hunting for Nature Art
and Play

Children observe and learn about the natural environment around them as they play outside. As children climb, balance, and jump, they strengthen and develop their major muscle groups. 

Natural loose parts are both FREE and accessible and can be easily incorporated in home spaces, neighborhoods, backyards, apartment balconies, parks, and schoolyard settings. Allowing them to take their favorite blocks, action figures, small play animals or vehicles and beach toys outside will allow them to construct and play creatively in miniature toy worlds of their own making.


Natural loose parts play often ignites imagination and divergent thinking opportunities, and supports curiosity about the natural world. What makes loose parts play so compelling is that there is no single way to play, and, for the most part, loose parts are also found parts like twigs, branches, stones, seed heads, water, and so on. These natural loose parts can be combined, moved, manipulated, redistributed, and reassigned many times over, taking different roles in different settings and play times. 

List of things to collect on your Nature hunt


(Use the Photos in this section below for ideas on how to collect and use nature)
If you’re looking for ideas, here are some things that you might be able to collect on your next walk.
  • Sticks – by far our favourite thing to collect. Kids love sticks. I even wrote a post with ideas for 30 fun things to do with sticks.
  • Pinecones – another great free natural craft material. How about using them with play dough and making hedgehogs?
Child with a pile of pine cones
  • Leaves. Fallen leaves are easy to collect even for toddlers. How about asking them to find 5 different coloured leaves or 5 different types of leave. They’re also great for taking home to paint like in this autumn process art activity.
  • Acorns
  • Conkers – Wondering what to do with all your autumn treasures? You need my autumn activities for preschool post.
  • Helicopter seeds
Egg box filled with shels, pebbles and sea weed
  • Stones. Why not take some home to paint?
  • Shells, the ultimate things to collect on a trip to the beach
  • Drift wood
  • Seaweed
  • Fossils if you’re really lucky
Close up photo of pink wildflowers
  • Wildflowers (never pick flowers from other people’s gardens, parks etc and don’t pick protected wildflowers like bluebells. We only ever take a few. Leave more than you take.) Once home why not try making these beautiful gelatine flower suncatchers.
  • Moss
  • Feathers

Creative ways to collect nature on a Backyard Safari

You could simply give your child a list of things to collect on a nature walk or you could try one of these different ways. They are still all about collecting nature but they add a creative element to it. Sometimes they even add a competitive element too if you have more than one child to entertain.

 Nature weaving

I saw this gorgeous idea on one of my favourite blogs for nature crafts, Little pine learners. All you need it some cardboard and some rubber bands or string/wool.
Child's hands adding nature to a piece of card board with wool wrapped around it

Create a journey stick

We love to creating journey sticks on walks. They’re a really fun way to collect things on a walk. All you need is a stick and some wool or string to tie your nature finds to your stick as you walk.

Go find it cards

Why not make collecting nature into a game using a set of go find it cards. We love our set and use them regularly on walks.

Go find it scavenger hunt cards - The Ladybirds' Adventures


Heading out into nature is a great way for the family to enjoy quality time together. It's also a fantastic opportunity to put down the tech and learn to appreciate the world around you. If you happen to have some public woodland near your home, it's a great destination for a family day out. You can pack a picnic, get some exercise, and reconnect with each other away from the stresses of busy family life.

DYFT Decorative stones, natural, 1 lb 8 oz. A simple thing like stones can be a nice decoration in a bowl or a vase. With this collection, you can decorate with beautiful small pebbles, even if you live far from the beach. Stone.

I'm not sure what the attraction is with hunting, does it attach us back to our prehistoric roots and make us hope that we could survive even if everything wasn't handed to us on a plate?

The boys definitely enjoy all kinds of hunt (although strangely, finding a missing shoe when we're late for school is the one time it doesn't seem to appeal.)

Found one!

Ascavenger hunt is a great way to keep the kids active in the great outdoors. Basically you challenge them to find particular things, either on their own or in teams, and see if they can collect the lot. There are loads of different ideas for scavenger hunts on the internet. Some we've tried have been finding things which:

  •  are a particular colour-  can you find 6 yellow things, or can you find one thing for each colour of the rainbow?  

  • begin with a particular letter- who can find the most things which begin with the letter b?

  • are a particular shape- can you find 4 round things?

  • the same but different- can you find 5 different leaf shapes or different feathers?

DYFT Decorative stones, natural, 1 lb 8 oz. A simple thing like stones can be a nice decoration in a bowl or a vase. With this collection, you can decorate with beautiful small pebbles, even if you live far from the beach. Stone.

If you're doing it as a party activity, you could give them a list of things to find- there are lots of printables online, either in words or pictures, but I'm not generally that organised, it's usually a spur-of-the-moment challenge when they're flagging on a walk or wondering how to occupy themselves in the garden.

Can you find a creature with lots of legs?

Can you find something which rustles?

 We also used to hunt for imaginary things! If we walked through the woods we inevitably searched for Gruffalo tracks, walking cross country often included a bit of a bear hunt- "Uh oh! Mud! Thick, oozy mud!" When the boys dressed up in their Knightly costumes they hunted dragons and other monsters, foam swords in hand.

What can you find at the bottom of a rock pool?

My own favourite place for hunting is at the beach. Beach combing is such a relaxing activity and you never know what you might find. Searching for interesting shaped pieces of driftwood, pebbles with a hole through, particular types of shell or beautiful sea-smoothed bottle glass is my idea of a perfect holiday activity, plus you can use the things you find to create pictures on the sand.

Nature Sorting Game

One of the highlights of our summer was when dad set up an island-wide treasure hunt, with a series of written clues to follow, and all the kids would set off on a mission to find the treasure. I remember one year it was a 50p for each of us in the zip pocket on Grampa's hat! My boys are a bit little for this kind of hunt just yet, but I hope I can find a safe place for them to enjoy the same kind of challenge when they're older- it gave us such happy memories.

Of course, if the weather continues to be this cold (please, please let it be for not too much longer!) our main source of hunting fun will have to be indoors hide-and-seek or sardines, tho how many more times I can pretend to be surprised to find Danny under our bed I'm not sure!

Have you ever been on a flower hunt?

DYFT Decorative stones, natural, 1 lb 8 oz. A simple thing like stones can be a nice decoration in a bowl or a vase. With this collection, you can decorate with beautiful small pebbles, even if you live far from the beach. Stone.

We as adults have a tendency to only look at the end result – and though I’m not against this line of thought, we do need to look at the process as well, especially when it comes to kids. If you think of picking flowers with your little ones as a sure way of getting a small bundle of random flowers at various size and lenght to slowly wither away on your counter top, then you’re not wrong per se. But flower picking can be so much more – and to be quite frank, you don’t have to pick the flowers if you’re not allowed to (or don’t want to) in order to have a great time going flower hunting.

These are the top reasons to go flower hunting with your kids:

  • it can easily be made into a game

  • it’s a great opportunity to spend time with your children as a family

  • it’s an excuse to get moving outdoors

  • it can have quite the educational purpose, even for the adults. Be honest, how many names of flowers do you know? And do you know which are edible and which are not?

  • it’s the perfect opportunity to connect with nature and get familiar with your local natural settings

6 fun and educational ways to pick flowers with your little ones

Picking flowers is a such a simple activity, but kids love it. Though you might not have thought about it before, picking flowers doesn’t have to be done the exact same way each time – you can actually make it into a game, a gesture and even give it an educational spin or two. ("Picture This" app is always in my pocket and I find it very useful.)

This contains an image of: Best Plant Identification Apps (That Actually Work)

Below you’ll find 6 ideas to change up the whole flower picking ordeal. And keep in mind – you don’t actually have to pick the flowers to enjoy most of these ideas:

  1. Pick or identify as many different kinds of flowers as you can find. If you either can’t or decide not to pick the flowers you find, you could instead take photos of the flowers to count afterwards or simply just take note of every flower you find. You could also make this activity into a competition for older kids to see who can find the most – or even make it into a family challenge to see how many different kinds of flowers you can find everytime you go out to pick or every time you go to a new place. Does the trail to the forest have more different types of flowers than the road to grandma?

  2. Use your smartphone and an app to identity the flowers you find on your way. Either on the go or when you get home. This is not only a good way to learn the names of the flowers, but also quite handy to figure out in a jiffy if a flower is poisonous, endangered or maybe the opposite. There are many different apps out there, so just go to your playstore or appstore and find the one you like.

  3. Find or pick flowers of different colours, sizes and maybe even looks. Maybe make a few small bouquets or simply choose a colour for the day. Saying “Today we only pick the yellow flowers” can also be an easy way to limit the amount of flowers you bring home or the time spend picking, which can sometimes be necessary. For younger kids this is also a great way to learn about sizes and colour shades. When is a flower yellow and when is it orange? Which is biggest? Which look like trumpets or a sun?

  4. Make picking flowers into a nice gesture. Instead of just picking flowers for the tabletop yet again, decide to pick a bouquet for someone. Maybe as a way of saying thanks or simply to surprise them. I’m sure they’ll appriciate the gesture and sometimes it can be nice for us adults to have a purpose with the flower picking. Just make sure that the flowers you pick are some of the more common kinds, so you’re not messing with the cosystems for bees, butterflies and so forth. Making a daisy chain for a friend or a bookmark for a grandma is also variations of this idea.

  5. Use flower picking as an opportunity to practice counting and doing simple math. I like to tell  my kindergartner Eva to pick 3 of one sort of flower and maybe 5 of another. When she gets older I’ll make it into math problems like “pick 1 +2 of these dandelions” and asking her how many we have picked so far and so forth.

  6. Pick flowers that you can eat and use them in a meal. When I was a kid my parents would sometimes make schnapps for Easter, so we would head out to collect yarrow flower. I absolutely loved it (picking the flowers – not drinking the schnapps). There’s something so satisfying about foraging that every child should experience. While we don’t make schnapps, we have collected both elderflower for lemonade and dandelions and daisies as salat toppings. Here’s a great list of edible flowers and how and when to pick them.

A few guidelines to picking (wild) flowers

Take your time to get to know the laws that apply to your area before heading out to pick bucket loads of flowers. Make sure you know which flowers are legal to pick and enjoy at home. You also need to know which one are poisonous or flowers have insects that sting near by.

  • Don’t drag up the whole plant by it’s root. How to pick flowers is not a given – especially for toddlers, so remember to show and guide them. It can actually be quite tricky to figure out for little hands.

  • Don’t pick every flower – and sometimes don’t pick any at all. You don’t actually have to pick all the flowers you find – sometimes looking can be just as fun. Especially if challenge your kids to see what the plant look like from the other side without touching it. Leaving flowers on their stems make it possible for others to enjoy and might help preserving the ecosystem. This might not apply to a huge meadow filled with daisies, but if you only see a small gathering of a specific flower, look it up or simply leave them.

  • Don’t pick flowers from people’s gardens without asking or if there’s a sign asking not to. You might think this is common sense, but it might not be for a toddler. Also try to teach your children the difference between flowers that have been planted and wild flowers. Usually this means avoiding picking flowers in most parks and recreational areas, national parks and of course in botanical gardens.

  • Avoid picking endangered, rare or posinious flowers. Instead of steering away from them completely talk about why you should not pick these flowers, teach your children how to recognize them and simply take your time to admire their beauty on their stems.

  • Bring a container for the flowers you pick. We have often just used a paper bag, but a bucket or similar would work as well. Avoid plastic bags. You could of course also hold them in your hand, but my experience tells me everyone quickly gets tired of holding them.

If you can’t remember the last time you went flower picking with your kids, then this might be the reminder that you needed. Even though looking for flowers – and even picking them – can seem overwhelming (what do I know about flowers?), changing it up, giving it a purpose and making it into a game can make it a awesome experience for eveyone. Installing a flower identification app is something that changed the way I pick flowers with my kindergartner and have definitely taught me more about flowers than I knew before.

Easy Containers
(to show off your collection)


Nature Basket

Nature Exploration Tray or Shadow Boxes

Journey Stick

Fall Treasures in Play Dough

Flower Drying Mobile

 Nature Sensory bottles

Put them in a clear container to investiagate them or use them as displays or shelf decorations.

Mobiles are a great way to display nature.

A fun way to get them to carry their water bottles back home is to fill them with nature on their way home.


Spread them on Contact Paper - then cover them with another level  of clear Contact Paper to seal them in for a wall hanging or suncatcher.

They make great loose parts for outdoor play

50+ Creative ways to Use Nature's Treasures

Nature walks are fabulous activities for both kids and adults. But what should you do with the treasures found along the way? I’ve rounded up over 50 lovely, creative ways to use the materials found on your nature walks.

50+ Creative Ways to Use Materials Found on Your Nature Walks

Here are lots of creative ideas you can use at home or in the classroom with a variety of ages.

Nature Exploration Table (The Imagination Tree)

Flower Exploration Center (Buggy and Buddy)

Invitation to Play and Learn with Numbers and Natural Materials (Fun with Play and Learn)

Nature Exploration Station (Mama.Papa.Bubba.)

Montessori Nature Trays and Nature Tables

Investigating Nature Trays and Nature Tables (my roundup post)

Nature Sensory Activities

Nature Mobile (Danya Banya)

Nature Sensory Bottle (Lemon Lime Adventures)

Nature Pocket Art (5 Minutes for Mom)

Nature Suncatcher Wind Chimes (Hands On As We Grow)

Nature Sensory Bag Suncatcher (Hands On As We Grow)

Nature Activities Using Rocks

Stone Pendant (Red Ted Art)

Story Stones (Inner Child Fun)

Zentangle Rocks (Edventures with Kids)

Puffy Painted Rocks (Babble Dabble Do)

Painting with Rocks (Fantastic Fun and Learning)

Building Towers with Natural Materials (Nurture Store)

Story Stones - Farm Animal Families Treasure Basket

Story Stones – Farm Animal Families Treasure Basket

Story Stones – Farm Animal Families Treasure Basket (my post)


Crafts Made with Beach Treasures

Beach Memento Windchime (Mama Miss)

Shell Painting (Fun-a-Day!)

Driftwood and Broken Shell Rattle (Photo from Red Ted Art)

Seashell Decorations (Crafts on Sea)

Seashell Wall Hanging (Crafts on Sea)

Seashells Sensory Bottle (Rhythms of Play)

Driftwood Boat (Red Ted Art)

Nature Painting

Nature Paintbrushes (Messy Little Monster)

Painting Feathers (Danya Banya)

Painting Nature Objects (Natural Beach Living)

Printing with Nature (Danya Banya)

Painting with Flowers (Teach Preschool)

Dandelion Blow Painting (Teach Preschool)

Flower Petal Glitter (Teach Preschool)

How to Make Rose Petal Perfume

How to Make Rose Petal Perfume (my post)

Activities Using Sticks

Wind Chimes with Sticks Painted in Rainbow Colors (Happy Hooligans)

Syllable Sticks (In the Playroom)

Nature Tree Craft (Rain or Shine Mama)

Accessories for Playdough Creations (Mom Inspired Life)

Stick Art (Buggy and Buddy)

Bug Hotel (Red Ted Art)

Painting Leaves (Simple Fun for Kids)

Leaf Rubbing Collages (Mama.Papa.Bubba.)

Leaf Threading (Stimulating Learning with Rachael) – blog is no longer available

Leaf Printed Rocks (The Pinterested Parent)

Stick and Leaf Butterflies (Artsy Craftsy Mom)

Nature Crafts

Nature Resist Tie Dye Shirt (The Pinterested Parent)

Pictures Made with Pressed Flowers (5 Minutes for Mom)

Bookmark Craft Using PressedFlowers and Leaves (Buggy and Buddy)

Flower Mandala Design (Nurture Store)

Bark and Pinecone Crafts

Bark Owls (Fireflies + Mud Pies)

Bark Painting (Tinkerlab)

Pinecone Mobiles (Happy Hooligans)

Pinecone Bird Feeder (Tinkerlab)

Acorn Necklaces (Arty Crafty Kids)

Nature Activities

Nature Weaving (True Aim Education)

Nature Impressions Crafts (Paging Fun Mums)

Nature Journals for Kids (Simply Rachel) – blog is no longer available

Nature Impressions (Arty Crafty Home)

Nature Stampers – Impressions in Playdough (Danya Banya)

Nature Ornaments (Danya Banya)

Tactile Nature Letters with Free Letter Template

Tactile Nature Letters {Free Printable Letter Templates} (my post)

What is your favorite way to use materials from your nature walks?

FOR MORE SUMMER Garden Play IDEAS,
YOU COULD CHECK OUT

Summer Planning Printables

101 Fantastic Ideas For Summer Fun With Your Kids


Superscript

How to Teach your kids to love spying around to find edible Edible berries or snacks

(MAKING BOTANY FUN)

FORAGING WILD FOOD FOR BEGINNERS

Foraging with kids - simple safety tips for foraging with kids including best fruit and nuts to pick

My little picky eater happily munches blackthorn berries from the hedgerows. She won’t touch a banana. Or an orange.But hand  picked sourer-than-lemon sloes she gobbles by the handful!

What’s with that?

Part of it’s taste. Of course. But another big part of it – I reckon – is that she picked it herself.When she was tiny she would turn her nose up at shop bought blackberries.

 But devour them when we went blackberrying.

Foraging with kids - simple safety tips for foraging with kids including best fruit and nuts to pick

Maybe it’s some deep primordial instinct k icking in?

Foraging is a totally fab way to have a fun day out with the kids.

You get to be outdoors,  tinkeringering and exploring.

Chatting away as you gobble yummy stuff.

And just slowing down.

But isn’t it all a bit complicated AND dangerous?

Foraging with kids - simple safety tips for foraging with kids including best fruit and nuts to pick

Honestly, not at all!

It’s much easier than you think to find yummy stuff in your local countryside. Plus ALL the stuff you can forage in autumn is packed full of the immune boosting vitamins the whole family needs to survive the winter. How clever is nature?!!

And as long as you and your kids follow these simple foraging tips it’s perfectly safe.

SIMPLE FORAGING TIPS FOR KIDS

  1. Only eat stuff you’ve been told you can eat by a grown up

  2. Only eat stuff if you’re really sure you know what it is – if in doubt don’t

  3. Don’t eat stuff low down that a dog might have peed on – !!! – until washed at home

These are the foraging tips my mum taught me when I was little. And they are basically all kids need to know. Although, obviously with little kids you need to keep an eagle eye on what goes in their mouth.

Foraging with kids - simple safety tips for foraging with kids including best fruit and nuts to pick

OK. So you are on for a bit of foraging fun with your kids. But what can you actually pick? And what can you do with them?

Well, I’ve detailed some of our faves below. And nearly all of these are amazing in jams and jellies and chutneys. Just borrow a jam pan (USA) plus a jelly strainer as they make it super easy to make your own.

You can also add all the fruit and nuts to muffins, pies, cakes and crumbles.

Foraging with kids - simple safety tips for foraging with kids including best fruit and nuts to pick

If you want recipes Nigel Slater is your man! His Tender book (USA) is full of foraged fruit recipes. It’s one of the few recipe books these days I use over and over.

But what can you actually pick?

Well, obviously it will vary depending where you are.

But these are our favourite things to forage as a family.

WHAT TO FORAGE FOR BEGINNERS

BLACKBERRIES

Blackberries are probably the easiest thing to forage as a beginner or with kids.

They’re everywhere. The local park. The woods. By the beach.

Just inviting little hands to pick and gobble.

You’ll find all the blackberrying tips you need here.

Blackberrying tips - everything you need to know about picking blackberries with kids

DAMSONS

These dark bluey jewels are like a small, dense plum. But more tangy and flavoursome. They’re brilliant in crumbles and pies.

But with chocolate they are divine!

Foraging with kids - simple safety tips for foraging with kids including best fruit and nuts to pick

They do grow quite high in the hedges, so take a stick to bend branches down.

Or someone with long arms!

ELDERBERRIES

Elderberries are best eaten cooked.

And eating too many raw – and unripe – could make kids sick.

You want them black. Not green.

Foraging with kids - simple safety tips for foraging with kids including best fruit and nuts to pick

But these beauties are absolute super foods for fighting colds and sinus infections. You can add them to recipes with blackberries.

Or to really enjoy them make elderberry jelly …

or syrup …

CRAB APPLES

There’s a crab apple tree in the tiny wood next to my parents house. And every autumn we get the whole crop. No one else seems to know their secrets.

Foraging with kids - simple safety tips for foraging with kids including best fruit and nuts to pick

They are not pretty. They are sour raw. But they make the best jelly ever!

Yummy in tarts and cakes for kids. But also good with meat and cheese.

So there you go, everything you need to know about foraging with kids. 

If you’re creative and really learn to watch the landscape, there’s quite a bit to harvest even in the dead of winter.  Here’s a list of more than 50 things we’ve found to forage in winter, in a climate where temps dip to -25 part of the year. 

One of the easiest to find, and most accessible options are rose hips which generally hold on the bushes all through winter.  Staghorn sumac is another good choice, and it can be made into a lemonade-like drink (even in January). 


GETTING STARTED FORAGING WITH KIDS

Foraging with kids is a great way to spend time with your little ones outdoors.  

Basket of Red Clover

Kids are naturally curious and want to put just about everything into their mouths anyway, why not direct that towards tasty wild food?  Foraging helps tap all that curious energy into nature exploration while teaching them valuable skills at the same time.

GETTING STARTED FORAGING WITH KIDS

If you’re a beginning forager yourself, start simple. 

Edible flowers are a great beginning, and they’re delicious for kids and adults alike.  There’s a surprising variety of edible flowers, both wild and cultivated.  In many cases, you don’t have to look past grandma’s flower garden to find delicious “wild” edibles to peak a little one’s interest.

In the summertime, foraging is just a natural part of our daily routine. 

When my daughter was born that didn’t change, and she began harvesting wild plants with me before she could walk.  Little hands are naturally drawn toward bright colorful objects at their level, and I set my baby down in a patch of red clover with a basket. 

A bit of guidance and she spent an hour carefully harvesting red clover blossoms and filled her harvest basket.

Harvesting Red Clover

The following summer, the little ones could participate more fully and things got a whole lot more fun. 

Add a bit of walking and talking into the mix, and children can actually express how much they love the idea of harvesting their own lunch. 

Everywhere we go she’d see flowers and ask, “Is that an eating flower mama?”  That’s led to some wonderful interactions with friends and neighbors, especially when they’re in an older generation.

In a neighbors garden, she politely asked if she could eat the bee balm.  The neighbor didn’t know that one was edible, and my little one showed her how to enjoy the petals. 

The neighbor then took her on a tour of all the wild weeds in her garden that she used to harvest as a child. 

She told her stories about harvesting jewelweed seed pods, that pop in your mouth as you eat them and taste like black walnuts.  She let us sample her hosta flowers and showed us the best technique for eating daylily blossoms.

Jewelweed Seed Pod

Edible seed pods of jewelweed, which taste like walnuts!

While flowers are an excellent place to start when you’re teaching the youngest foragers, it’s easy to quickly expand to more advanced crops. 

Chanterelles began to pop out of the forest soil just after my daughter’s second birthday, and we went into the woods to harvest them together. 

Foraging mushrooms with kids takes a bit more discussion, and it’s important to communicate that all mushrooms need to be cooked before you can eat them.  Whether or not that’s strictly true is up for debate among mushrooms, but that simple rule allows for every last morsel to be checked over before it goes into a little one’s mouth.

I brought my newborn son in a backpack, and my daughter carried her favorite stuffed animal in a backpack too.  I’d pause to teach her something, and she’d settle in to pass the lessons on to her stuffie.  Here she is teaching her furry friend the finer points of chanterelle identificat

Once you’re ready to start introducing your kids to foraging, here are a few tips to get you started.

START WITH FAMILIAR PLANTS

When I say start with familiar plants, I mean start with plants that are a part of their everyday life. 

If there’s a maple tree in the yard, try tapping it for syrup.  Look for edible weeds in the lawn, that same lawn they run barefoot over all summer long.  Things they see and experience every day will have more meaning than even the most exciting find 10 miles and a car ride away.

Simple things, like dandelion blossoms, can be made into all manner of delicious things with the right dandelion recipes.  I make dandelion shortbreaddandelion honey marshmallowsdandelion gummy bears, and dandelion ice cream for my little ones.  I even can up dandelion jelly from their harvests, so we eat a taste of sunshine all year round. 

If they’ll put the time into picking the blossoms, there will be treats. 

See the subtle bribe there?  It’s all in the name of getting them outside and excited about nature (and foraging).

If you don’t have a lot in the yard, maybe it’s time to remedy that.  Toss a handful of yarrow seeds here and there, or encourage forageable crops by converting a portion of the yard to more “wild” space. 

Even if you’re in an apartment, there’s plenty of urban wild edibles to be found in sidewalk cracks and neighborhood parks.

Yellow dock seed in an urban environment

An urban patch of yellow dock growing around a light pole. The seeds can be ground into flour and a tiny bit flavors some tasty cookies.

CHOOSE SWEET AND TENDER EDIBLES

For the most part, everyone gets excited about foraging in the spring as the new growth bursts from the earth anew.  The problem is, most spring greens are bitter and not exciting to young palates. 

Don’t try to force it!  Once a kid learns that foraging is just an excuse to shove bitter dandelion greens at them they’re not going to be excited about the adventure. 

Just as you’re expanding their horizons, you need to expand yours as well so that you’re guiding them towards sweet, tender, and kid-friendly edibles.

Linden buds are some of the sweetest greens around, and they bring a smile to my little one’s face with ease.  While dandelion greens might not be a good choice, the flowers themselves are tasty if you use them to flavor kid-friendly treats like dandelion ice cream

Child foraging linden buds

FORAGE FOR KNOWN FOODS (LIKE BERRIES)

When kids learn that the woods can be their grocery store, providing foods they’re familiar with already, that’s almost more exciting than learning to identify strange wild weeds.  Edible wild berries are some of the absolute best choices when foraging with kids.  Many are incredibly easy to identify, like wild raspberries.

When I led my 18-month-old son over near the raspberry patch, I didn’t have to tell him twice.  He knew his favorite food when he saw it, and after I picked one off and put it in his hand it was like his whole world expanded right before my eyes. 

To see the look on his face, you’d have thought I showed him an ice cream bush, not a wild raspberry.  I can only imagine his thinking, realizing that raspberries just grow right out there for the taking.  Simple things we take for granted are really magical when the whole world is new.

Once they know you’re showing them good stuff, kids are more liable to trust you when you try to introduce them to new exciting wild edibles.

Child Foraging Raspberries

MAKE FUN FORAGED TREATS

Beyond just tasting wild edibles in the field, the adventure can continue into the kitchen with kid-friendly edibles.  Last spring we baked a Japanese knotweed pie, and the little ones couldn’t taste the difference between it and the rhubarb pies from the week before.  Similarly, wild hawthorn lollypops were a huge hit.

While sweets are an obvious choice, you don’t have to pack on the sugar to make things kid-friendly.  Think warm, savory comfort foods.  Dice up some wild ramps into homemade mac and cheese, or make a warm and creamy chanterelle risotto.

Still, when all else fails, make ice cream out of it. 

Really, you can make ice cream out of almost anything.  We made chanterelle ice cream this summer, and months later when you ask my daughter what her favorite ice cream flavor is she’ll sill enthusiastically answer “Mushroom Ice Cream!” 
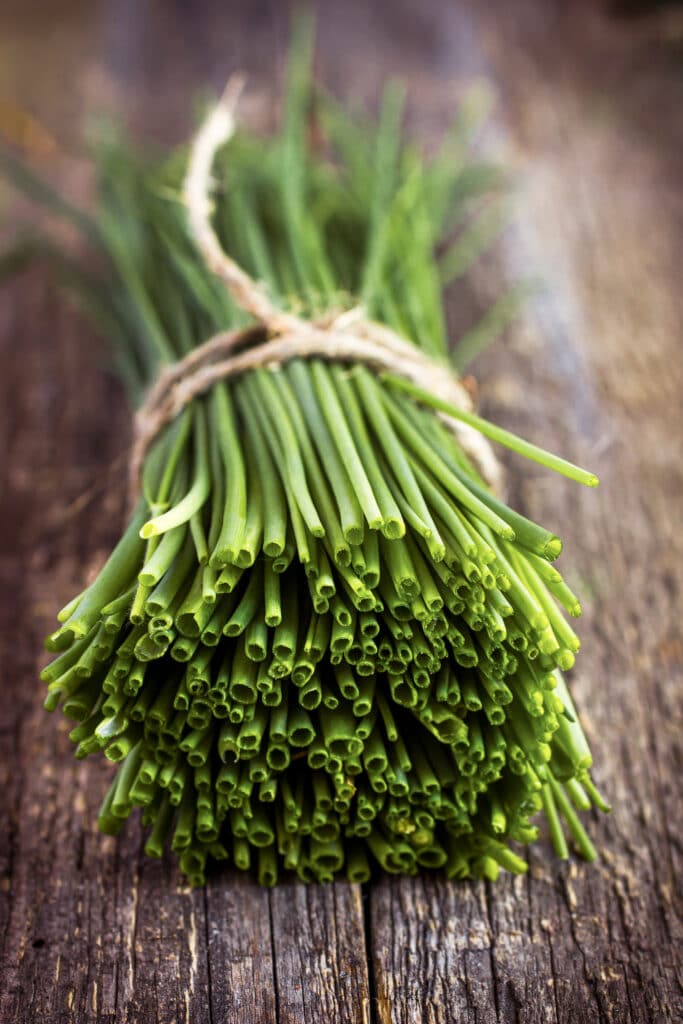
Homemade Chanterelle Ice Cream Recipe

DON’T UNDER ESTIMATE THEIR TASTE BUDS

I know, all I’ve been talking about thus far is making sure foraged foods are sweet, tender and kid-friendly. 

That’s true… to a point. 

Don’t let your adult bias keep you from sharing some more exotic flavors with your little ones.  I try to use a bit of Huck Finn psychology whenever I can.  While I’m not convincing them that panting a fence is the best thing ever, I am leading by example trying new things.

I made a big show of how tasty dandelion coffee is, and my little one couldn’t wait to try it. 

It tastes an awful lot like coffee, bitterness included, but she drank her whole cup.  Maybe it was the fact that she could have her own caffeine-free cup and share coffee time with mama, or maybe it was the excitement that she harvested, cleaned, and processed the roots herself…but the bitterness was no obstacle.

Child Drinking dandelion coffee

FORAGE IN KID FRIENDLY LOCATIONS

The adventurer in me wants to stop the car every time I see a patch of something tasty and exciting, but that’s just not an option with little ones. 

I passed up a patch of wild asparagus because a narrow strip between railroad tracks and the highway is just not a good foraging spot period, let alone with kids.  Alone, I’ll admit I’d be all over crawling down a ravine or foraging in other semi-hazardous locations. 

I really rein in that impulse now that I’m foraging with kids.

More often than not, if we’re going to go out somewhere to forage I choose somewhere that’s stroller friendly.  That allows for snack storage and is a bonus carrier in case we find a big patch of something exciting. 
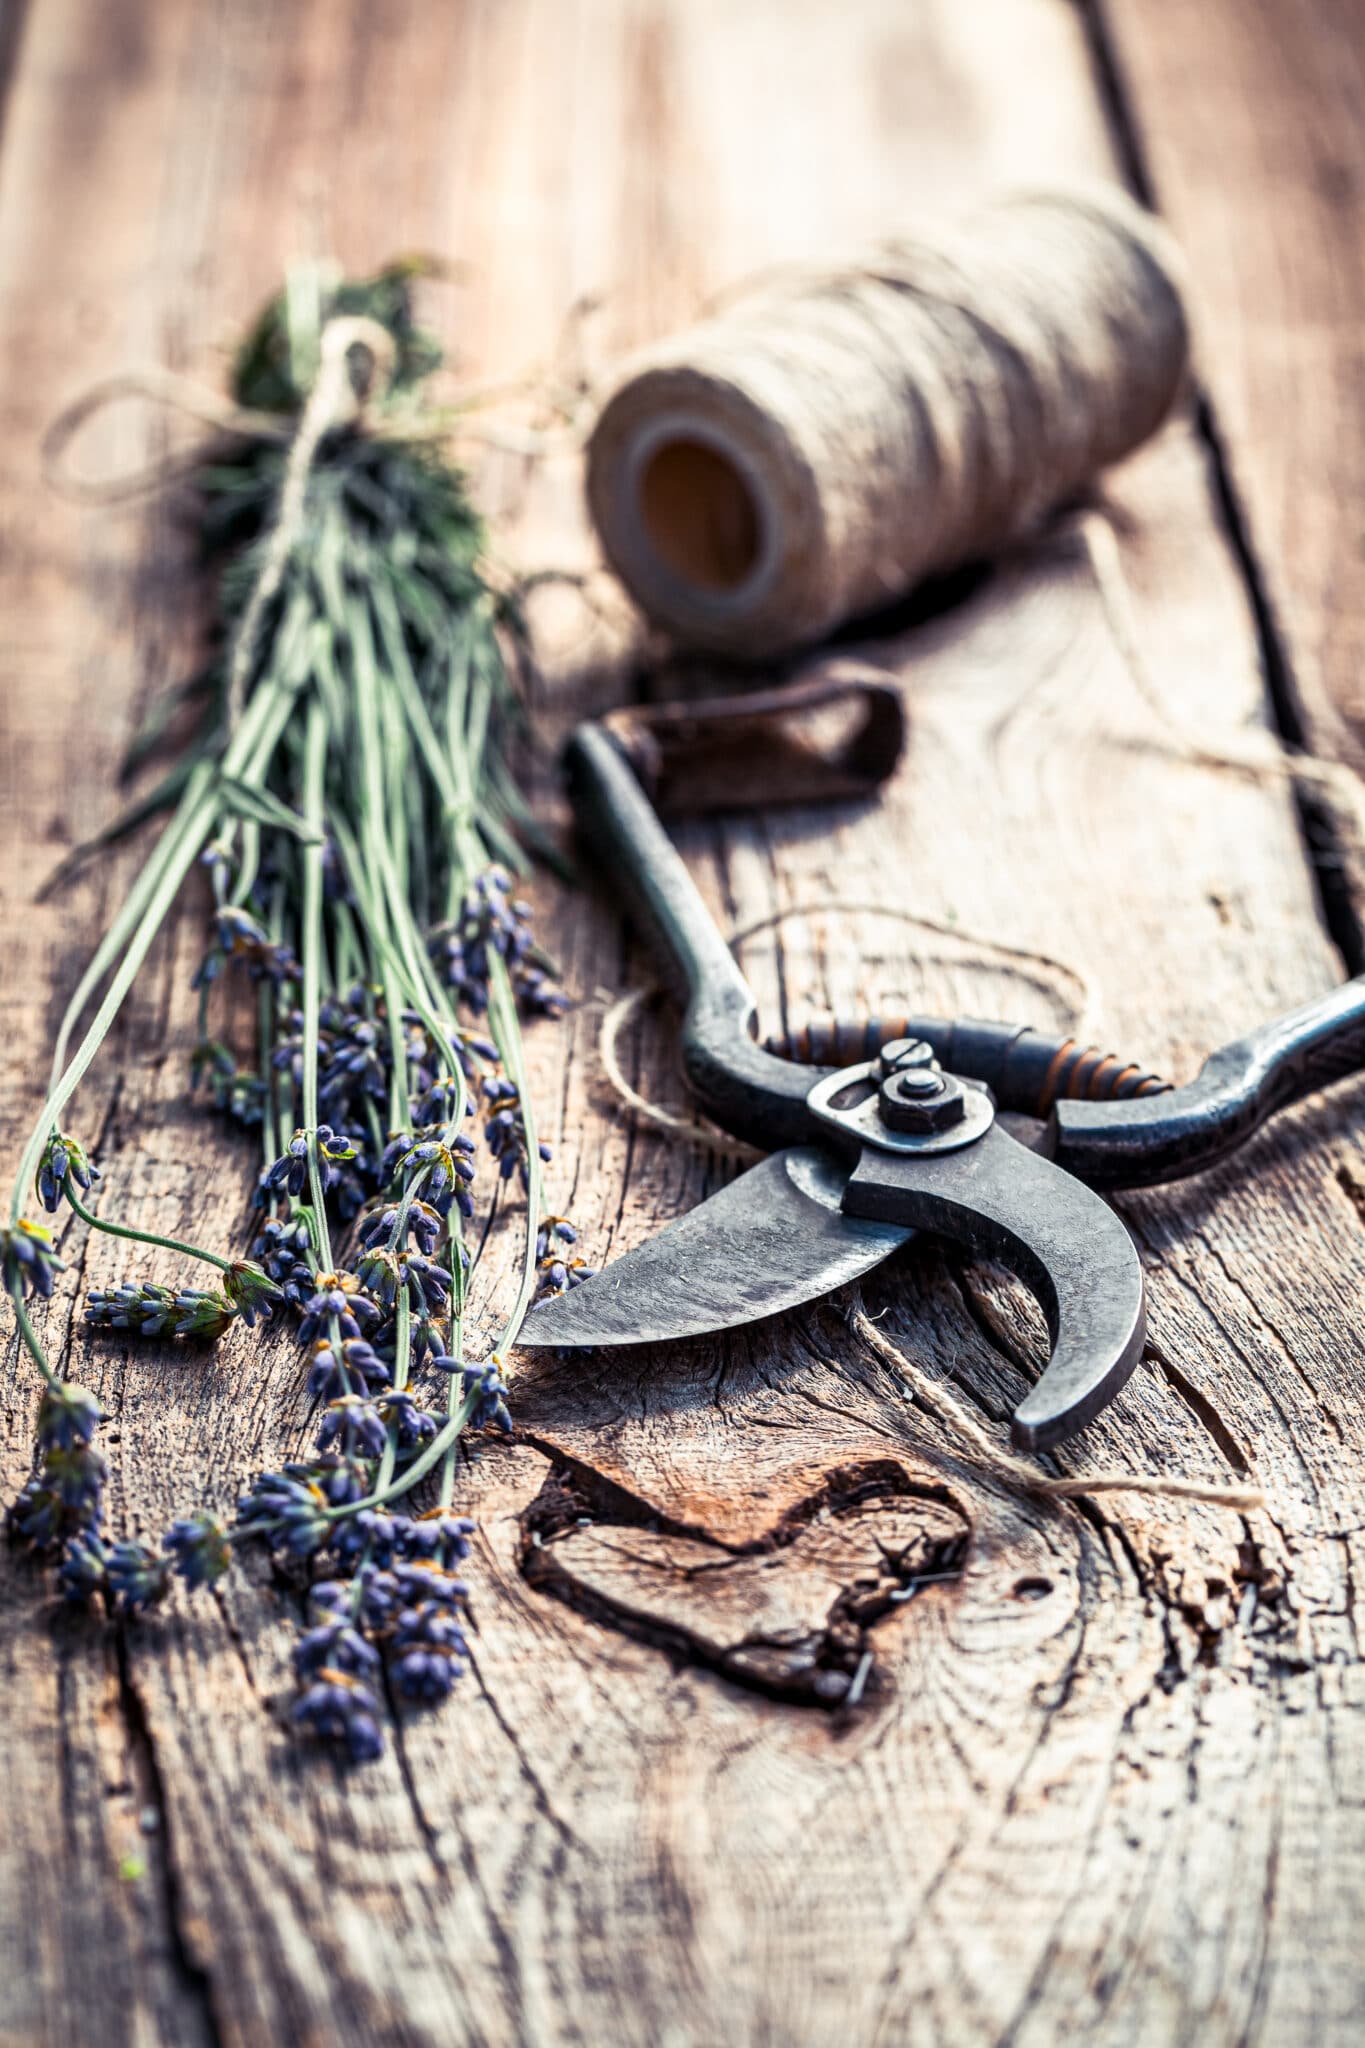
An old rail trail near our home is the perfect spot, and last summer we found all manner of wild berries, cattails, wild gingertinder polyspore mushrooms, and several dozen species of wild weeds. 

You don’t have to go too far off the beaten path if you keep your eyes open…

Double Stroller Foraging with kids

One of the easiest to find, and most accessible winter options are rose hips which generally hold on the bushes all through winter.  Staghorn sumac is another good choice, and it can be made into a lemonade-like drink (even in January). 

Foraging rose hips in winter

Winter foraged rosehips are easy to spot, even in deep snow.

Lastly, in the winter and early spring, don’t forget about syrup! 

There are nearly 30 trees that can be tapped for syrup, including maple, birch, ironwood, linden, and many more.  Even if you don’t have maples nearby, there’s likely a way to make syrup where you are.

ONLY FORAGE PLANTS YOU’RE 100% SURE YOU CAN IDENTIFY

While this should go without saying, whether you’re foraging with kids or not, only eat plants you can positively identify. 

If you’re not sure about something, say so.  Kids need to know that even parents are cautious when it comes to identifying plants, and I’ll make a big show of collecting something that we can all go research when we get home. 

We’ll sit down with the identification books together and go over the features of a particular plant piece by piece.  It’s a good exercise for everyone, adults and kids alike.

Child Collecting Dandelions

DON’T FORGET TO HAVE FUN

I know this one maybe seems obvious when working with kids, but I’ll be honest that I struggle with it.  I get focused on searching for a particular plant, or harvesting enough of something to make something really special…and I forget to make time for the simple joys of finding snacks in the wild places of your yard and community.


 Spying for Snacks- An Edible Hands on Botany Experience

Our children learn more from what's hapenning outdoors during the foraging experience as they ever will from their school books. The multi-level process of discovering and learning about the environment with all their senses brings them close to the way the they learned so quickly as babies. But its also a way to have some father robust family time. So make it fun for them to interact and learn to cherish and protect all that nature has to offer. 

SO, What’s Foraging?

Foraging is another word for identifying, and eating plants that grow wild. Plants can be gathered to help heal injuries too as well as a whole range of other uses. A wild chemist if you will.

At first, we focused on foraging for medicinal plants and food as a lesson in self-sufficiency and survival. We forage for rosehips, wildflowers, chamomile, raspberries, and cranberries.

Whether you’re homeschooling or not, foraging with kids is fun! Even better, you'll enjoy quality family time outside with your children. And take note: you don't need to live in a forest to forage.

Do some local research to find five easy plants to forage with kids. Then take a walk and try urban foraging in your own neighborhood. We keep it casual when we're learning about foraging northern greens, herbs, and wildflowers.

Instead, we just head outside with our sunhats, wilderness survival packs, baskets, and bear spray.

(By the way, we forage all year round. But in the autumn, we get distracted by the beautiful changing colors of our leaves. That's why I created this fun fall leaves printables pack and study tips. Use them with your 3-to-13 year olds.)

FORAGING SAFETY FIRST

Don’t forget to teach outdoor safety skills first when foraging in the wild with kids.

Teach children to never eat any berries, greens, mushrooms, fungi, etc. until they check with you.

And remind them that sometimes just parts of a plant that are dangerous or poisonous. For example, rhubarb leaves are poisonous yet the fruit may be safely eaten in jams, preserves, and pies.

And while we’re talking about foraging with kids, remember to ask your kids - Who else is foraging for wild edibles? Other animals.

Learn about the predators in your area. And remind your kids to be aware of animals while foraging in the wild. Teach them to keep an eye out for woodland animals including deer, bear, and wild fowl.

#1. Sensory Science

Consider foraging a science learning opportunity for even your littlest learners. For example, use it to teach preschoolers and kindergartners about the seasons. 

Keep it casual, and talk about how it’s hard to pick leaves, berries or flowers in winter. Show them the buds or berries that are in season in the spring or summer, and point out which leaves or fruit is better in the fall.

Foraging allows you and your kids to use all your senses. Smell that? It’s mint. Hear the rustling sound? That means acorns will fall soon. See those rosehips? Time to pick them for jelly. 

From a brief lesson on photosynthesis to full-blown science projects, use foraging to teach your kids science basics and beyond.

#2. USE MATH & CHEMISTRY TO MAKE HERBAL TEA AND JAM

Math comes into play in most areas of life, including foraging. 
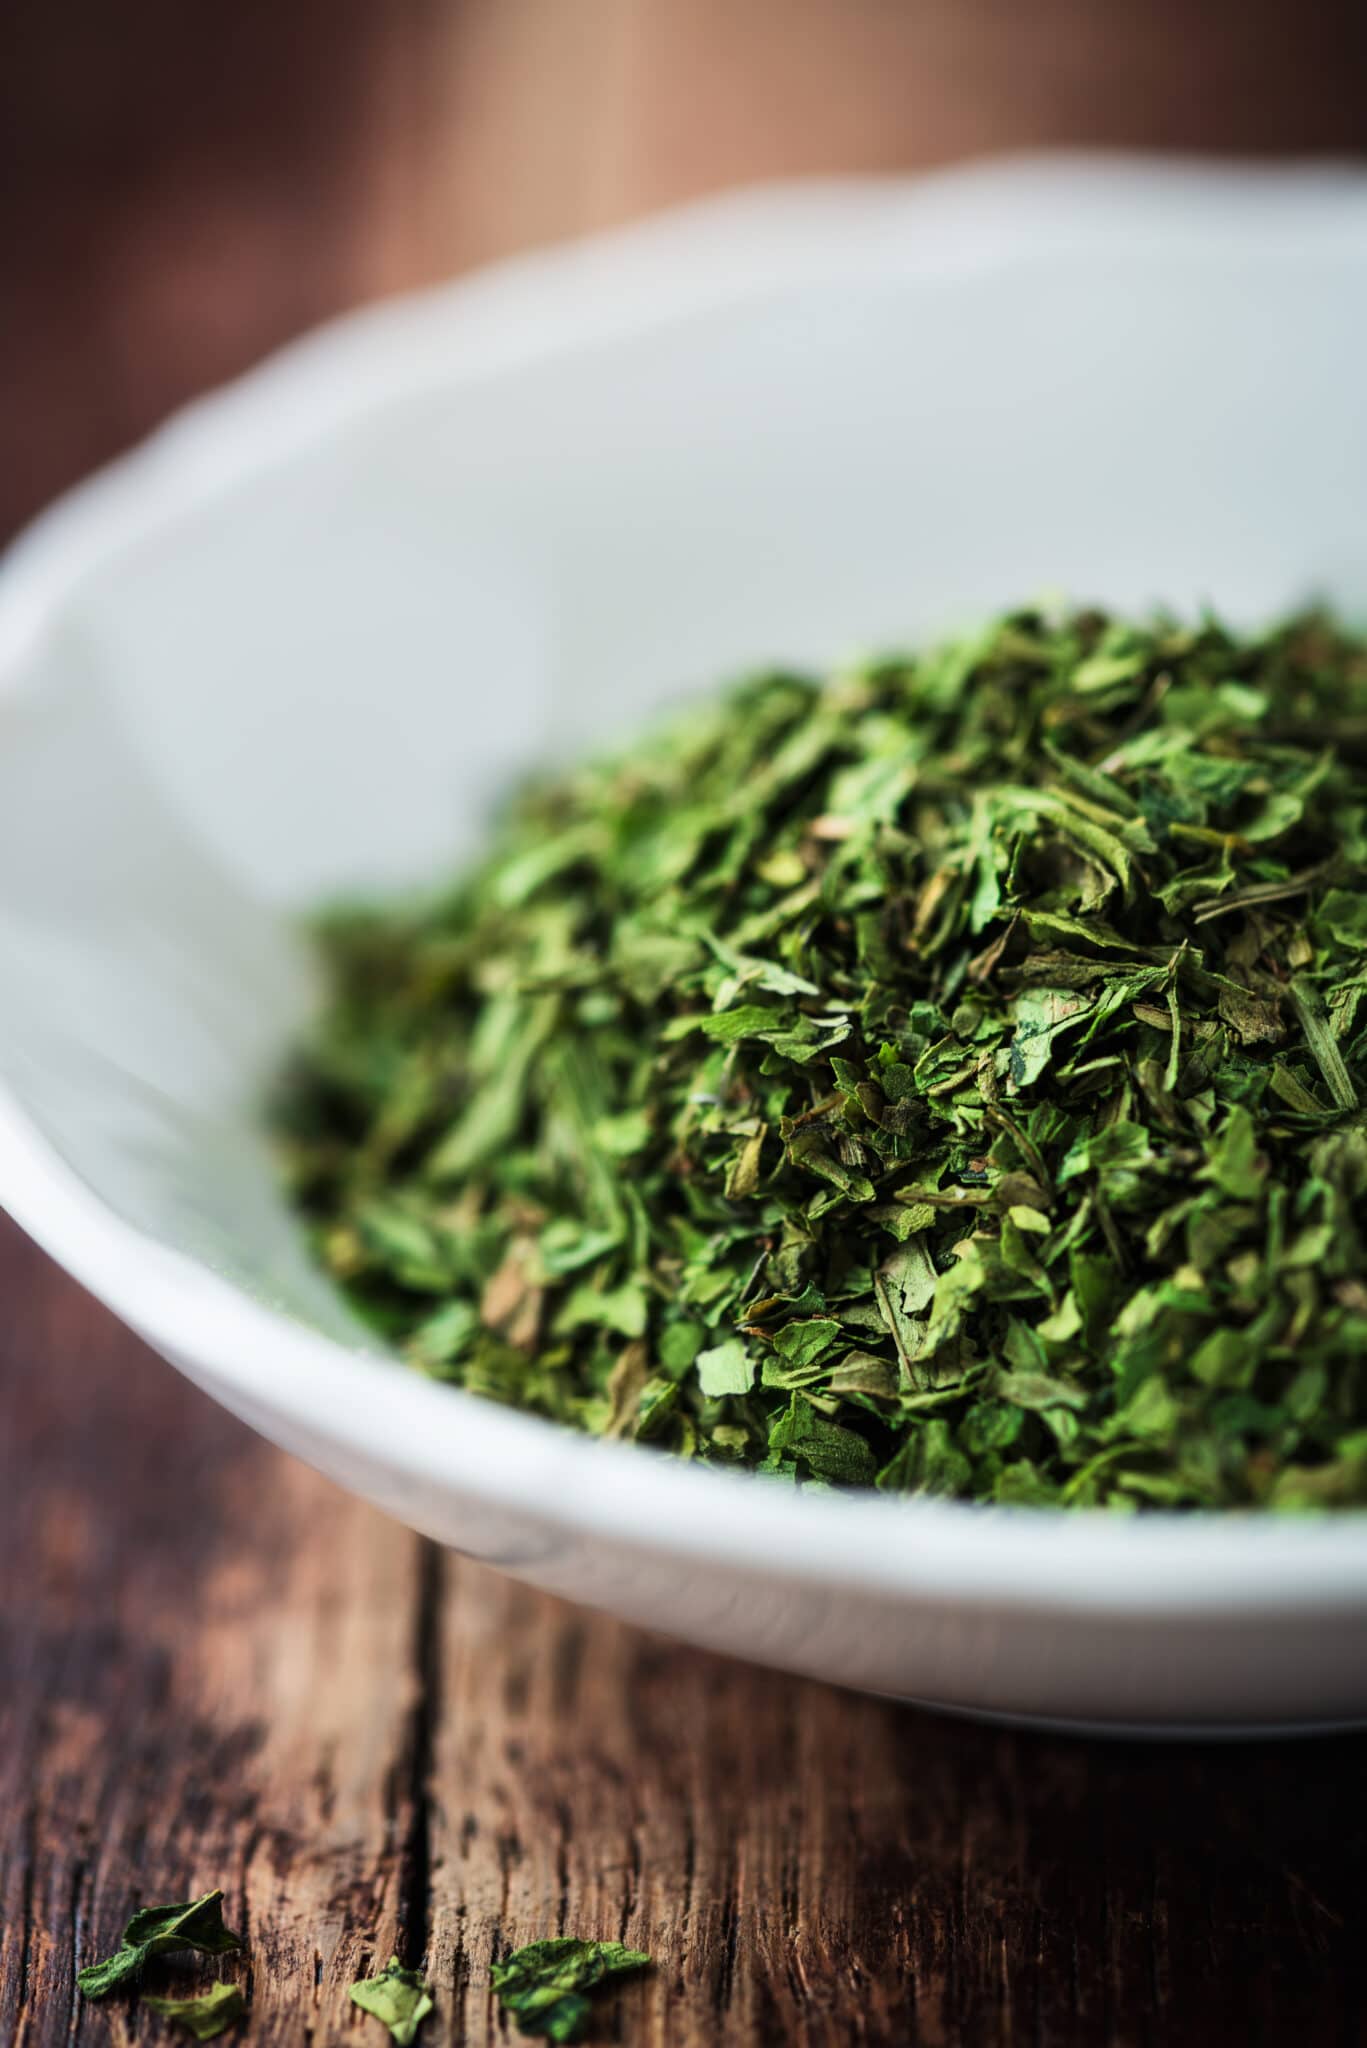
Calculate out loud when you’re deciding how many shoots, buds, stems or leaves to gather.  Talk it over with your school-aged kids.

So just how many rosehips do we really need to make rosehip jelly? How much wild chamomile should we gather to dry for chamomile tea? What ratio of mint leaves to cups of water makes the tastiest tea?

And if you use a dehydrator to save leaves, wild herbs or petals for tea through the winter, you'll get the opportunity to teach even more math! For example, estimation, ratios, weights, and volume.

Children bored by workbooks might make more of an effort to understand math lessons when applied to harvesting and preserving what they foraged.


#3. LEARNING BIOLOGY & SELF SUFFICIENCY

Foraging has long been a necessary survival activity for people through the ages. Early North American settlers learned to identify medicinal roots and herbs in the new world from the indigenous people. And pioneers, mountain men and women, and homesteaders often foraged for food and medicine – they had to in order to survive. 

Do some research at your local library to identify the wild plants and foods foraged in your area over the years. l also use biology in the field as we learn about unusual local flora and fauna. And discuss the unique qualities of that habitat that harbors and provides the wildlife food chain. your area will host both the plantlife and the animal life to create a balanced natural home for all. Why do the plants grow there and what draws the wildlife to that area?

Although some plants may be native to your area only, others may be found in other countries or even on other continents. When you’re out gathering with your kids, ask some questions to get them thinking about the world at large, as well as your neighborhood’s place in it.

Feul their curiosity with questions like

  • Why does this grow here? 

  • Where else does this grow? 

  • How is it different in other parts of the country? 

For example, we have beautiful Spruce trees (Spruce Tips are delicious in spring) and Labrador Tea here in the Northwest Territories. Yet they differ from those found the Yukon and Alaska, to the west of us. 

Once you head indoors, open your laptop to discover other areas where your foraged goods grow. Depending on your children’s ages, read about them, plot the places on a map, and note the similarities and differences. 

If your kids like to cook, try a recipe from another country. For example, this Scandinavian Chicken with Rosemary and Juniper recipe could make a special family dinner.

Forage with kids

Teach Your Kids To Forage – It’s amazing what’s out there.

I have always been a forager before I even knew what that meant. I would walk the dogs for miles through the woods and along river banks while we munched our merry way.

I never thought of it as foraging, it’s just something we did as soon as I learned to walk.

I loved those walks and as soon as my kids were born I knew I had to educate the in the wonders of the outdoors.

I wanted to know more, so I could teach them to learn more, find more and use more. 

 Ok that sounds a bit airy fairy, but in these scary days of global warming, over population and water shortages amongst a whole range of disasters that could fall on us at any moment.

I do feel NOW is the time to get to educate our kids and really get to grips with this under used resource.

BUT, There are a lot of things that can hurt or make you very sick out there, so it takes a little knowledge and care to get the best from Mother Natures Larder.

This is our forage list of regular food we gather, there is so much more to experiment with but it’ll get you started. Just click the picture below for your own copy.

Forage calendar

People have survived off this stuff for countless generations long before supermarkets and plastic wrap came along and some places on the planet still do.

So give it a chance, the worst that could happen is you get a FREE meal!!!

Forage with kids


Why Should You Encourage Your Children Forage?


Wild Herbs for Little Foragers

  • It can help to cement the bond between you and your kids and the natural world around you.

  • It’ll give your kids a chance to fall in love with nature from a different point of view. Nature suddenly has a use and a function not just pretty to look at.

  • Foraging can introduce you to a world of edibles that are generally highly nutritious and full of flavour. According to Jo Robinson, from Eating On The Wild Side. “Dandelions are a Super-food” and have 8 times more antioxidants. Twice the amount of calcium, 3 times more vitamin A and 5 times more vitamin E” Unbelievable for a weed!

  • It’ll help your kids experience the flow of the seasons and pay more attention to them.

  • Kids feel more in control of the world around them. Foraging can help make the world feel smaller and less intimidating as kids understand and recognise the leaves and plants around them.

What Is A Good Age To Start Foraging With Your Kids?

There is no minimum age to begin foraging with kids, the younger the better. I introduced my first son to foraging by letting him play with and then nibble on dandelion leaves. He’d sit in his buggy and quite happily munch his way through anything I gave him.

When should you forage?

As soon as the first flush of Spring shoots appear, the foraging seasons starts.

Pay attention to the tiny green shoots you see. Watch them unfurl and show you their leaves so you can begin to work out what these wild plants look like at all their stages of growth.

Once you identify plants you can then find out whether it’s edible and what its uses are. This is the book I refer to time and time again but you’ll need to find one that reflects your country and area.

Foraging with Kids: 52 Wild and Free Edibles to Enjoy with Your Children

As you learn to recognise plants, you’ll find out what plant parts are only safe to eat, or which ones taste best when eaten during a certain stage of their growth, while others can be eaten all year-round.

It all sound complicated but don’t worry. Start with a familiar plant such as the dandelion and explore its uses and flavors. Once your comfortable with one plant its easy to spot others you can look into as you go.

What to Collect

Find a local foraging book or a local group to join to learn as much as you can.

What to Bring when you forage.

  • A good strong basket or bag to hold your yummy goodness is a must although for soft berries a tupperware tub would be easier.

This is the one I use, I was given it for my birthday and I love it!! We gather wild edibles for our rabbit too so it gets used everyday.

Ulster Weavers Foraging Foxes Packable Bag

  • I’ve also found gloves for kids is a good idea to avoid being stung or scratched.

  • Good sturdy wellies can help too if your going to be walking near nettles etc.

  • You also need to set some ground rules with the kids. Make sure they’re aware the MUST have an adult with them at all times before they pick ANYTHING. Think about what kind of place your visiting, will there be a river to stay away from, do the kids need to stay beside you or is there an area you want them to stay inside. Set this out before they get out.

  • You could also make a Nature Journal and use it to draw and record your foraging results. Information you’ve learned and record the location of any fantastic finds so you don’t forget next year.

  • Bring some drinks and snacks to keep energy up. It’s better to wash your foraged findings before eating so bring something the kids can snack on.

You could also try to find an app on your phone to help you identify plants, see if you can find one for your area.

After Harvesting

Now you and the kids have foraged and collected some wonderful plants that you are sure of, now what?

At home, wash your goodies gently. Then munch them all up. Its amazing what kids will eat if it doesn’t look like conventional food. You might also have to prepare the fruit etc for cooking if your making jam etc.

Recipes

Why not try a different recipe with your edibles. Here are some recipes that they will love:

Some tips of where to start if your still unsure.

  • Find a local club or group to join to build your 

  • Just start small. If your family only explores, identifies and works with one plant a month thats still 12 plants you’ll know next year that you don’t know now!.

 Ok so we have covered lots of information on;

  • -Why should you forage

  • -When should you go

  • -What you need

Now lets look at some examples.


Teach kids to forage

I’ve listed some of our favourites ‘findables’ here. As you can see the best wild edibles to begin teaching your children are the obvious ones.

Berries like Blackberries and easy to find and they taste so sweet. Freshly picked Blackberries always taste better than any shop bought ones.

Edible flowers are another fun idea for kids. We collect bags full of Dandelion’s to make allsorts of recipes from dandelion fritters to beautiful syrup to pour over our ice cream.

Himalayan Balsam

Forage for himalayan balsam

It is an invader from far off climates that has made a successful home here. It covers riverbanks in pink flowers that have an almost aniseed flavours.

We call this plant “popper” for its seeds, they are long pods filled with black seeds that explode at the tiniest touch. The kids love it. The seeds are used to flavour bread and we use the pink flowers to make a syrup which has a shocking pink colour. Find the recipe in my post on Himalayan Balsam.

Elderflowers

Foraging with kids

These are one of the best edible treasures of early summer. Whilst we don’t tent to eat them raw (though the flowers can be forked off the stem and added to salads and jellies) a great snack for children is to turn them into fritters! Just mix chickpea flour with water until you get a thick batter and then fry in hot oil for a minute or two. Lightly dust in cinnamon and a small amount of brown sugar or honey.

Blackberries

Sadly more and more children in the UK have never popped a ripe Blackberry into their mouth straight from the hedge. Wild blackberries are like the ones you buy, but better. The fruit, which ripens from mid-summer to early autumn, goes from green to red to black. There are so many fun recipes to create with your kids but for me – nothing beats bramble jam on toast. The kids LOVE making their own drinking coridial and ice lollies.

Mahonia berries.

Mahonia berries are everywhere in council plantings at the moment. And they’re not a common edible in this country at least but they are AMAZING!!! They are high in pectin so are great to add to jams. Which is what we do with them, I make an amazing jam which id say is like blackberry jam but nicer!. Its also a good fruit for making cordials with.

Plantain lily

The leaves of this under appreciated plant are very tasty and SO good for you. It grows everywhere here but not many people even notice it. If you ever scrape your finger or get stung by a nettle, crunch some of these up and rub on. They are nature’s cure-all.

Gorse

forage gorse with kids

The edible flowers have a coconut smell and a subtle almond taste.  A great snack food to nibble on as they are high in protein. Watch out with picking as the stems have sharp spikes.

Here’s a simple foraging guide for the things we find in our area

Forage calendar

Right now you are ready, Remember Safety First!

Please go over regularly with your kids that they MUST check every plant with you BEFORE they eat it. If you yourself are in any doubt, then just leave it alone.

Make sure your children understand that not only do they need to be sure that the plant is edible, they also need to ensure that they are picking their edible plants from a safe location – e.g. not from a busy roadside or low down on a path frequented by dog walkers,
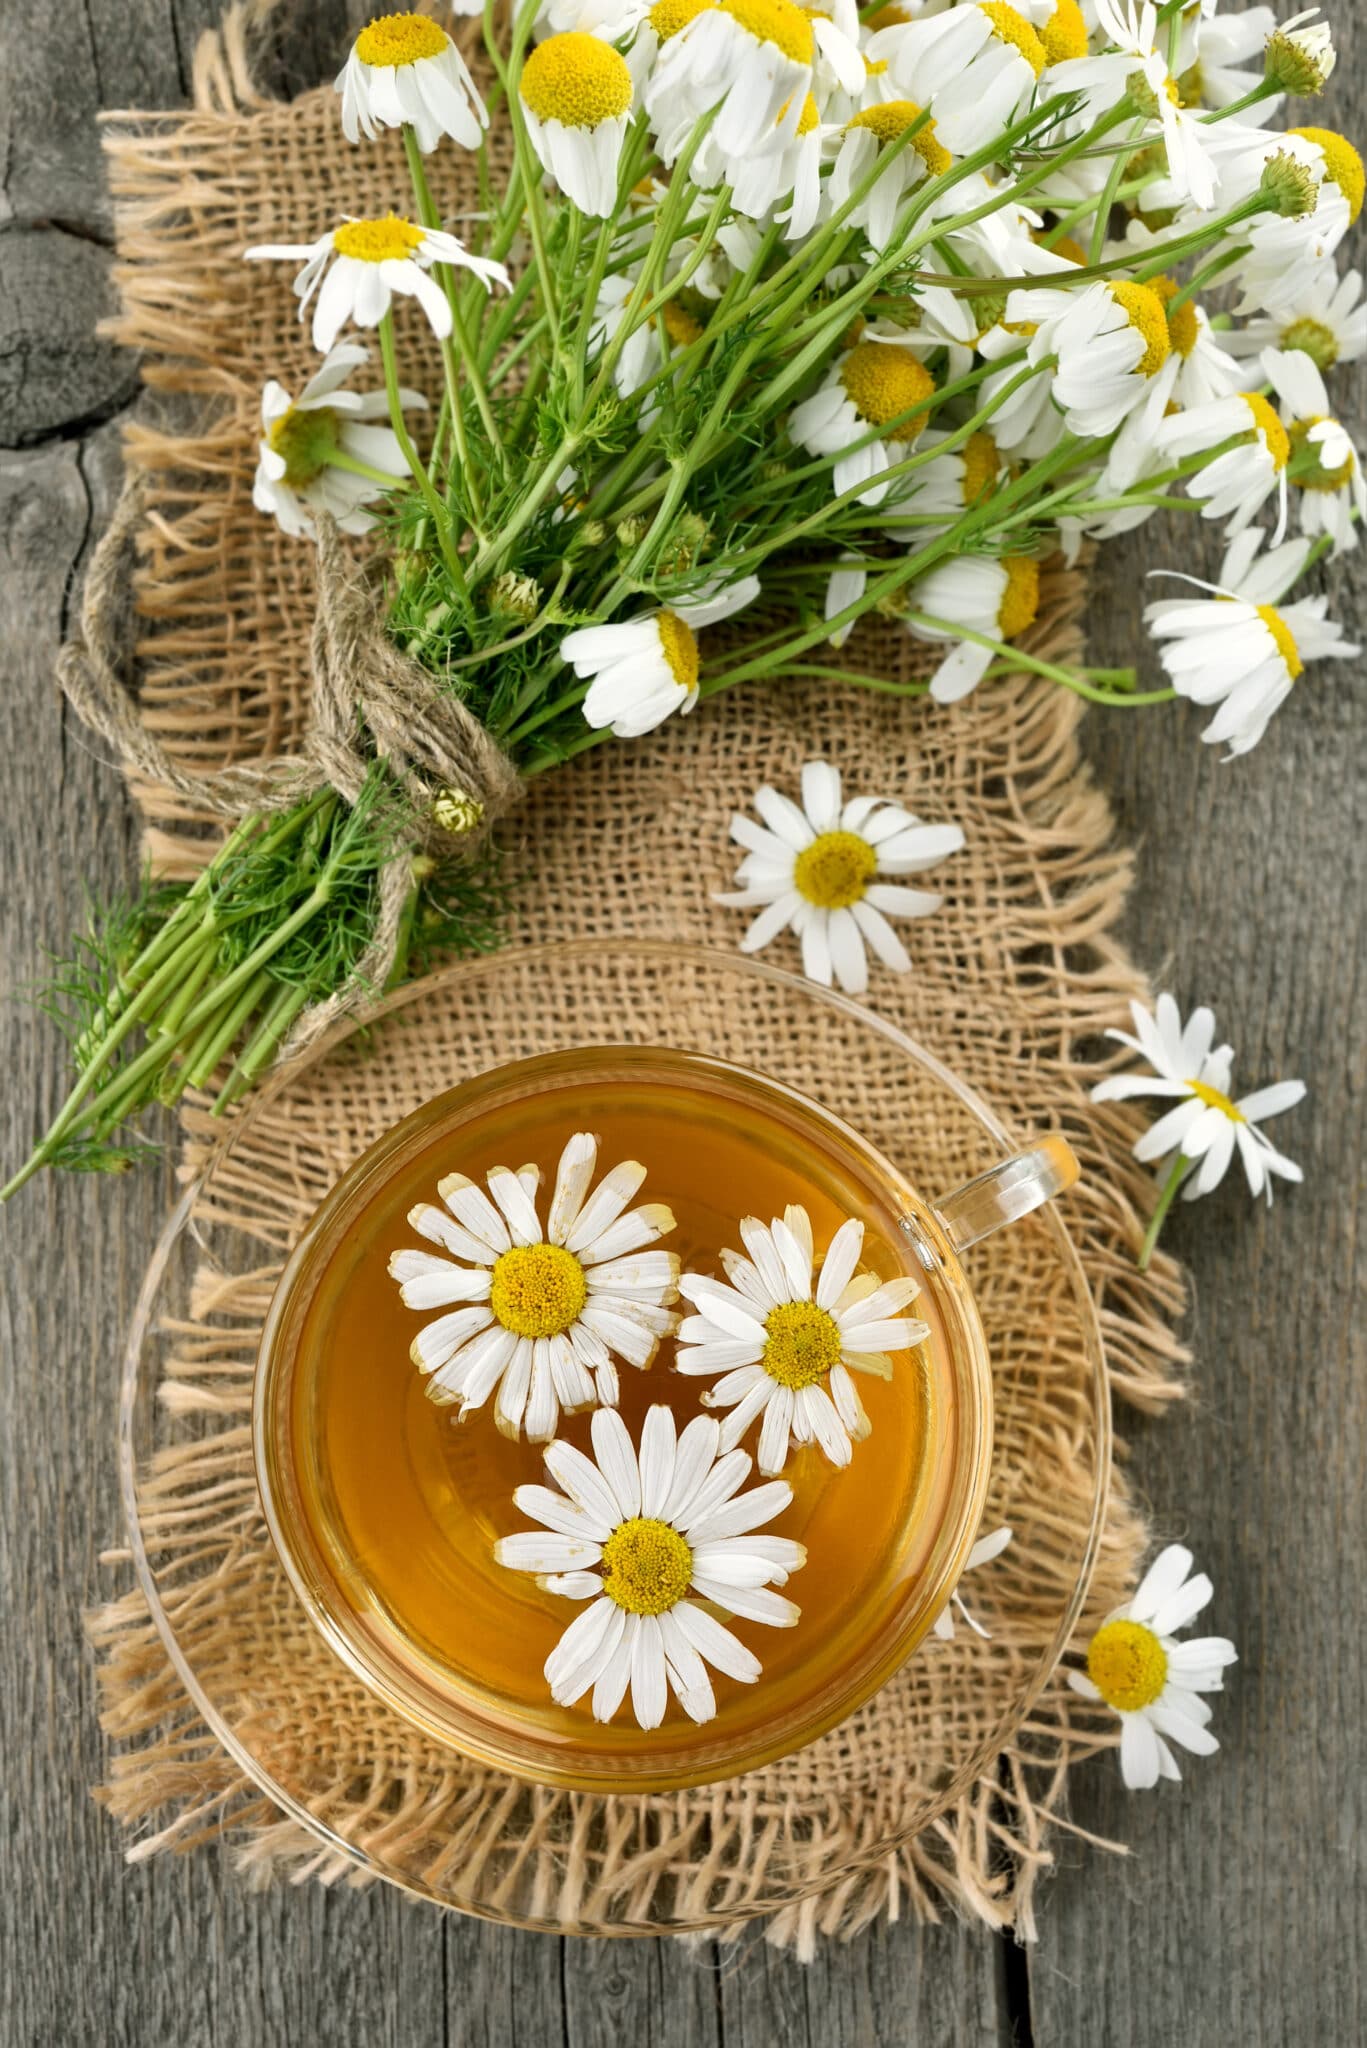
Also, it’s worth reminding them not to pick everything from a plant , be responsible and only pick what you need from a few different plants. The plant your picking needs to be able to feed itself to survive and if you rip off all the leaves it can’t do that and you might kill the plant.
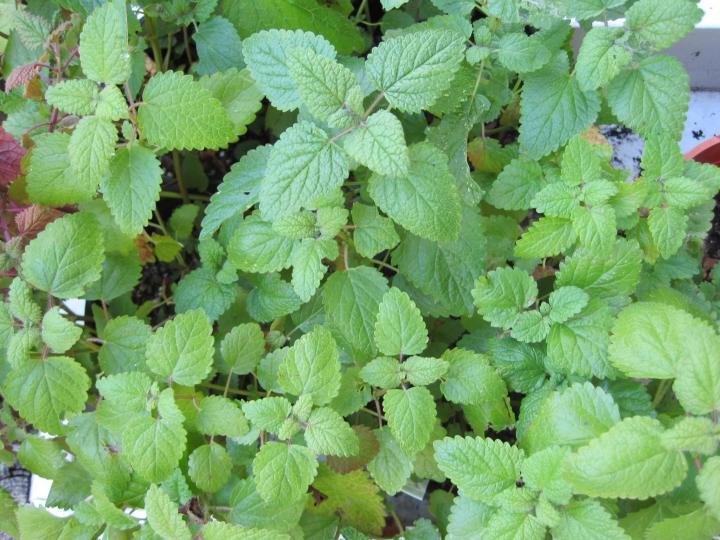
Remember the wildlife in your area will also depend on the food you are picking, don’t take more than you need. Always leave some for others.

Encourage your kids to have a try. Children are usually brave and adventurous at trying the plants as they don’t look like ‘food’.

Try to set challenges, like the first to spot a clump of wild garlic wins. Have a taste test with some rotten or sour flavoured objects like vinegar put in for a bit of fun.

So there you go, I hope this guide has helped give you a bit more information on Forging with your kids to get you all outdoors, eating healthy and experiencing the space around you in more detail.

Delicious Recipes For 5 Easy To Forage Plants

Getting into foraging is a great way to supplement your diet with free, nutritious food.

The benefits go beyond adding some tasty plants to your pantry – foraging gets you outside in nature in a way that heightens your awareness of your surroundings.

When I first started foraging, I thought, there can’t be that much to eat around here, can there be? Now that I know – I see food everywhere, on every walk I go on, whether it’s in the woods or downtown.

Edible plants surround us; you just have to know what you’re looking for.

But once you know what you’re looking for, you’re hit with another problem.

“Okay, now that I have all these plants, what the heck do I do with them?”

I’ve got you covered.

In this post, we’re going to discuss my Fabulous Foraging Five – these are five plants that are beginner-friendly foraging finds, easy to cook, and easy to find.

You’ll be amazed how many times you’ll look down and find all five of these plants growing within several feet of each other.

Before we go any further, please remember to be careful when foraging.
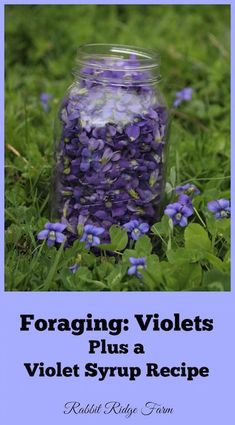
The five plants we’re going to cook with are all beginner foraging finds, meaning they have few or no look-a-likes that can make you sick.

When you’re just starting, it’s best to get help from someone knowledgeable in edible wild plants. Facebook is an excellent resource for local foraging clubs. It’s also a great way to find out what grows in your area and when.

If you don’t have access to a person, a book is your next best bet. There are many great foraging books. A couple of my favorites:

Recommended

Recommended ContentRecommended Content

Edible Wild Plants: A North American Field Guide to Over 200 Natural Foods

The Forager’s Harvest: A Guide to Identifying, Harvesting, and Preparing Edible Wild Plants

When it comes to identifying plants, the internet should be your last resource. There is a lot of great information online about foraging and what plants are and aren’t edible. However, the internet shouldn’t be used as your primary source to identify plants. People and books first, the internet last.

And of course, follow proper foraging etiquette.

  • Know the area and whether or not it’s been treated with chemicals.

  • Know if you are allowed to forage in that area and if there are limits.

  • Forage responsibly, leaving behind plenty for the animals that make that land their home.

Let’s eat some weeds!

1. Stir-Fried Dandelion Greens

Dandelion greens are one of the easiest foods to forage.

First up is the humble dandelion. Most people know that this common flowering plant is edible, but few bother to eat it. There are many ways to use the flowers, but fewer think about eating dandelion greens.

This is one of the first flowers we see each spring. Dandelions are also bees’ first food for the spring, so forage the actual flowers responsibly.
I’m going to show you how to stir fry dandelion greens. Oh my gosh, they’re so tasty!

Ingredients

  • 3-4 cups of freshly picked and washed dandelion greens

  • 1-2 cloves of garlic, finely minced

  • ¼ tsp of red pepper flakes

  • 1 tbs olive oil

  • Salt and pepper to taste

When picking dandelion greens, I try to find short ones in the early spring. The taller they are and the hotter it gets, the more bitter they become. You can still eat them, of course, they are just less bitter in early spring.
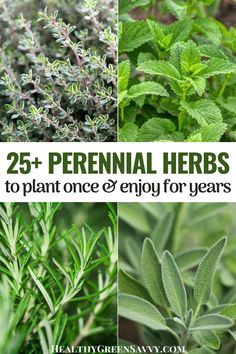
Plunge your freshly picked greens in a bowl or sink full of cold water and swirl them around. Let them soak for a few minutes, so dirt and debris can fall to the bottom. Now spin them dry in a salad spinner (I love this one!) or pat them dry with a clean kitchen towel.

Heat the tablespoon of olive oil over low-med heat in a skillet. I prefer cast iron for stir-frying my greens. Add the garlic and red pepper flakes, gently stirring them, so the garlic doesn’t brown. When the garlic has softened, turn the heat up to medium and toss in your dandelion greens.

Gently pat and stir the greens, so they are all equally coated with the oil. You want to keep stirring and moving them, so they all come in contact with the bottom of the pan. You’re aiming for them to be wilted, but not limp and soggy. This takes between 5-8 minutes.

Transfer to a dish and serve immediately. The slight bitterness of the greens goes so well with the garlic and the kick from the pepper. This is a fantastic and impressive side dish for any meal.

Stir-fried dandelion greens are easy to make, and impressive to serve.

Or lightly chop your finished greens and –

Use them as a pizza topping – seriously, this makes for an incredible pizza!

Toss them with pasta, olive oil, and parmesan cheese.

Add them to a frittata, omelet or quiche.

Once you give these a try, you’re going to be grabbing dandelion greens as often as you see them.

2. Garlic Mustard Pesto

Tender garlic mustard shoots before the flowers open.

Next up is a tried and true classic that shows up on every forager’s table each spring – and with good reason.

Garlic mustard is an invasive species here in the US. It’s one of those plants that you can forage to your heart’s content. Seriously, eat as much as you can!

Garlic mustard is a biennial plant, meaning it will grow for two years. Lucky for us, though, it can easily be found year-round. I’ve picked this stuff out of the snow in the middle of the winter when I wanted something fresh and green to eat.

My favorite way to enjoy it, though is in the spring when it’s in its second year.

I love to pick garlic mustard right before the flowers open. Picked in this way, it’s a lot like eating another one of my favorite greens – rapini or broccoli rabe, and you cook it the same way. It’s so much more tender than rapini, though, and easier to find, and cheaper! Yum.

Today though, we’re going to make pesto with it. Garlic mustard tastes exactly like its name, making it a perfect pesto plant.

Ingredients

  • ¼ cup of pine nuts, almonds, or walnuts (I rarely have pine nuts on hand, so I just use whatever nuts I happen to have in the pantry.)

  • 4-5 cups of freshly washed and destemmed garlic mustard leaves (You can leave the skinny stems that are attached to the leaf, you just want to remove the larger stalks.)

  • 1 cup of freshly grated parmesan cheese

  • 1/3 to ½ cup of extra virgin olive oil

  • ½ tsp of salt or more to taste

Using a food processor, pulse the nuts several times until they resemble large crumbs. Now add your garlic mustard leaves and parmesan. Pulse repeatedly until leaves are thoroughly minced, and everything blends well together.

Continue pulsing and slowly pour in the olive oil. I usually eyeball it, pouring in enough so that the mixture becomes shiny and wet in appearance. Add the salt, pulse several more times and then taste and adjust the salt if necessary.

Store your pesto in an airtight container in the fridge if you aren’t using it right away. Let it come to room temperature before using it. Use or freeze your fresh pesto within a week.

This pesto is almost better than traditional pesto.

Garlic mustard pesto freezes well, so make several batches.

Use it on pasta, spread it on a sandwich, mix it in with meatloaf. Heck, eat it straight out of the jar with a spoon, I know I do.

One of my favorite ways of enjoying garlic mustard pesto is to mix in a heaping tablespoon or two with cottage cheese. Oh yeah, so good!

Because of the prevalence of this invasive species, you can make quite a few batches of this delicious pesto and freeze them to enjoy in the winter months.

3. Stinging Nettle Soup

Stinging nettle is often the first foraging find in spring

Nettle soup is a foraging classic, and for many folks, it’s the first foraged dish of the spring.

This bright green soup is wonderfully nourishing on those chilly days when winter is still hanging around, but green things start to promise warmer days to come.

Always wear gloves when picking and preparing uncooked nettles. Even the new buds can still give you a good zing if you aren’t careful. Once you have blanched the nettles, you can handle them with bare hands. I don’t bother with the gloves in the kitchen, as I find using tongs to wash them and get them into the pot for blanching easier.

Ingredients

  • 4-6 cups of stinging nettle buds

  • 2 tablespoons of olive oil

  • 1 cup of chopped celery

  • 1/2 cup of chopped onion

  • ½ tsp of dried thyme

  • 2 tsp of salt

  • 4 cups of vegetable or chicken stock

  • 5 or 6 small to medium-sized potatoes, washed, peeled and quartered

  • 1 cup of buttermilk or heavy cream

Heat a large pot of water to boiling. While you wait, wash the nettles in a sink full of cold water, using gloves or tongs. Plunge the nettles into the boiling water, keeping them submerged for two minutes. Pour the nettles into a colander in the sink and run cold water over them to stop them cooking.

In a stockpot, heat the olive oil over medium heat. Add the celery and onion and stir occasionally sweating the vegetables until the onion is translucent. Add in the thyme and stir for another minute.

Pour in the stock and the salt and bring to a boil. Once the stock is boiling, add the potatoes. While the potatoes are cooking, finely chop the nettles and add them to the soup. Stinging nettle tends to be pretty stringy, so chop them well.

Simmer on low heat, occasionally stirring for half an hour to an hour. Remove the soup from the heat and stir in the buttermilk or heavy cream. Pulse or blend the soup in a blender, food processor, or with an immersion blender until smooth and creamy. Season to taste with salt and pepper. Enjoy!

This hearty and delicious soup is a great way to welcome spring.

This soup is excellent with crumbled sausage added to it as well. And like most soups, it tastes much better the second day.

4. Purple Dead Nettle Tea

This is one of those plants that is everywhere once you know what you’re looking for. I see it all the time. Again, this is a favorite of bees, so harvest responsibly. It’s hard to over-pick purple dead nettle, though.

Purple dead nettle makes a wonderful tea for spring allergies. This stuff is a lifesaver!

Simply put three or four rinsed heads per cup of water in a teapot and pour boiling water over them. Let the tea steep for five minutes, then strain and serve.

Purple dead nettle tea helps to ease annual allergy symptoms.

I will warn you, served as is, this tea is very astringent tasting. I always add a liberal amount of local honey. It becomes a one-two punch to my allergies!

I begin drinking the tea as soon as I start seeing purple dead nettle, and it dramatically reduces my allergy issues.

If you wish, you can dry the heads of the leaves and flowers to make tea with year-round. Check out our post on ways to dry herbs at home.

And finally…

5. Violet Infused Syrup (or Gin)

Pick the darkest purple violets you can find for a blue syrup.

Yes, making this treat means you have to pull the petals off a bunch of violets, but the effort is worth it when you see the result – bright purple-blue gin or syrup!

You only have a few short weeks a year to enjoy this gorgeous treat, don’t miss it.

Violet syrup is a wonderful addition to cocktails; the taste is light and refreshing and green. It’s like drinking spring!

Violet syrup also makes for a tasty and beautiful soda when mixed with seltzer or club soda. My 12-year-old asks for this treat every spring! It also makes a delicious flavoring for buttercream icing.

Violet infused gin makes an incredible martini or gin and tonic. If you add a twist of lemon or lime, the acid will turn the gin pink!

You’ll need purple violets for the color; I try to pick the most purple ones I can find to achieve the most intense color.

Ingredients

  • 1 cup of violet petals, gently packed (You need to remove the stem and the tiny little green parts at the base of the petals. This is easily achieved by pulling the top petal off first, then the rest of the petals come off quite easily.)

Remove the top petal first, and the rest will come away easily.

For syrup

  • 1 cup of water

  • 1 cup of sugar

Heat the water to boiling, then remove from the heat, add the petals and cover the pan. Let the petals sit in the covered pan for 24 hours. Using a double boiler, heat the water and petals over steam and stir in the sugar.

Bring the syrup to a boil, stirring frequently, then remove from the heat and strain into a clean jar or swing-top bottle. This beautiful syrup will keep refrigerated for six months.


FYI Violet infused syrup or gin make for a beautiful spring sipper.

I hope these recipes make it easier for you to get into eating the wild edible plants growing around you.

Once you taste a few of these, you’ll likely add more foraged food dishes to your table year-round. Edible plants are everywhere.

Recommended ContentRecommended ContentRecommended Content

This is a frequently asked question?

This is a FAQ description. Add more detail about this service, such as benefits, appearance, components and value

This is a frequently asked question?

This is a FAQ description. Add more detail about this service, such as benefits, appearance, components and value